SilentSurfer's Laboratory: Come up to the Lab & See What's on the Slab.

Collector Freaks Forum

Help Support Collector Freaks Forum:

This site may earn a commission from merchant affiliate links, including eBay, Amazon, and others.
Congrats Nathan, that is AWESOME! You've got mad talent and deserve the attention! :clap
 
Thanks guys. No, really, I mean that. If it weren't for some of the work I've done for you guys here, my portfolio just might not have been enough. Thanks again.:monkey2:1-1:
 
Very cool Nathan! keep it up! :hi5:

By the way, when do you have time to repaint my billy sole? i need to get this done asap, please help!
 
Thanks! I was very pleased with how it turned out.


Hey, P. Almost done. Just eyes and mouths left to do. You might complain some more about how warm it looks, but it is right on with all my reference pics. I did cool down the feet, stomach, chest, and throat for you. He also has ass detail now. I'm very happy with it. Pics tonight or early tomorrow. I've been painting all morning and afternoon. I'm taking a break.:chillpill:

Nathan, are you happy with everything, or just the ass?:D

Seriously man, the P2 looks great.
The work that you did on the Pred Maquette head is amazing.
 
For those who wanted to see the rest of this teaser pic from the Star Wars SDCC video, here you go.

TotalProject.jpg


And some more of my own pics taken before the final decals were added. Not sure if the final pieces will be Cody orange, or more yellow like the show, but here's what they looked like in my home. You can see much more of the weathering in these pics.

With Clone Wars helmets:
BoilWaxer.jpg


Double dose of Boil:
BoilEp2Ep3.jpg


Double dose of Waxer:
WaxerEp2Ep3.jpg
 
These definitely look better than the other Clones. The weathering is much more realistic, the "chips" in the orange actually look like chipped paint.
 
I got the Predator maquette head yesterday. It looks phenomenal and you cannot tell it was ever broken.

I was so bummed when I bought this and it arrived broken, so it's great to have it back to its full glory.
 
I'm glad I could undo your disappointment. It was fun to see if I could really make it look that good. I would say it turned out better than expected, but it honestly just looks perfect. Thanks for the challenge.

the "chips" in the orange actually look like chipped paint.

Because that's exactly how I did it. I masked off and painted the color markings, and then took a sharp instrument and scratched away the "chips". Much easier than painting them on.
 
I just finished up a real 'killer' of a job, so I thought I'd take a break and do another quick mod for myself.

I got tired of thinking of this-
P2elderFullShot.jpg


-only to see this broad-shouldered linebacker on my shelf.
HPIM2419.jpg


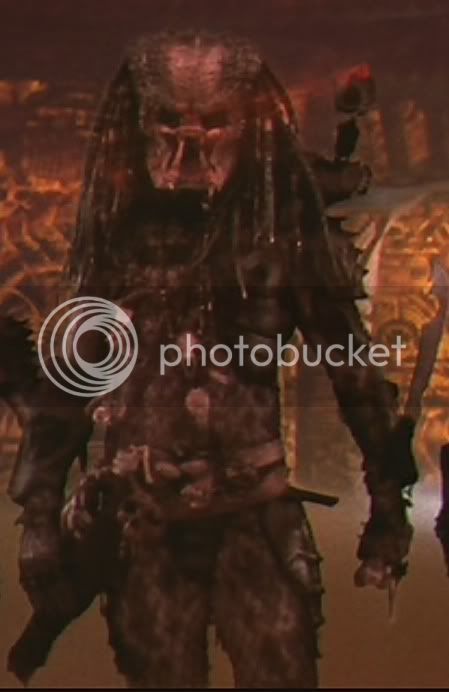
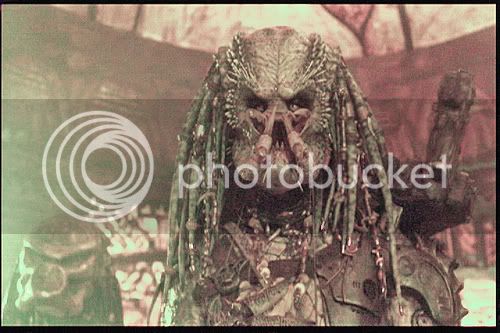
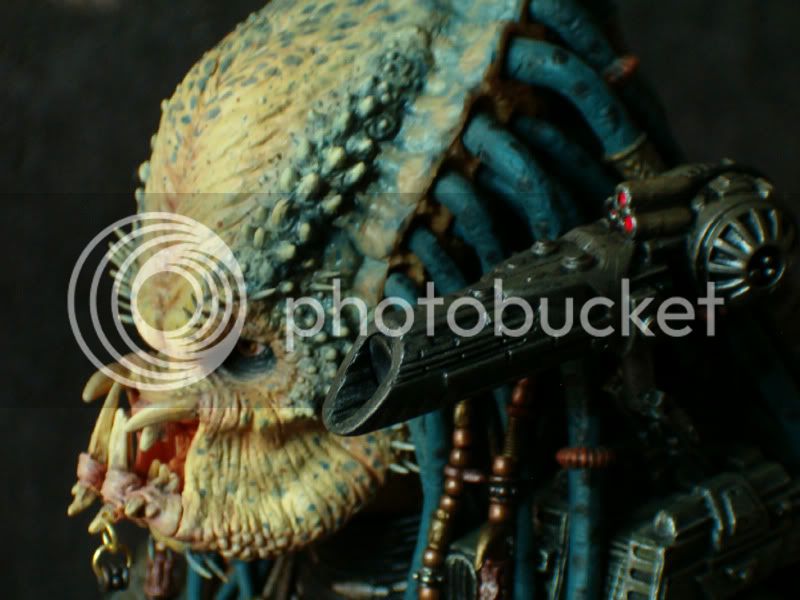
My only complaint about the Elder figure is that the original style Hot Toys Pred body has those giant bowling ball deltoids at the top of the arms which is not the best representation of the Elder to me. However, if Hot Toys made this figure today, you know the body would be unbelievably amazing. But the improved P1 body did present an opportunity for Elder improvement. So, for almost a year now I have had a decapitated Predator 2 Elder on my shelf waiting for a new P1 body repaint, but I never found the time.

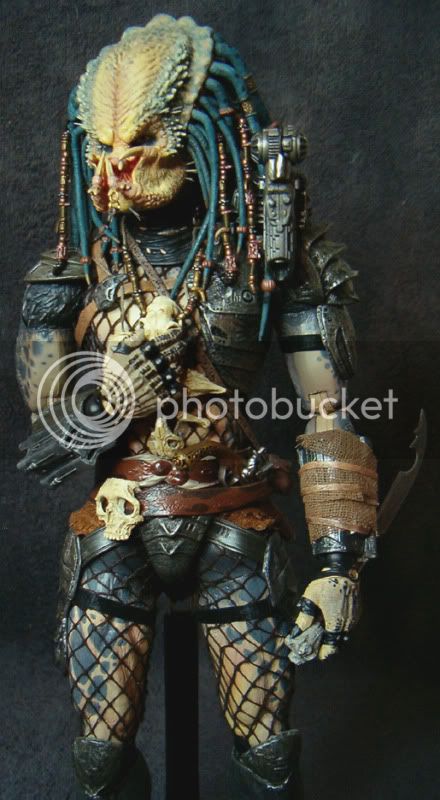
I still don't have time for a full body repaint for my own figure, but I decided to try something else, and I was surprised how easy it was to do. And the end result still isn’t visually perfect, but it is a noticeable improvement, and even better than a P1 body swap because I didn't lose any of the figure's height. It also saved me the trouble of adapting the neck.

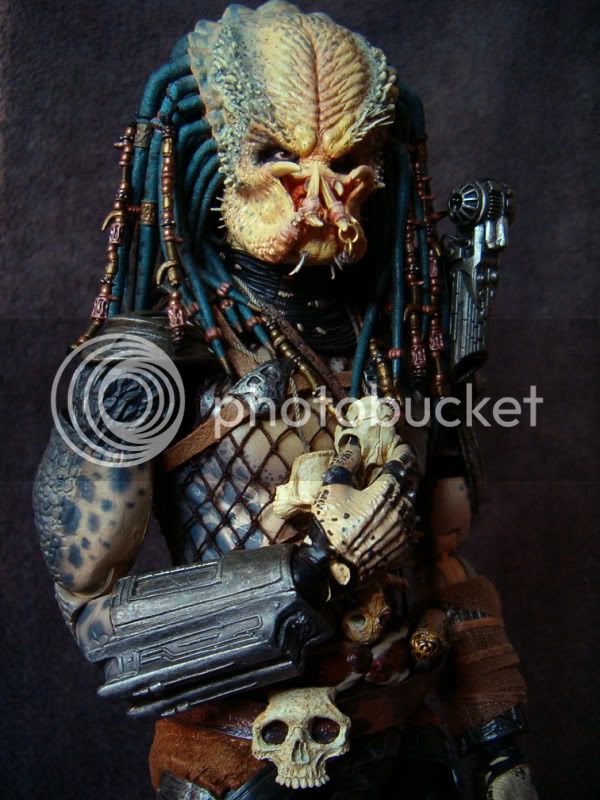
First, a finished shot:
TallShot.jpg


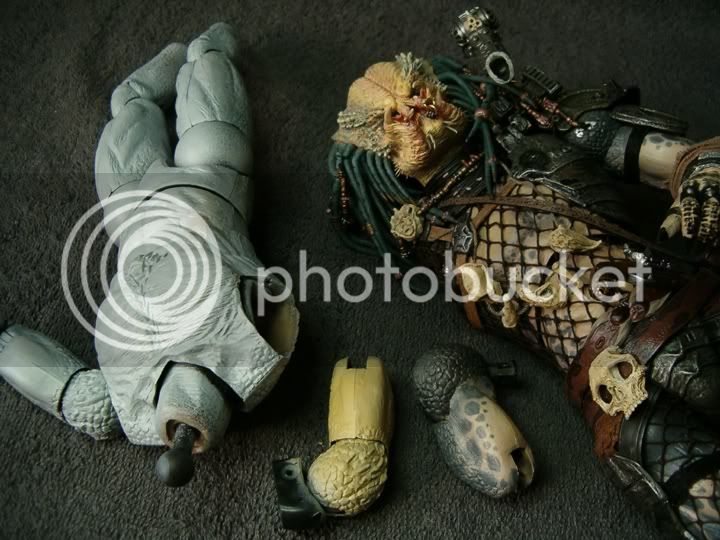
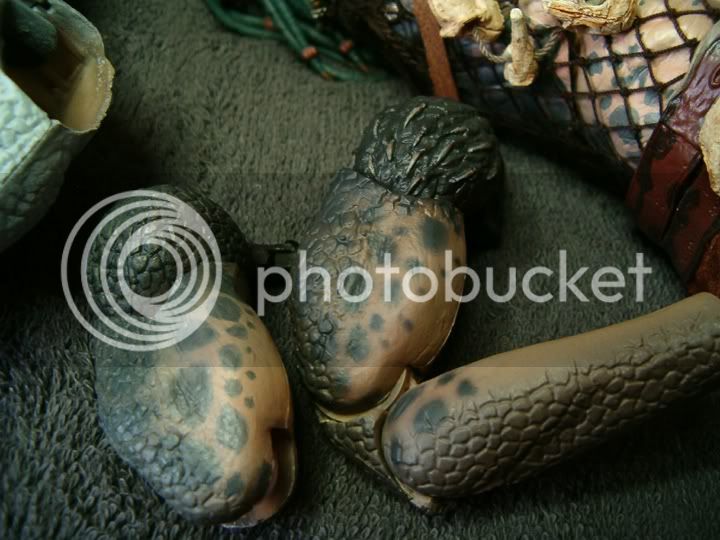
So, how did I do it? Well, I just took the arm I needed off of a spare P1 body I had and repainted that. It was so simple to get that arm off, too. The only thing holding it in place is the one screw in the front of the piece just behind the chest. If you push the arm backward enough, you can easily get to the screw with a narrow Philip's head screwdriver. The two screws in the back are just to keep the two halves of the piece that attaches to it together.
RemovedArms.jpg


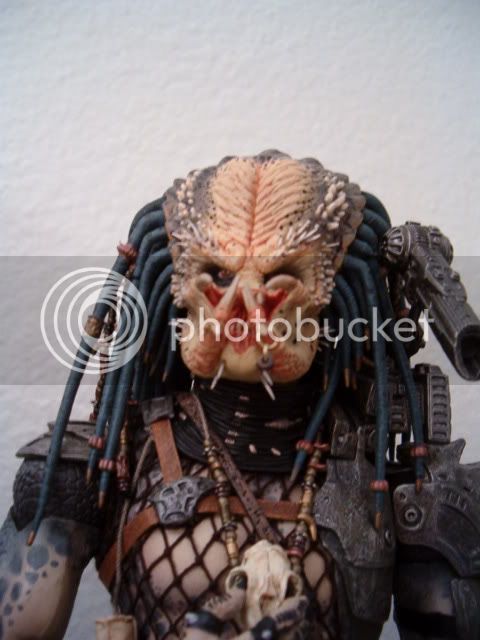
I had already done a mild paint mod to my Elder way back when it first came out, but certainly nothing like the excellent job Les Walker did on his. I pretty much just grayed over the black spots already on the figure and gave the lighter areas a little pink. The head I later gave more attention to along with some much needed quills. For this current mod though, my first job was to match the modified paint of the arm I was replacing.

You already know I got that down:
PaintMatch.jpg


PaintMatch2.jpg


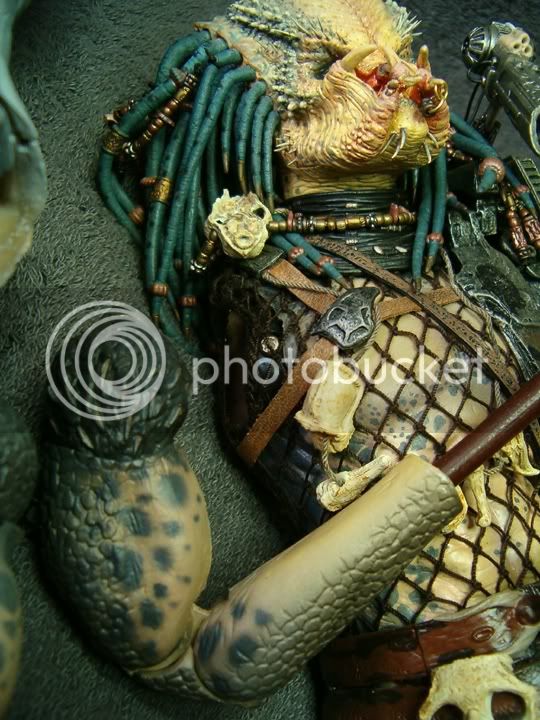
Making sure it still looks good next to the rest of the figure.
ColorCheck.jpg


Another thing that was a vast improvement on the P1 was that the shoulder canon had full articulation, could be folded all the way down, and it was not too close to the head anymore. All I needed to do was swap the chest strap. Easy money.
ArrmMod.jpg


I also like having some quills showing on the deltoid since the suit in the movie was the original P1 suit with some modifications.
 
Last edited:
I didn't need to bother with the left arm since the huge deltoid is hidden by the shoulder armor, and the armor doesn't get any closer to the body anyway.

The P1 armor presented one more amazing opportunity, and I won't get into details about. Here you go.
CIMG1600.jpg


elder.jpg


Canon.jpg


TargetEngaged.jpg


Oh, and I changed the blade box on his P1 gauntlet to the movie correct P2. I may eventually give this a full Les Walker style repaint with dreads and all, and darken the armor, but for now, I'm happy to look at him again.
 
Last edited:
Back
Top