LasVegasYankee
Freaked Out
Would you be willing to recreate some of mods you have done for sale? The blaster you are creating looks like it will be better than what came with the speeder.


 The Imperial Scout Trooper and Speeder Bike was always a favorite of mine. Can't wait to see how it wraps up.
Excellent work Scallywag!


Wow. This has to be one of the most intricate builds ever and you';ve put up WIPs all the way.
Ace at the very least !
I saw in a modelling magazine a technique for creating foliage for dioramas . It involved a sort of "hole punch" which cut leaf-shaped holes . The modeller used this to cut holes in real leaves and the bits "punched out " were then used on dioramas .
https://www.ebay.co.uk/itm/1-Piece-...ing_DieCutting_Punches_EH&hash=item257d182f29
Cheers Annihilate22. Its been great building this and as I usually make model kits, very different from the normal work. Having said that, I have only re-started modelling since being a young lad and as a result have lots of partly made models and only one finished! So many skills to learn especially airbrushing...I still tend to cheat with spray cans where I can and on this sort of scale, cans work fine for me.
ANNOUNCEMENT ( drum roll )
Ladies and Gentleman...the forest floor base is finished ( just drying at the moment )
Just need to fix the bike to the Trooper, fit his hands and the gear he is holding. Will probably use araldite metal adhesive for the bike to trooper joint ( brass rod into brass rod ) as it takes 5 mins to set. Superglue might set immediately and not leave any tweak time.
The weather is not condusive to photography at the mo, so will probably leave it till tomorrow to finally fit and take finished photographs.
Hang in there..nearly done. Must admit....its looking quite good IMHO...might need those fern type leaves though.
Ciao for now.
Took it apart and put it in nail polish remover for a while. You can all take a deep breath and relax.I saw in a modelling magazine a technique for creating foliage for dioramas . It involved a sort of "hole punch" which cut leaf-shaped holes . The modeller used this to cut holes in real leaves and the bits "punched out " were then used on dioramas .
https://www.ebay.co.uk/itm/1-Piece-...ing_DieCutting_Punches_EH&hash=item257d182f29


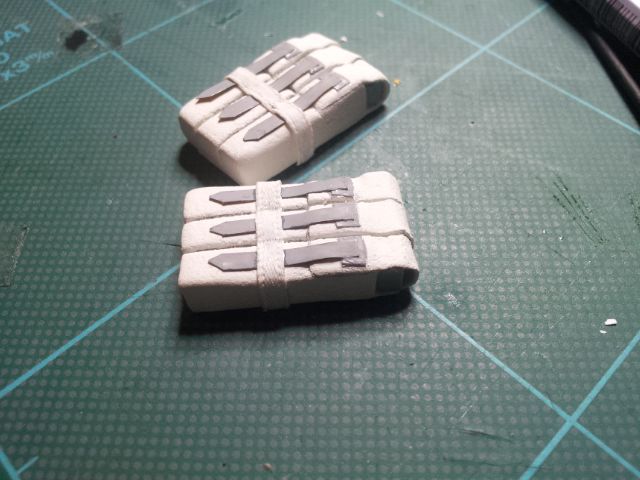
 ) and the strap retainers are painted ribbon.
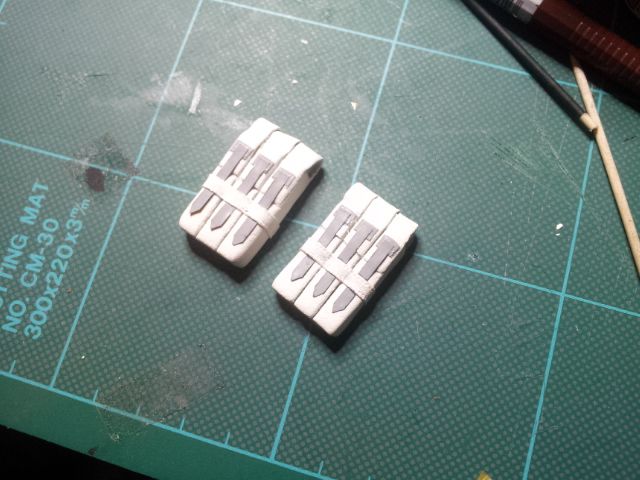
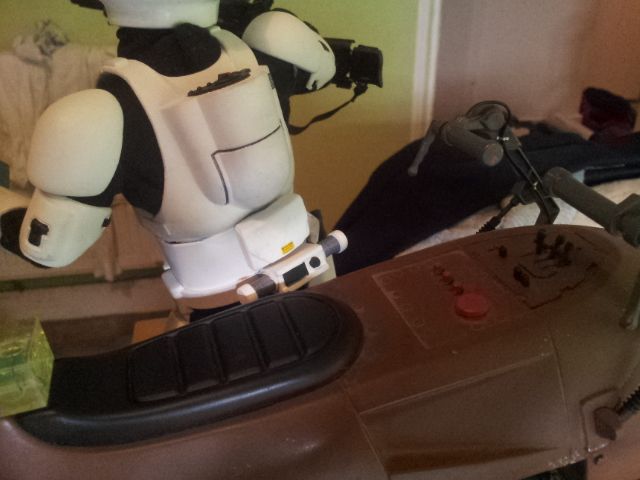
Nice update. Looking forward to seeing more pics. You might have mentioned this and I missed it, but are you going to pose him like the Gentle Giant statue?
 )
) Enter your email address to join: