You are using an out of date browser. It may not display this or other websites correctly.
You should upgrade or use an alternative browser.
You should upgrade or use an alternative browser.
Custom made Han Solo in Carbonite Diorama
- Thread starter Natedog
- Start date

Help Support Collector Freaks Forum:
This site may earn a commission from merchant affiliate
links, including eBay, Amazon, and others.
Natedog
Super Freak
Thanks for all the compliments. Here's another update:
I finished the carbonite block today. I repainted everything. I did the actual carbonite portion in a lighter grey with a bit of silver mixed in. Then did the surrounding structure in a bit darker grey. I also repainted the controls in aluminum. Then added the electronics. I recreated the two green (oscilloscope) screens at the top on either side then added a bunch of LEDs. Some are on all the time and some flash at different intervals. There wasn't a lot of reference material on the control pods, so I made most of it up. I think it looks pretty good, no too much like a Christmas tree!
I still have some touch up to do on the paint, but I'm basically finished.

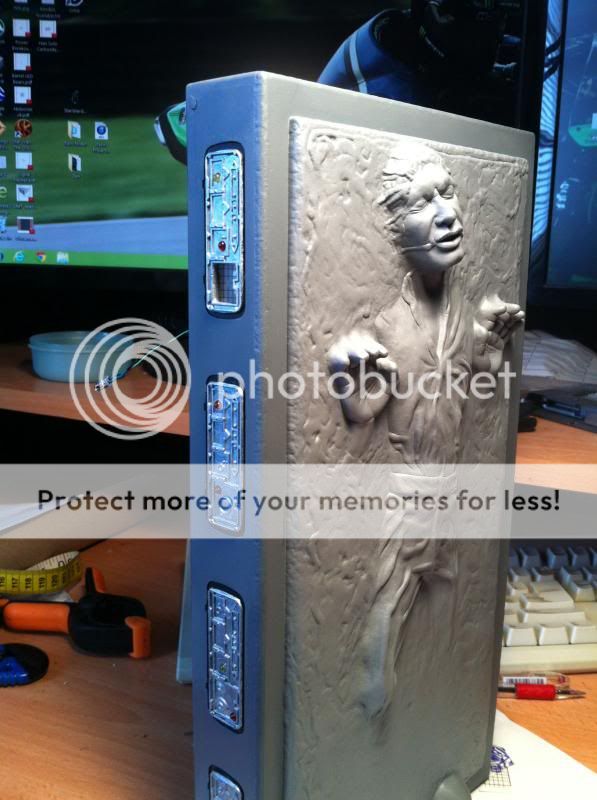
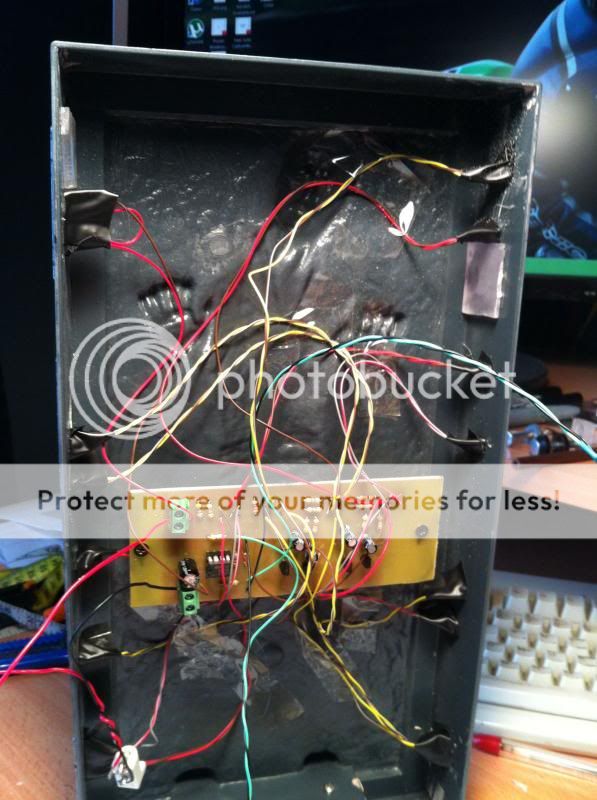
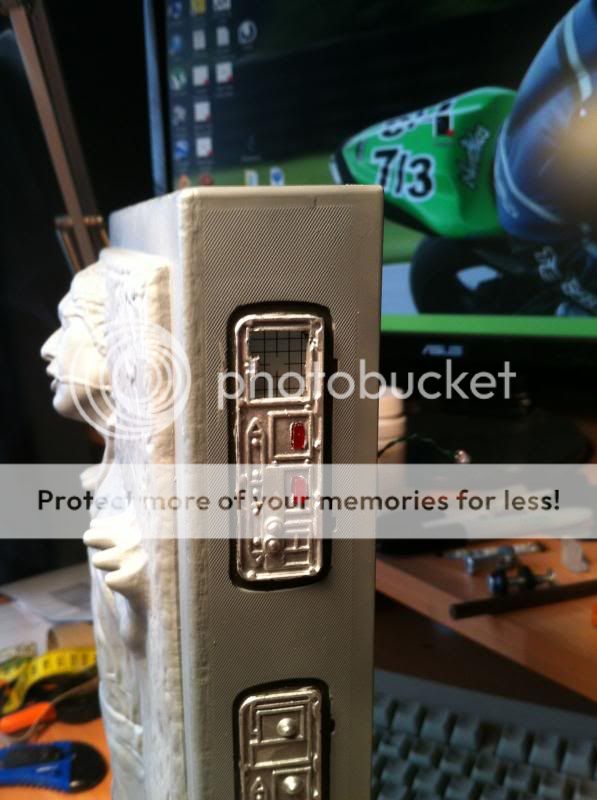

I finished the carbonite block today. I repainted everything. I did the actual carbonite portion in a lighter grey with a bit of silver mixed in. Then did the surrounding structure in a bit darker grey. I also repainted the controls in aluminum. Then added the electronics. I recreated the two green (oscilloscope) screens at the top on either side then added a bunch of LEDs. Some are on all the time and some flash at different intervals. There wasn't a lot of reference material on the control pods, so I made most of it up. I think it looks pretty good, no too much like a Christmas tree!

I still have some touch up to do on the paint, but I'm basically finished.


That's a really nice piece of electronics there, bet the light show kicks this into another gear
Paint job is excellent too nice and clean.
Is the wiring a kit or are you the mastermind electronics genius ?
If you are, do you have a wiring diagram so that we mere mortals could have a go at this ?
Love the work you are putting in on this, can't wait for the next update

Paint job is excellent too nice and clean.
Is the wiring a kit or are you the mastermind electronics genius ?
If you are, do you have a wiring diagram so that we mere mortals could have a go at this ?
Love the work you are putting in on this, can't wait for the next update
Natedog
Super Freak
I have PDFs of all my drawings but have nowhere to host them so here's crappy JPGs.
FYI - In the schematic "R5+, R5-, Y5+, Y5-" etc. are solder points for the LEDs. All component values may differ depending on the voltage source you use and how bright you want the LEDs. I'm using a 12V wall adapter.
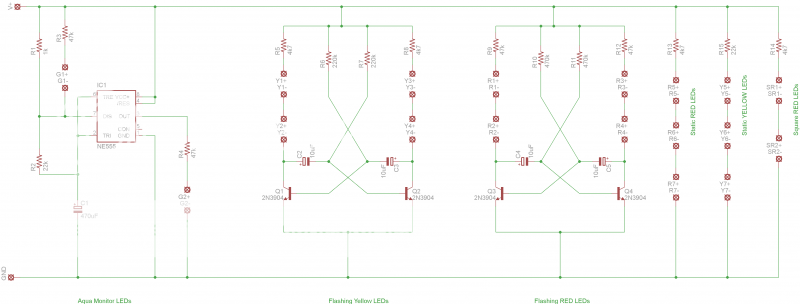
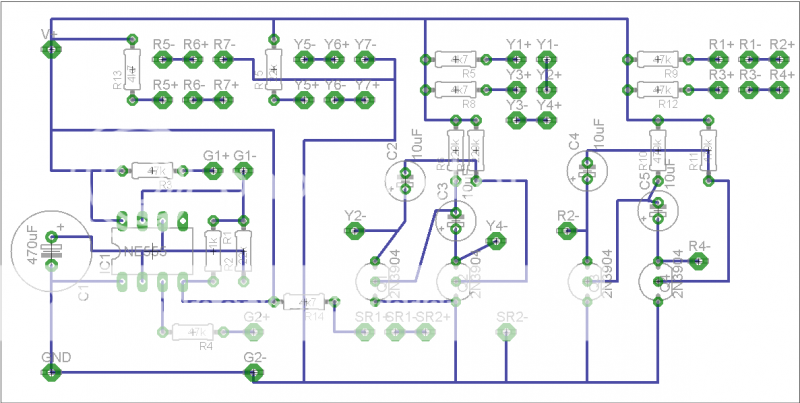
FYI - In the schematic "R5+, R5-, Y5+, Y5-" etc. are solder points for the LEDs. All component values may differ depending on the voltage source you use and how bright you want the LEDs. I'm using a 12V wall adapter.


Last edited:
Natedog
Super Freak
In case you were wondering the black electrical tape on the LEDs is simply there to prevent light backwash. All connections are soldered and the LEDs are hot glued in place. You could probably use black GOOP. That would probably block the light as well. I didn't have any.
Chakaman
Super Freak
Nice work Natedog. The extra work done to the carbonite block looks great. Looking forward to seeing it lit up. Good stuff. 
georgieboy26
Super Freak
impressive work
elar
Super Freak
Really nice work, man!
Absolutely outstanding work!!
Solo_bones
Super Freak
Sweet! Light that thing up! Let's see it glow.
So unreal...
So unreal...
Natedog
Super Freak
Update:
Finished the plaster. Still have some clean up to do and a little sanding. Almost ready for paint. It'll either make or break the whole thing.
In hindsight, I should have saved the grey vertical pieces on the back wall and installed them after the plastering. Going around those was a nightmare. Painting them wont be any easier.

Got some nice texture. I used regular spackling and a putty knife. Then wiped it all down with a damp sponge to smooth things out. Then to add some texture by dabbing the sponge.

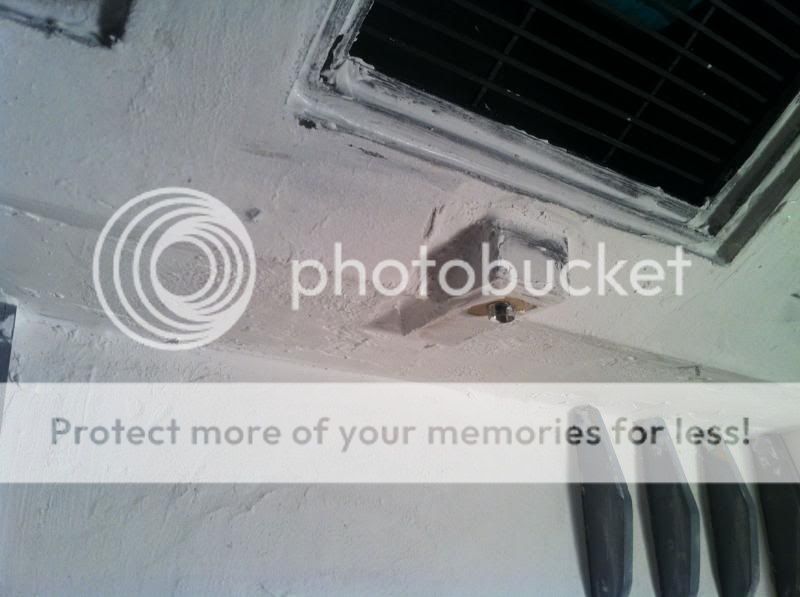
I had to add this little bulkhead for the LED shining on the carbonite block. I know its not accurate but I could not figure out another way to do it.
Finished the plaster. Still have some clean up to do and a little sanding. Almost ready for paint. It'll either make or break the whole thing.
In hindsight, I should have saved the grey vertical pieces on the back wall and installed them after the plastering. Going around those was a nightmare. Painting them wont be any easier.

Got some nice texture. I used regular spackling and a putty knife. Then wiped it all down with a damp sponge to smooth things out. Then to add some texture by dabbing the sponge.

I had to add this little bulkhead for the LED shining on the carbonite block. I know its not accurate but I could not figure out another way to do it.

Chakaman
Super Freak
Looking good man!!
StarconstruX
Freakalicious
A realy good work. I also start with the "Han in Carbon" diorama, but its not so cool as yours! Gratulation!!!
Natedog
Super Freak
Started painting 

Natedog
Super Freak
OK starting the paint over!
I was using sandy browns and tans. It ended up looking like wood. I went back to reference photos and confirmed that the walls are definitley grey. If you look close, even in the moonlight you can see the sand on the ground and compared to that the walls are grey. Maybe a slight brownish grey. I'm having a tough time creating the right look, so please be patient. This is my first dio and I'm new to airbrushing too. Big learning curve here.
I was using sandy browns and tans. It ended up looking like wood. I went back to reference photos and confirmed that the walls are definitley grey. If you look close, even in the moonlight you can see the sand on the ground and compared to that the walls are grey. Maybe a slight brownish grey. I'm having a tough time creating the right look, so please be patient. This is my first dio and I'm new to airbrushing too. Big learning curve here.
StarconstruX
Freakalicious
The color is the hardest part on a diorama. Here is a picture of my 4 inch "Han in Carbonite"


flying dutchman
Super Freak
This is going to be so awesome.....someday I'll make my own and this is going to be my turorial! Great work and can't wait to see it finished!!!
Similar threads
- Replies
- 0
- Views
- 714
- Replies
- 22
- Views
- 4K
- Replies
- 0
- Views
- 627
- Replies
- 1
- Views
- 907


