1/6th Scale Sideshow Boba Fett Figure

Collector Freaks Forum

Help Support Collector Freaks Forum:

This site may earn a commission from merchant affiliate links, including eBay, Amazon, and others.
20110212022327894.jpg


Also, ask yourself if this is ok with you. I don't care what figure is better,(i personally think the medi looks best) this is what pisses me off most!(proto looked heavenly) And i've had enough of it. (If i can get it for cheap i may)

sdcc2011sideshowstarwar.jpg


DSC_0757_edited-1.jpg

Hmm, the proto has the yarn-like scalps that I'm not too fond of.

The only difference in the proto and the figure I have in hand - the cloth undervest needs to be taken in a bit. That's about it.
 
Hmm, the proto has the yarn-like scalps that I'm not too fond of.

The only difference in the proto and the figure I have in hand - the cloth undervest needs to be taken in a bit. That's about it.

Is the in-hand color like the lower pic or the proto pic? The greens seem very different in those two pics.
 
I just want to add that I owned the Medi ROTJ Boba (gave it to a good friend for his birthday last year) and it is a fantastic figure, imperfections aside. I was hesitant to give it away, but my friend is a Boba Fett fanboy. There were many times that I would look over at my diplay and think that it looks like an actual little man in a costume. That being said, I can't wait to get the SSC Fett, mod the vest, and be able to look over at Fett and admire once more.


You sound like a good friend
 
I thought someone would have done this already.
The vest is easy to remove and is kind of sturdy considering; its the clear plastic backing that makes it sturdy. To remove the vest take off the hands and gauntlets (these look very fragle), pop off the head and remove screws from the back (these go into the figure body, so body replacement will be an issue), remove the back/neck armor (loose at this point), un-velcro the vest (or adjust to tighten), adjust arms and remove vest carefully (the braids are attached and can snag).

I don't think the plates are glued to the vest and backing, think plastic rivets, a plastic post is heated and pressed onto the backing. Each plate is attached like this at 2-4 points. The backing does flex some but wants to hold a straight shape.

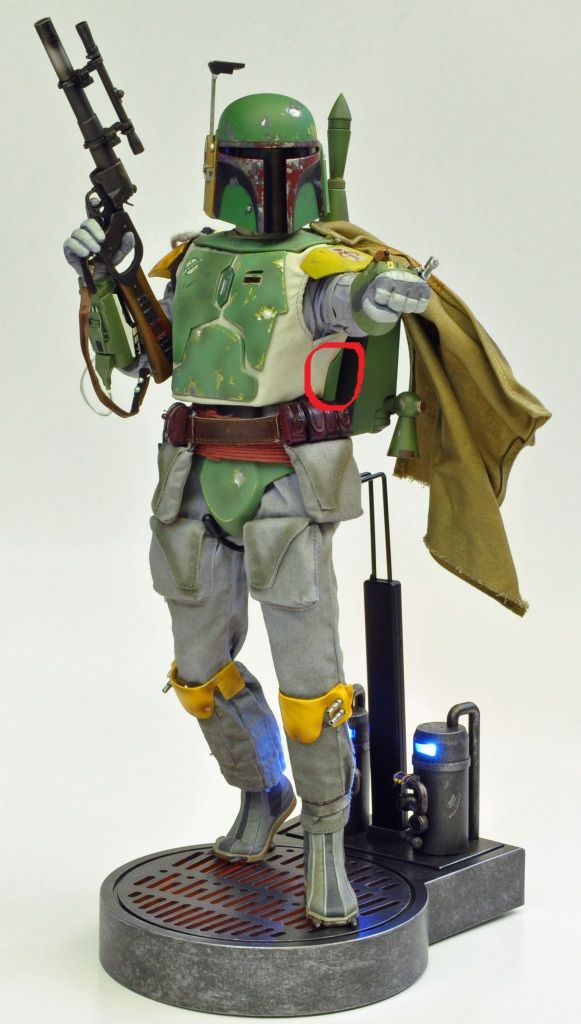
Futzing minimizes the blocky-ness but does not seem to eliminate it. Loosening the vest seems to give it a curve at the front but new holes will be needed in the vest for the screws. For me straightening the body and having the belt at the bottom of the vest to hide the gap and make the slight remaining blocky-ness seem more natural.

The blocky-ness seems part due to the solid one piece backing being larger than the armor, and the figure body being too thin; my first thoughts are to trim the backing on the sides closer to the edge of the armor, and maybe trimming the backing between the armor pieces so the armor pieces might "float" on the vest. I am not sure how to do this without cutting the vest or breaking the armor (and of course need to work up the guts to do it), others i am sure will have no problem with it.


Thanks for this info. As I stated earlier in the thread I had a feeling that it was the back armor plate that was causing the block look or at least adding to the problem.
 
You sound like a good friend
I'm not in the habit of gifting $150 action figures, but my best bud had been drooling over it at my house since I bought it. Got tired of cleaning the glass ever time he came by. He proudly displays it in his office at work, so I still have visitation rights.:)
 
I'm not in the habit of gifting $150 action figures, but my best bud had been drooling over it at my house since I bought it. Got tired of cleaning the glass ever time he came by. He proudly displays it in his office at work, so I still have visitation rights.:)

Still, awesome thing to do!

:hi5:
 
Just to pin point what I believe is causing some of the boxiness, I circled the part of the back armor plate I think should be altered. Maybe cutting the corners off?


DSC_0757_edited-1.jpg
 
I think the plastic piece underneath the vest that holds the front armor in place is the real culprit here. Note the flatness caused by this piece.
DSC_0757_edited-1.jpg
 
I think the plastic piece underneath the vest that holds the front armor in place is the real culprit here. Note the flatness caused by this piece.
DSC_0757_edited-1.jpg


Or it could be a combination of both areas. Either way when I get mine, I am going to mod the s__t out of it until it's right. :yess:
 
Me too, just like with every other 1/6 Boba I ever had. Including Medi. Face it, we just like playing with our dollies.


Dollies meaning 1/6 high end, museum quality, collectible figures from iconic pop culture properties. Not wieners.
 
... ON TOPIC, some pics of the Fett look amazing and some look real bad. I'll reserve judgement until I get mine. Been waiting for this for a while.
 
Last edited by a moderator:
there is a velco strap at the back if the vest but you can't really unstrap it because there is a piece of back amour piece screwed into the vest. the back armour piece is for hanging the backpack. i guess if you unscrew the back armour then you can remove the vest and do some modifications.

Yep, just remove the screws and the vest is designed to come off easily. I took it off and stitched it a bit tighter under the arms and it made all the difference. They used straight stitches when it should have been vertical to match the angle of the armor edge. Just one tiny mistake, but can make a world of difference.
 
Yep, just remove the screws and the vest is designed to come off easily. I took it off and stitched it a bit tighter under the arms and it made all the difference. They used straight stitches when it should have been vertical to match the angle of the armor edge. Just one tiny mistake, but can make a world of difference.

GOOD! That's what I will do. Will consider this like having to heat the stormtrooper's chest plate and bend it into shape.

Wonder if the change in the vest shape will cause issues realigning the screws to the body? Cutting new holes shouldn't be too troubling.
 
Yep, just remove the screws and the vest is designed to come off easily. I took it off and stitched it a bit tighter under the arms and it made all the difference. They used straight stitches when it should have been vertical to match the angle of the armor edge. Just one tiny mistake, but can make a world of difference.

GREAT NEWS! Any chance of pictures showing this improvement?
 
Yep, just remove the screws and the vest is designed to come off easily. I took it off and stitched it a bit tighter under the arms and it made all the difference. They used straight stitches when it should have been vertical to match the angle of the armor edge. Just one tiny mistake, but can make a world of difference.


Thanks Dave!!! I'm feeling more confident that the vest can be reworked without a great deal of effort now.
 
Great to be getting all this good news in regards to the modifications. Looking forward to seeing everyone's work until I pick mine up in a month or so.
 
Back
Top