1:6 Darth Vader 3D Laser Scan & Print Project

Collector Freaks Forum

Help Support Collector Freaks Forum:

This site may earn a commission from merchant affiliate links, including eBay, Amazon, and others.
Well, another little setback. I lost my producer, so this will not be made available through Sean Dabbs, and I will have to try and find someone else. I actually considered just letting people buy directly from the printing company, but thought against it as that will be extremely expensive and I am not sure anyone wants to spend this much on these pieces.

And the pieces are still at the printing company. Found a few issues on the first batch, so some parts had to be reprinted. Waiting for news.

Sorry I didn't have better news at this time. I'm as anxious as you guys to get this going.
 
The face masks have been reprinted and they sent me a picture of them. I signed off on the prints and they are now en route to me and I will get them before September 6.

No longer having a producer, I am considering buying a cheap resin printer called Orange 10, because I'm afraid I may be allergic to the resin and don't want to spend too much in case I can't tolerate working with the printer and prints. I'll keep everyone posted.
 
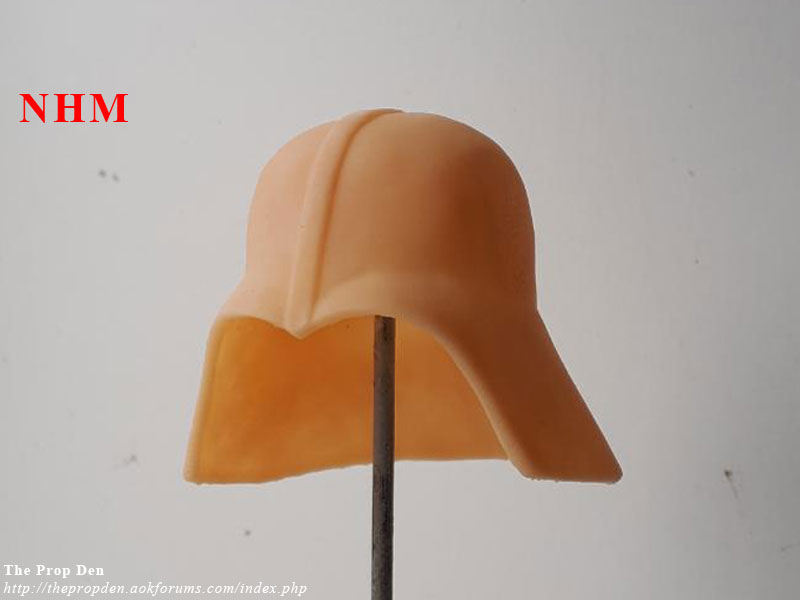
A little follow-up. Was told a few days ago that the Prowse project fell through, so there won't be a new improved version made available through Sean. So I have been working on the Prowse sculpt while I've been ill. Haven't had time to check out my new resin printer.

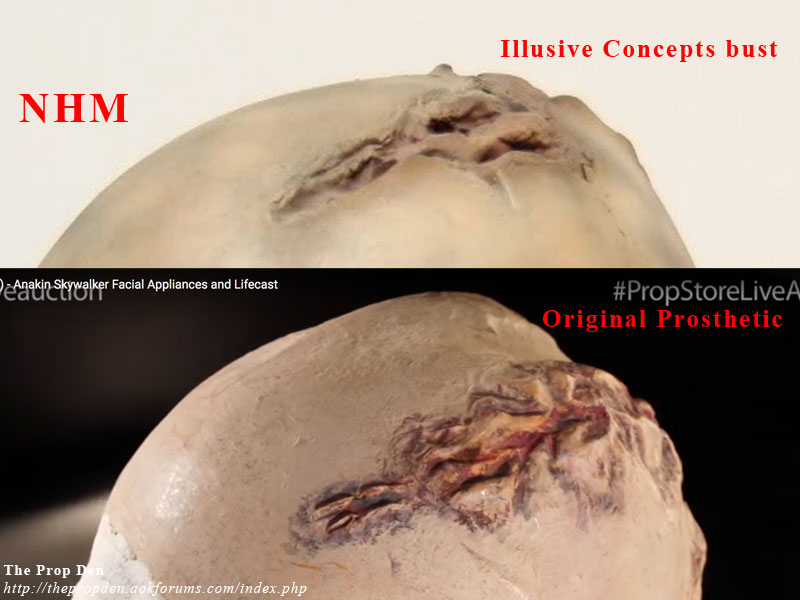
I managed to merge the front of the reworked sculpt I commissioned from Sean years ago with the rear of the original model, as the scan was more proportional and sharply detailed back there. However, I need to figure out how to add the moles and doing the fixes on the face. Also thought about adding the reveal detail on the cheek and top of the head for one version... but I'm not skilled at all at 3D modeling.

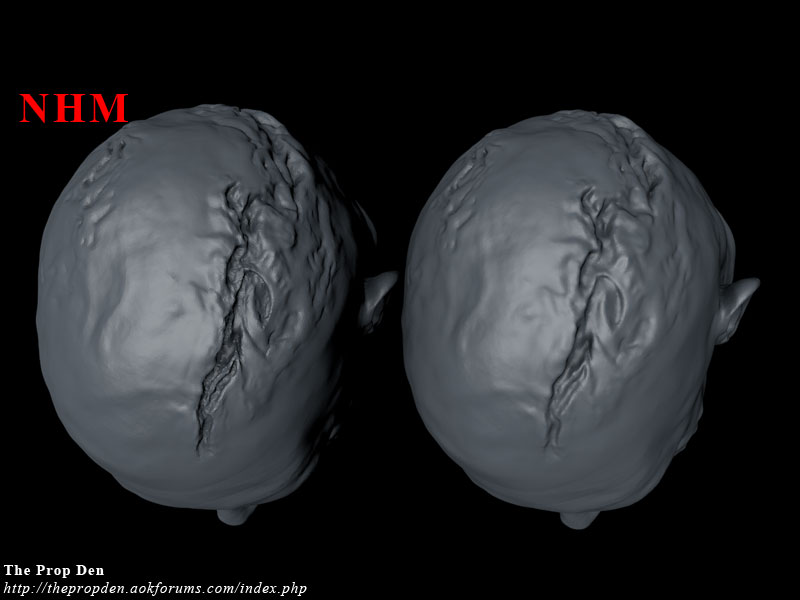
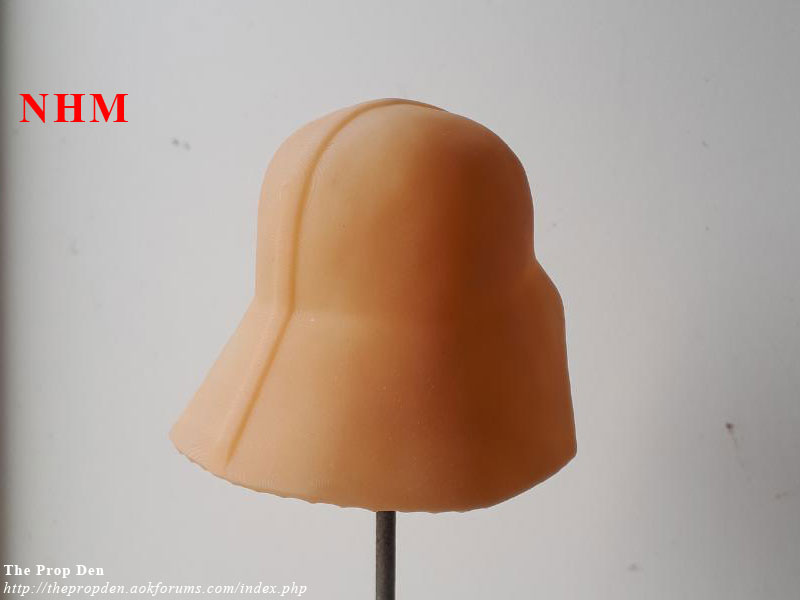
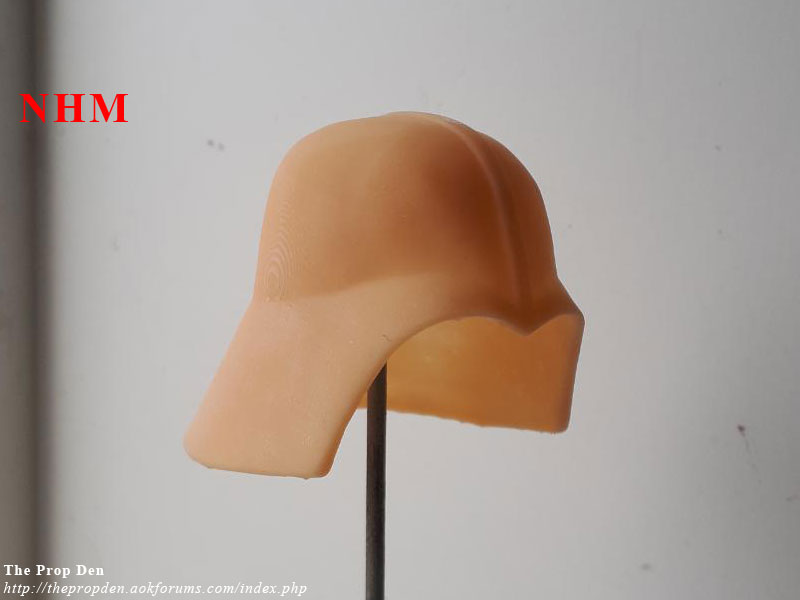
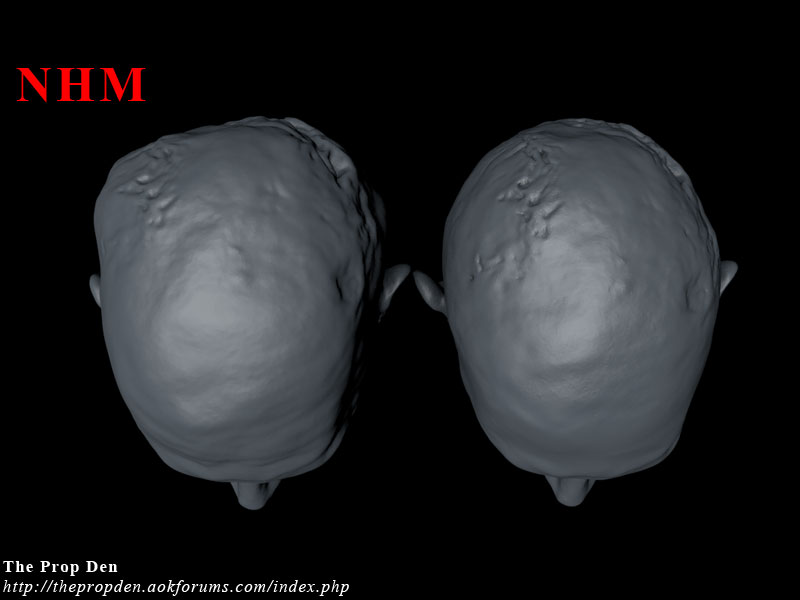
The left one was how the reworked sculpt looked before. The right one is the fixed version with the old scan rear section of the head. Took a while to get it right and I had to accomplish it through a round-about way that meant I had to manipulate things one polygon at a time.

, on Flickr

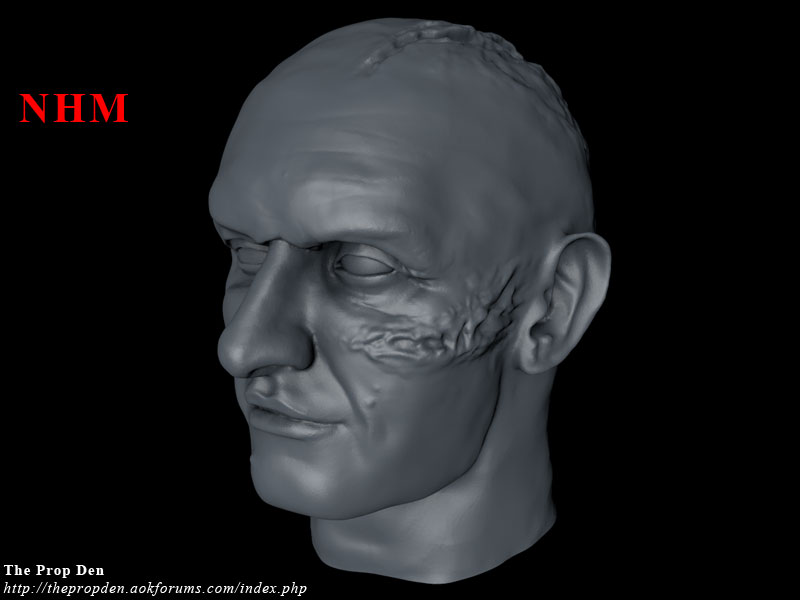
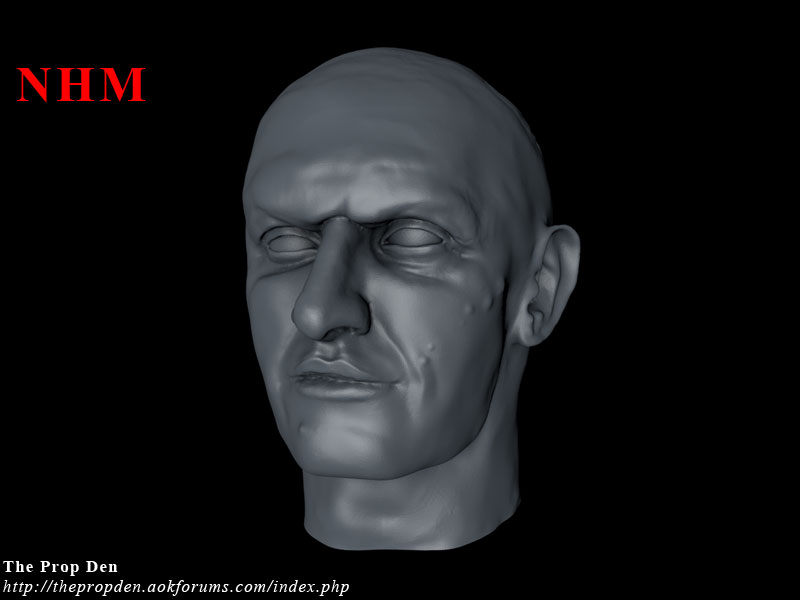
Added some details to the face - the moles - and worked a little on the chin. I'll try and see if I can fix the strange dip at the left temple as well as pulling the upper eye lid folds up a bit to show more of his upper eyelid - somewhat sunken-in kinda look - as well as fixing the brow above the nose and fix the mouth.

, on Flickr

I figured out Blender, so now I can do the fixes on the Prowse head in a better program than Meshmixer. I watched an awful lot of tutorials on Youtube to just get the gist of things to get started. Though, couldn't understand why I didn't get the sculpting tools when I activated that option in the program. Turns out I'm an idiot and I hadn't activated/highlighted the model itself.

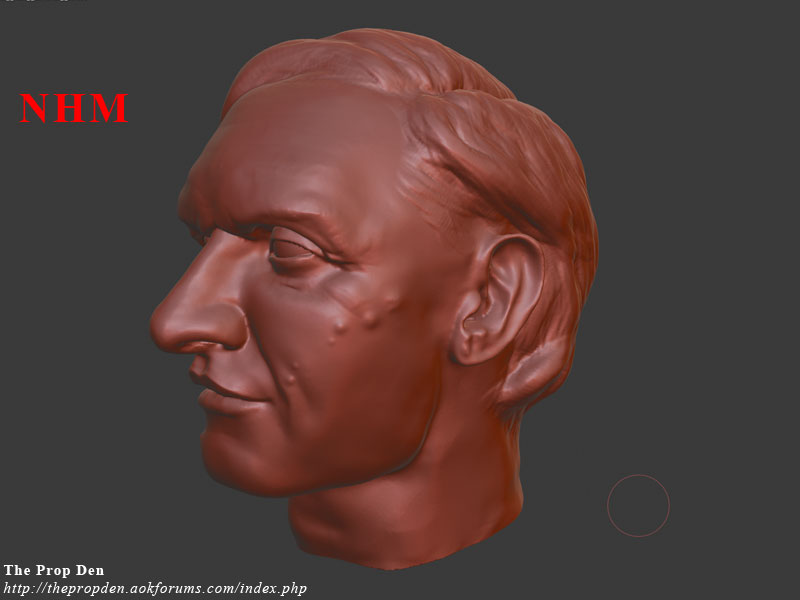
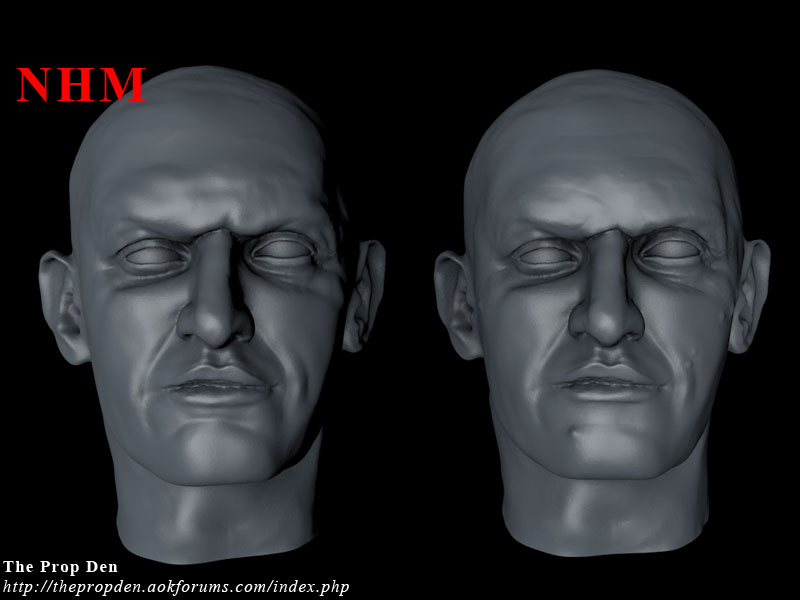
Newest version on the right. Worked on the brow and upper eyelid area and the chin and bottom edge of the bottom lip. Will work more on the mouth later. Needed to get away from working on the mouth because the first time I worked on it I got it perfect, but I didn't save, and ever since then I've not been able to get it to look good.

, on Flickr

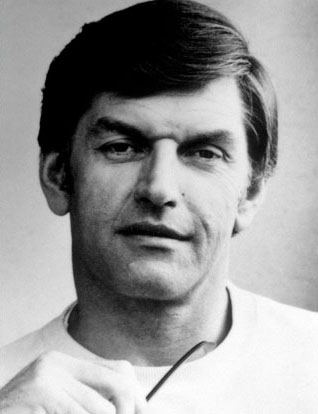
Prowse for reference in case people don't know what he looks like. :)

, on Flickr
 
Okay, finished the face. Am now working on the reveal scars.

Base model on the left and reveal scar detail version on the right. Having previously used the Illusive Concepts bust for reference for the scar, it was a little difficult to get used to how different the original screen used scar looks. Not sure I nailed it, but I'll keep working on it.

, on Flickr
 
Added a new picture. Since these are supposed to be old scars and the scars Mike Warren sculpted on the original piece that he scanned for me which Sean then reworked, were a little soft and old looking, I felt I needed to soften my added scars to make them look older and blend them more with the already existing scars.

, on Flickr

For anyone not familiar with the reveal details I've been working on here's a picture to show a comparison between the Illusive Concepts bust which I was using as reference before and the original sculpt prosthetic used in the movie.

, on Flickr

Can't say I got it 100% accurate, but I think it turned out fairly well.
 
Thanks.

Worked a little on the cheek scar. Think I made a pretty good start.

, on Flickr

Have been cleaning out my spare room, so I can get the new printer up and running... but it's taking longer than I hoped.
 
The following is a test of doing the hair. I'll have to start over because I didn't get the angle of the parting line correct and it will be impossible to fix because I did the hair directly on the sculpt instead of a separate model. I just wanted to see how it would look. I may try the separate model approach and rough in the basic hairline shape and see how it goes.

, on Flickr

Will likely be able to finally unpack my resin printer tomorrow and put it together. Won't be able to print, though, but at least things are getting closer to the first test prints.
 
Have ordered one of the last bits I needed before I start printing. I'll be a bit busy during some days of the week, but will hopefully have a test print shortly after I receive it, if all goes well.
 
First test print is happening now. I'll know more in 7 hours and 47 minutes. EEK. This is kinda exciting. Similar to when I tried out the filament printer, which I'm still mesmerized watching when it prints, as it is still the closest thing to magic for me. And it's science.
 
First test print is happening now. I'll know more in 7 hours and 47 minutes. EEK. This is kinda exciting. Similar to when I tried out the filament printer, which I'm still mesmerized watching when it prints, as it is still the closest thing to magic for me. And it's science.

We?re all excited with you mate! Can?t wait for this!!! [emoji847]


Sent from my iPhone using Tapatalk
 
Update: I may need to tweak the settings, as I'm getting lines in the print. It also has some areas where it didn't print, such as the bottom rear section of the raised ridge on the dome and a flat spot at the top where the print finished. From a distance it looks perfect, but those lines will show up when you paint it. It may lessen if you use filler primer or go over it with a light amount of filler and wipe away the excess pretty quickly to build up the recessed grooves, to make the surface more uniform. I didn't sand down the support studs, which is why the bottom skirt edge looks so raggedy. It works... though probably needs some tweaks to perfect it... however... I reacted to it in a bad way, even when wearing protection. I'll try one more time... but if it's the same result, then this option is out. Sadly.

, on Flickr
, on Flickr
, on Flickr
, on Flickr
 
Looks great!
Would you consider scaling this project up to 1/4 scale, as well?
I have no interest in quarter scale, but I'm working with a friend who may bring something out in that scale. Unsure whether it will be parts or a full piece only.

Health first, man! Take it easy.
Thanks. I try to. I just so wish I could get this done for you guys.
 
Back
Top