NECA: 1/4 Christopher Reeve Superman

Collector Freaks Forum

Help Support Collector Freaks Forum:

This site may earn a commission from merchant affiliate links, including eBay, Amazon, and others.
As much as I love this figure...the one to top it for the money will be penguin imo.

I think you could be right , he looks fantastic doesnt he. Just the fact Neca might end up topping this in less than 2 months brings us happy days :)
 
The hardest part of wiring this cape is to find the right gauge of wire to use. When I wire my cape, I just use the wire itself to poke through the material. The spot i choose is usually where the cape lands behind one of the legs. I measure the wire to cover the entire perimeter of the cape, insert and start feeding it through where bottom of the cape is stitched. The hardest part is the corner, just need to work through it because it may have another piece of cloth to puncture through or they stitched through the cross section. I make sure that the wire goes all the way into the collar. Then I insert the other end of the wire INTO the same entry hole (eventually it makes the hole larger but it should still be barely visible) and go the other way. The scariest part is when you already have the wire 99% in and at the entry point there remains a small loop of wire about half inch long. You won't be able to help it but that hole has to be stretched, (maybe up to 20 to 30 ml) to get that loop through which is why I place the entry behind a leg. If you're successful, you'll barely notice the hole and if you're really good, you probably won't even be able to find it again.
 
Excuse the crappy phone pic, but I wanted to show my Reeve after a couple of mods. I wired the cape, which I think really adds to the figure. The major thing I did is alter the neck by hollowing out the inside of the hear and grinding the neck down a little around the edge. Now the head is pushed on and sits lower than it did out the box, Im really happy the giraffe neck he had when I got him has been eliminated. I'm going to reattach the socket and neck peg within the head with some Aves, so I get the poability of the head back but at this new lower position.

NeKDnkI.jpg

Truly an amazing job that you did here with the head and the neck area. he looks absolutely fantastic now. Kudos to you......how did you get to pop off the head, I tried many times and have failed.
 
Truly an amazing job that you did here with the head and the neck area. he looks absolutely fantastic now. Kudos to you......how did you get to pop off the head, I tried many times and have failed.

Thanks! It's pretty tough to remove the head. I heated it with a hairdryer for a while to get it really hot, then gave it a good old bend and pull. That got the big neck peg out of the neck, then I pulled the peg out of the head with some pliers after some more hairdryer action. I cut around the inner edge of the recess in the head with a scalpel. Removing the socket for the neck peg and the plastic between the hair, ears and chin. With this area removed you can fit the head onto the neck and push it on to the height you want.
 
Anyone have a good tutorial on wiring the cape?

I snipped a tiny hole in the underside of the cape, between the edge and the stitching, near the top where the cape meets the body. Then I fed in a piece of wire, down the channel created by stitching, until it reached the bottom of the cape. I cut off the wire with a little excess that I tucked behind the blue rubber of the front of the suit. You can't see the small amount of exposed wire, as it's runs under the cape and is hidden beneath the blue suit. It only took me a few minutes to get both sides done.
 
Thank you Boosham very posting the process that you took to customize him. It is nice of you to do something you did not have to do. Congrats on a job well done. Funny, I am afraid to mod a figure, but not afraid to restore my wife's 76 camaro by myself.
IMG_20150714_150747.jpg
IMG_20150713_163020.jpg
 

Attachments

  • IMG_20150713_171555.jpg
    IMG_20150713_171555.jpg
    304.5 KB · Views: 476
just a fyi to folks modding this guy ,might seem obvious but the hair is a separate piece and can be removed with the boil and pop method

20150719_191920_zpsj2m6ozlx.jpg

20150719_193443_zpsumg5yir0.jpg

20150719_193528_zpsdzp5c5qu.jpg

robo supes

20150719_193552_zpsawchucfh.jpg


this opens up the possibilities of fitting glass eyes which may or may not be a improvement lol ,i saw these on ebay ,seem cheap enough ,but im not really sure if they are the right size and if my skill set is up to the job lol
Sky Blue Pair Doll Eyes Ball Half Round Acrylic Dolls Eye 10mm for BJD Dollfie | eBay
$_57.JPG

any input
and here he is put back together with his head sitting in a lower position non the worse for his surgery ,in his garden of solitude guarded by his labradoodle guards , because if you've watched the documentary "the death of superman lives" you will know Jon Peters says "labradoodles are the fiercest killers in the animal kingdom!" lol ,well them and spiders ,and polar bears and ,himself etc
20150719_195325_zps8ptriuo7.jpg

20150719_195641_zpsfspaqwmf.jpg
20150719_195636_zpsloatipe4.jpg
20150719_195744_zpssgoqhhiy.jpg

on a side note i gotta say neca really stepped up with this guy 100% improvement on the other neca 1/4 scales i have in every way ,this guy stood unaided on a trampoline no less lol for a couple of hours never wobbled never fell ,cant remember any of my others having that kind of joint or weight distribution success ,
1236686008009.jpg

great work neca ,roll on the next figure
 
Last edited:
Mine arrived a couple of days ago and I confess I'm quite disappointed. He feels a bit cheap and flimsy compared to my other Neca figures. The plastic on his back is thin and was badly indented. I'm going to see what I can do with a hair drier and cold water but even if I get the shape sorted the plastic is still liable to buckle again because it's so thin. Don't know if this is an exception or a manufacturing weakness.
 
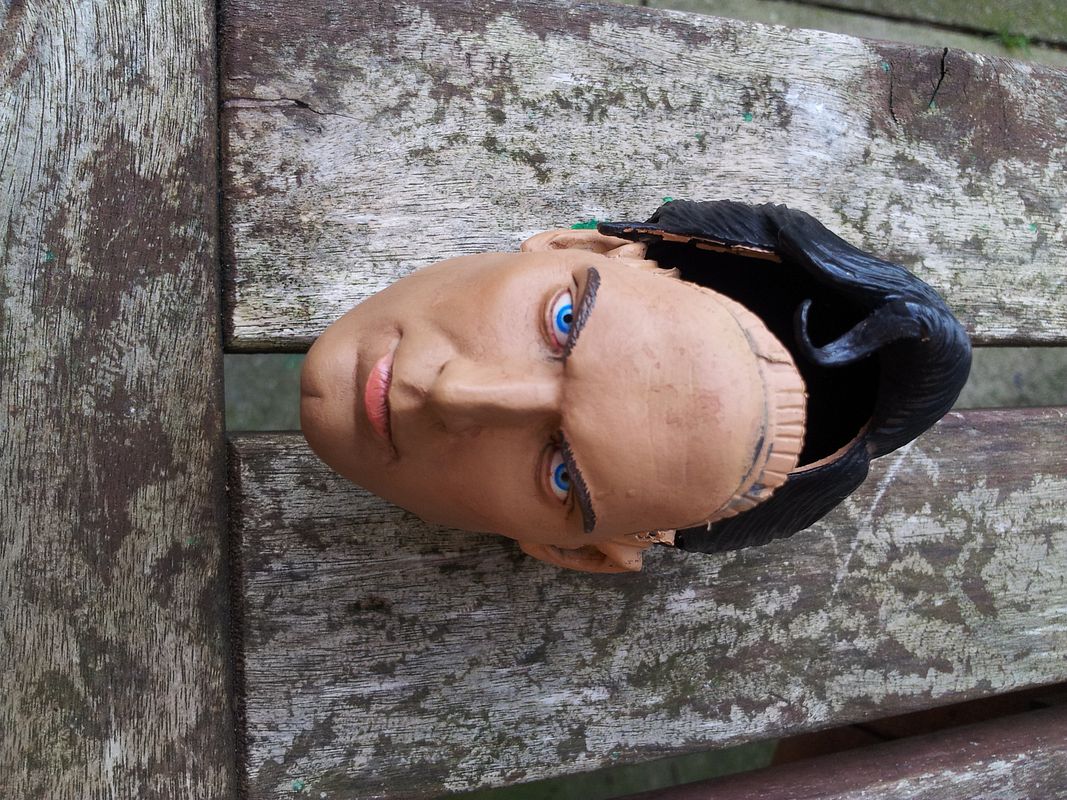
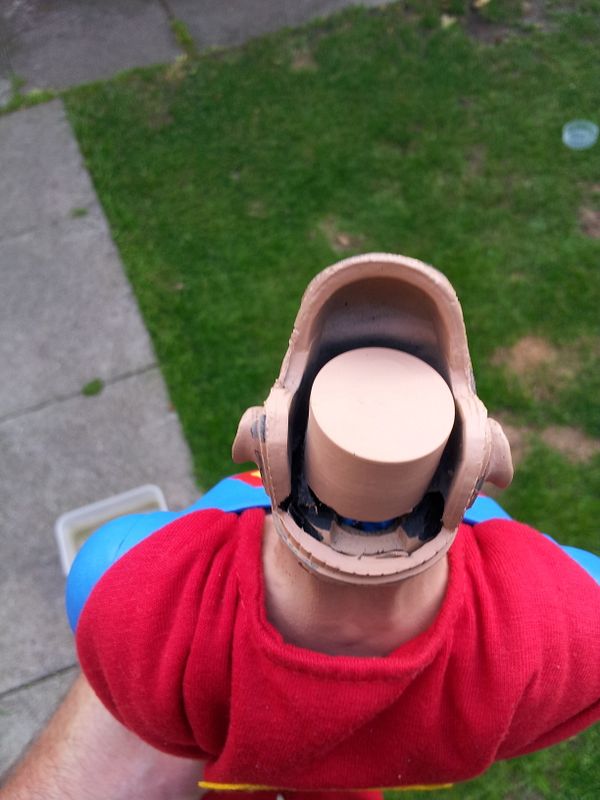
not sure if im reading this right but are you looking to pop the head back on to the neck post ball joint
if so i would immerse the head in boiling water for a couple of minutes and push it on to the post ball joint
or if your trying to push the ball joint back into the neck post ,ive not done it this way but i think ivanski did ,heat up the neck with either a hairdryer or boiling water ,a elastic band around the cape holding it to the body helps greatly lol ,and when softened push the ball joint peg in to the neck post ,hope this helps
tom k
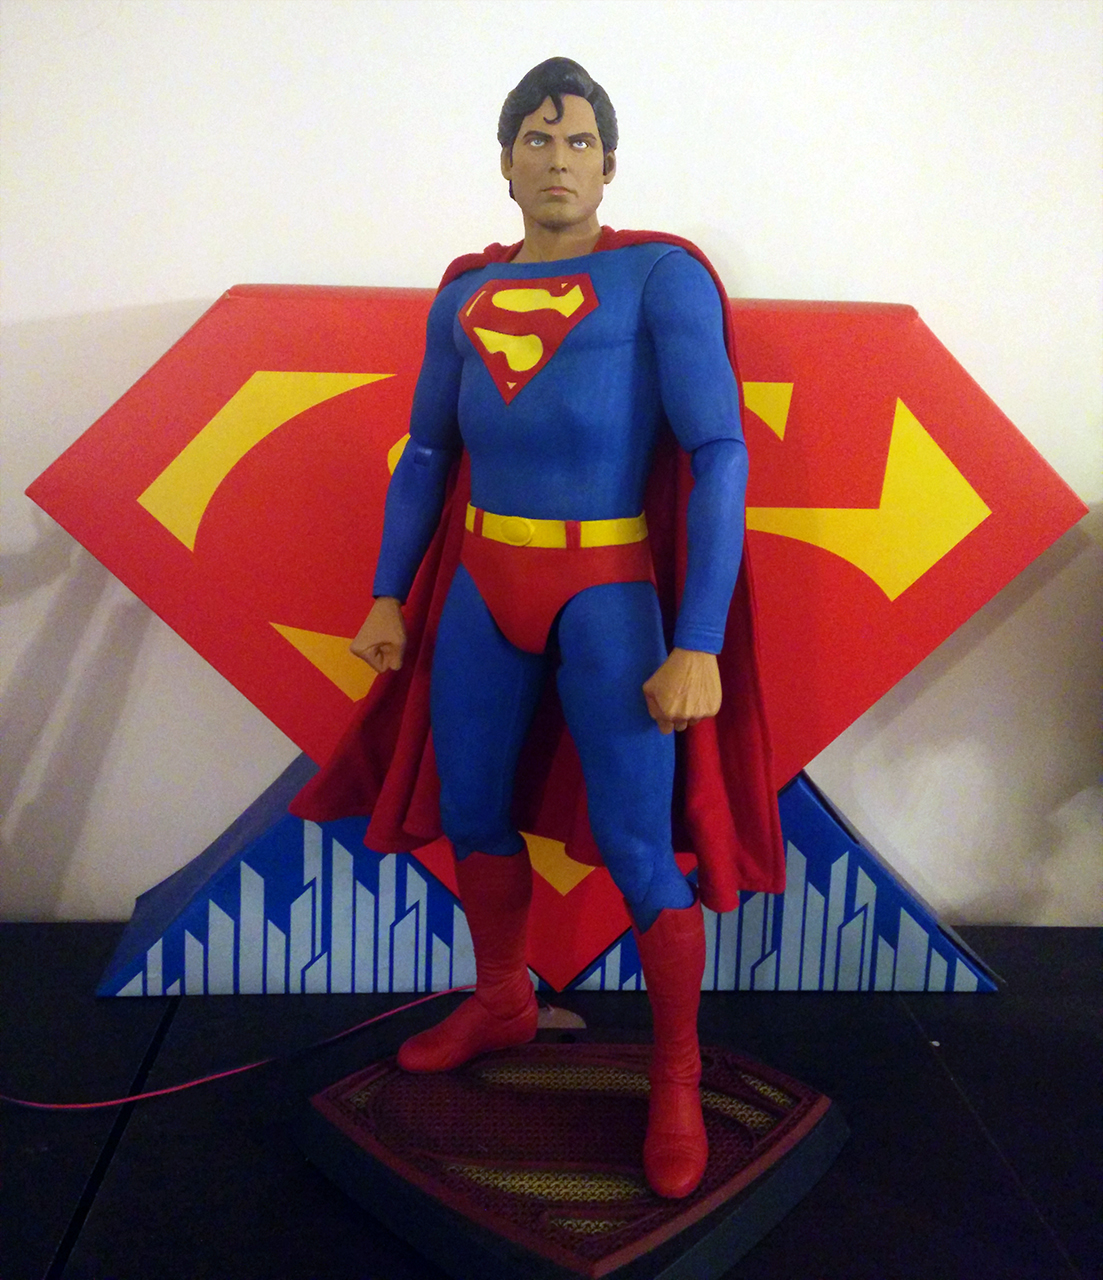
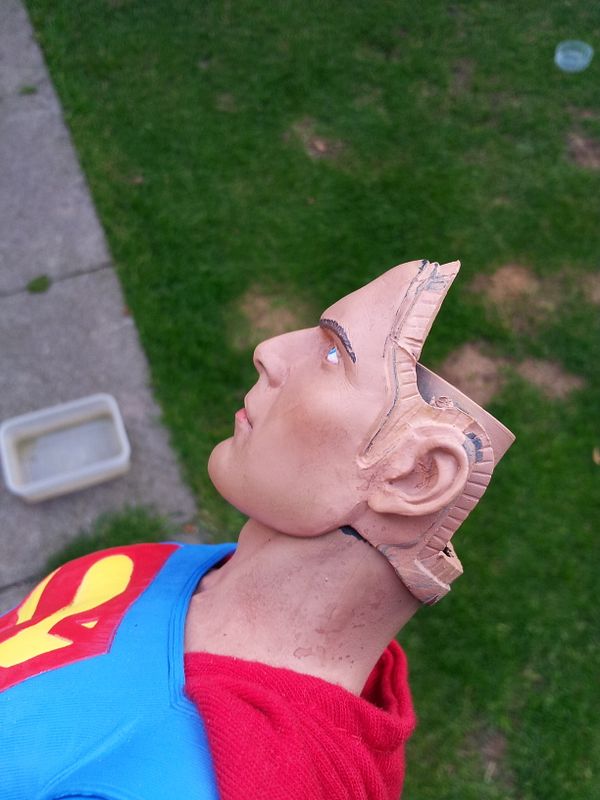
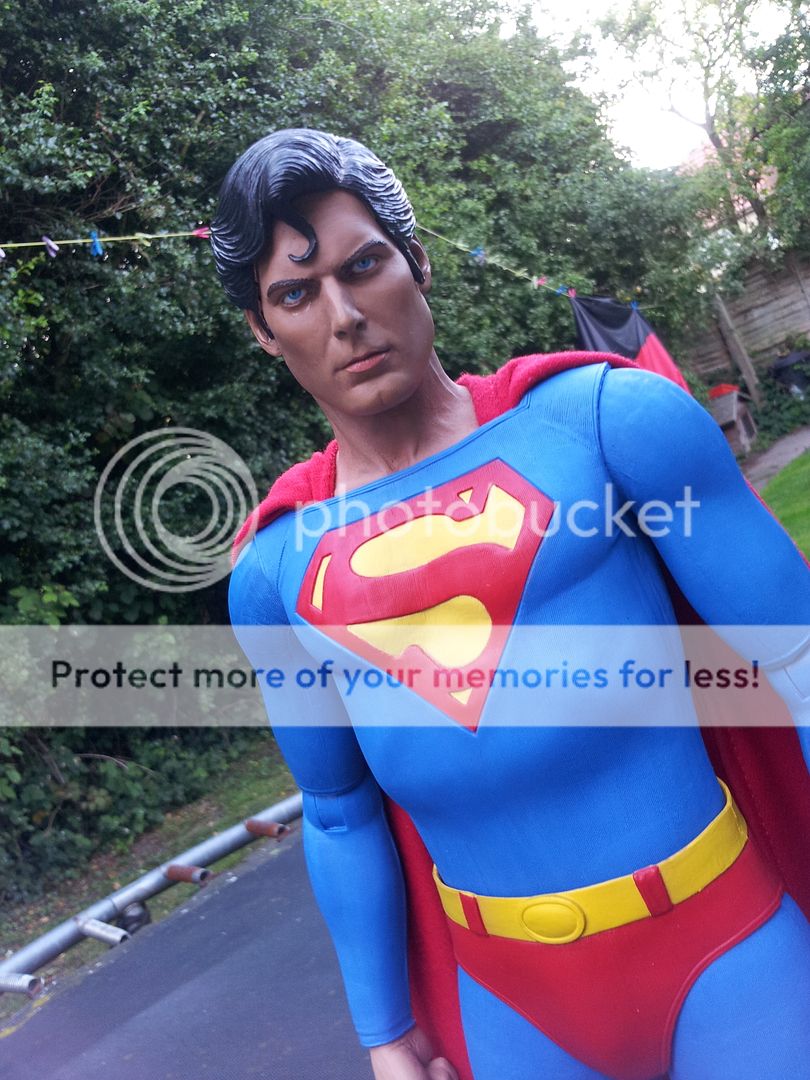
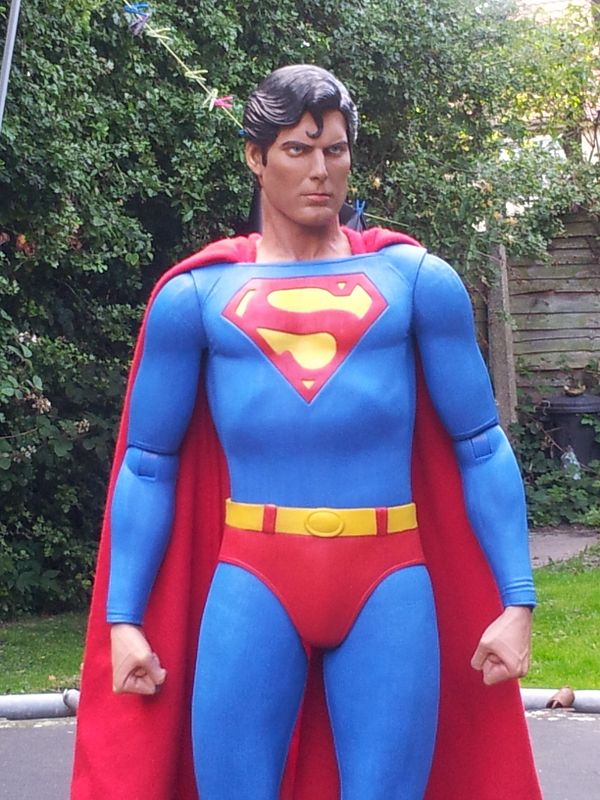
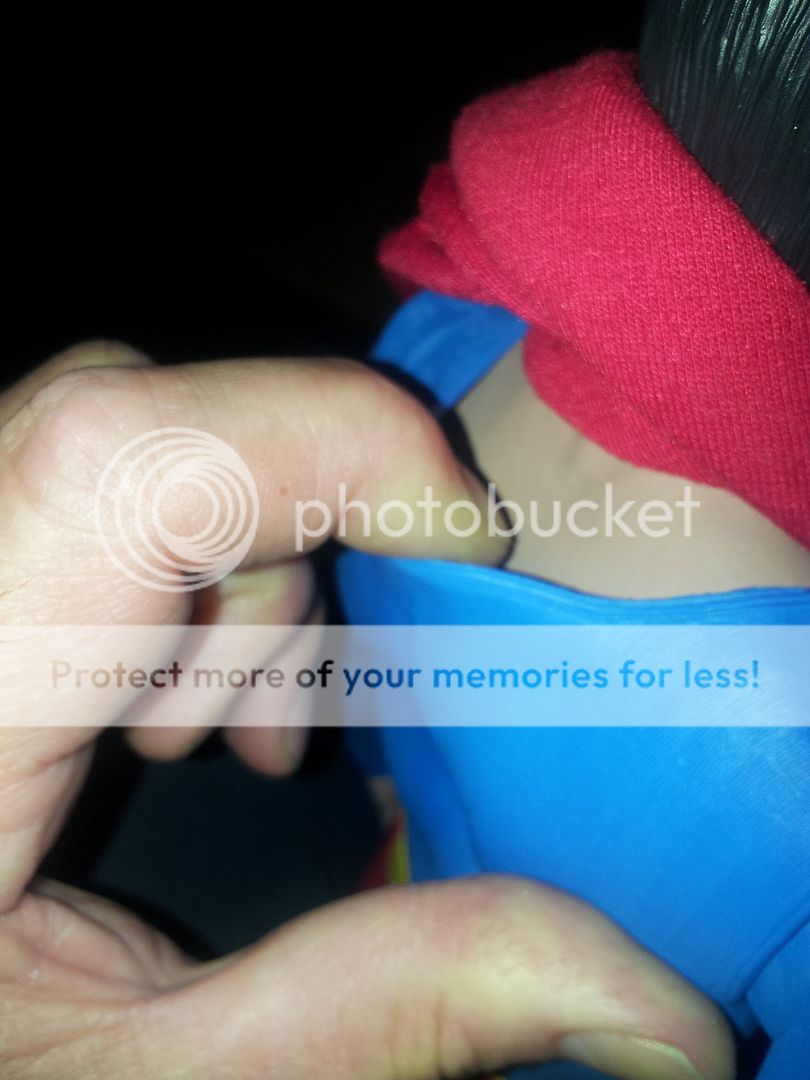
the chest and back are made of, if not rubber its has rubber like properties and wont harden like plastic when reshaped ,it looks quite natural on mine and most of the pictures ive seen ,im wondering if yours could be warped or defective in some way ,any pictures
the only way i can think to remedy this would be to pad the chest and back cavity with that cotton wool like stuff they stuff cushions with ,ive not opened him up ,but feeling around i think if you opened the trunks at the seem between his legs you could push the stuffing in from there ,a bit like stuffing a turkey lol ,this should help to hold the back and chest cavity to fill out the parts that you refer to ,again i hope this helps good luck mate and let us know how it works out for you ,
 
tom k
just had a closer look at my supes and if you decided to pad the back section to fill it out ,you can just fill it from the neck of the shirt ,hope this helps
20150724_204147_zpsk8soezmn.jpg
 
Who even looks at the back?
Non issue in my book
Next, we are going to be worrying about the soles of his feet
 
Did you guys have the paint on the nose rub off on the plastic window of the box? I think when they stacked them it ended up being to heavy and the plastic window pushed against the nose. :(

I hope calendars.com can offer me a replacement or refund....(did not open fig)
 
Hello, im spanish, and i recived my Superman Reeve, i love it !
In person is diferent, i belive if for the flash in pictures, i take some withut flash and the result is good, what do you mean ?

IMG_2601.jpg
IMG_2602.jpg
IMG_2605.jpg
IMG_2609.jpg
 
Back
Top