El-Vi-Riachi
Super Freak
**New Update**
**Shield repaint guide**
Since I have been asked to repaint shields, which I am very uncomfortable doing, I will instead offer a guide so you can go at your own shields. Now I did not take pictures every step of the way so I will attempt to describe the best I can.
So.....
Step 1.
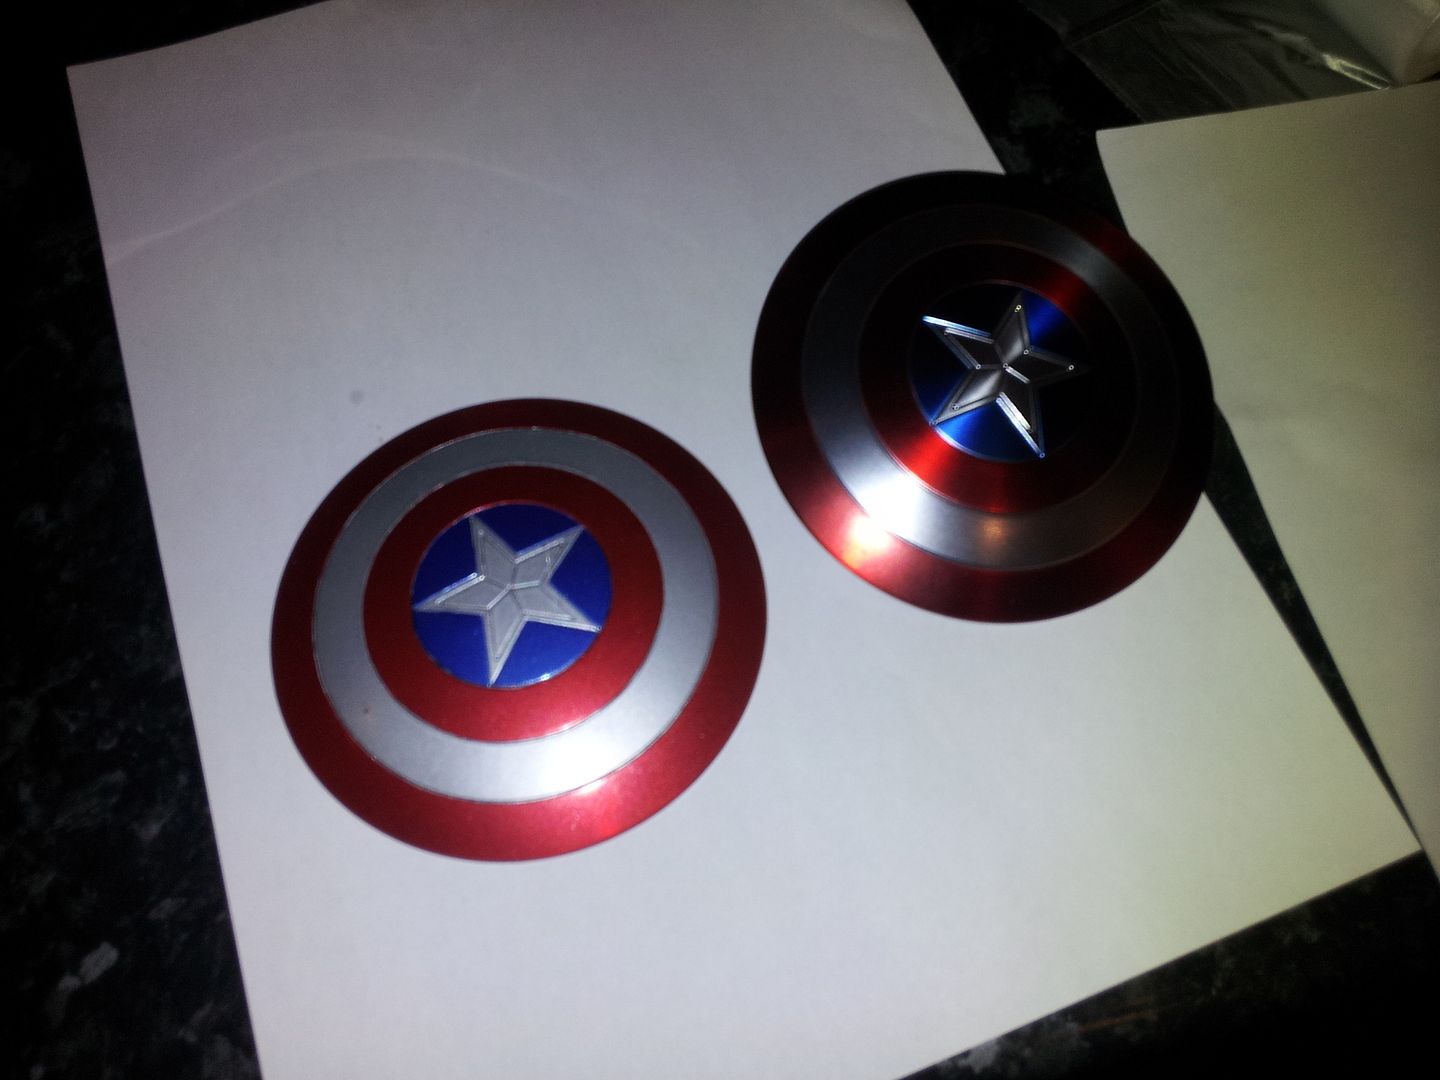
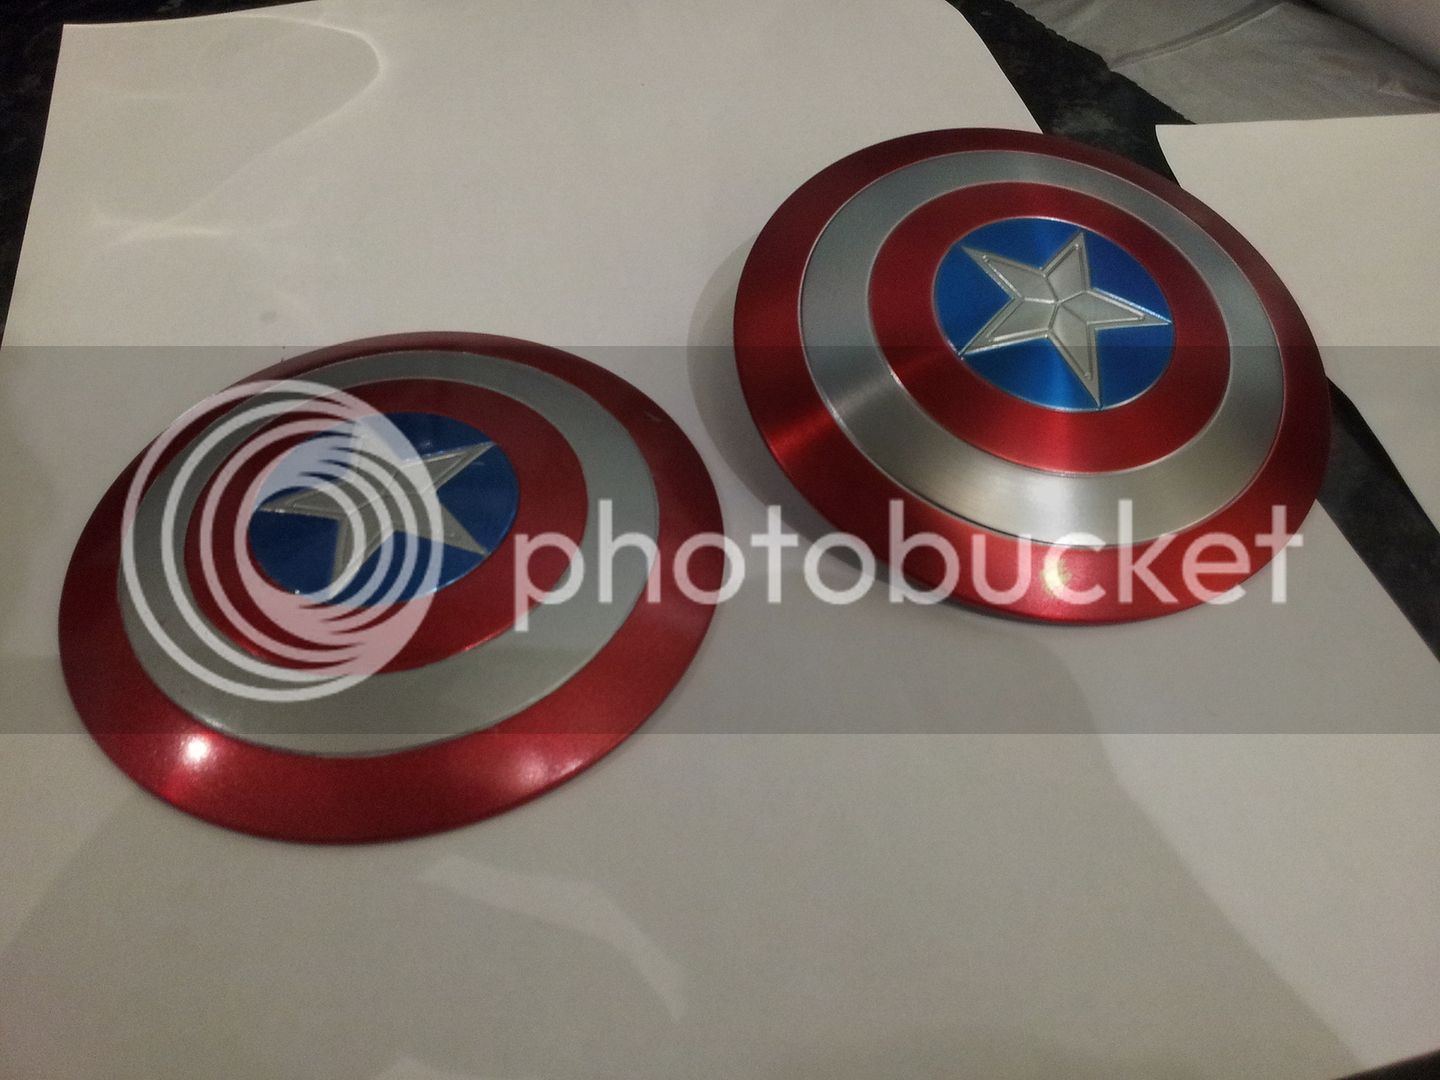
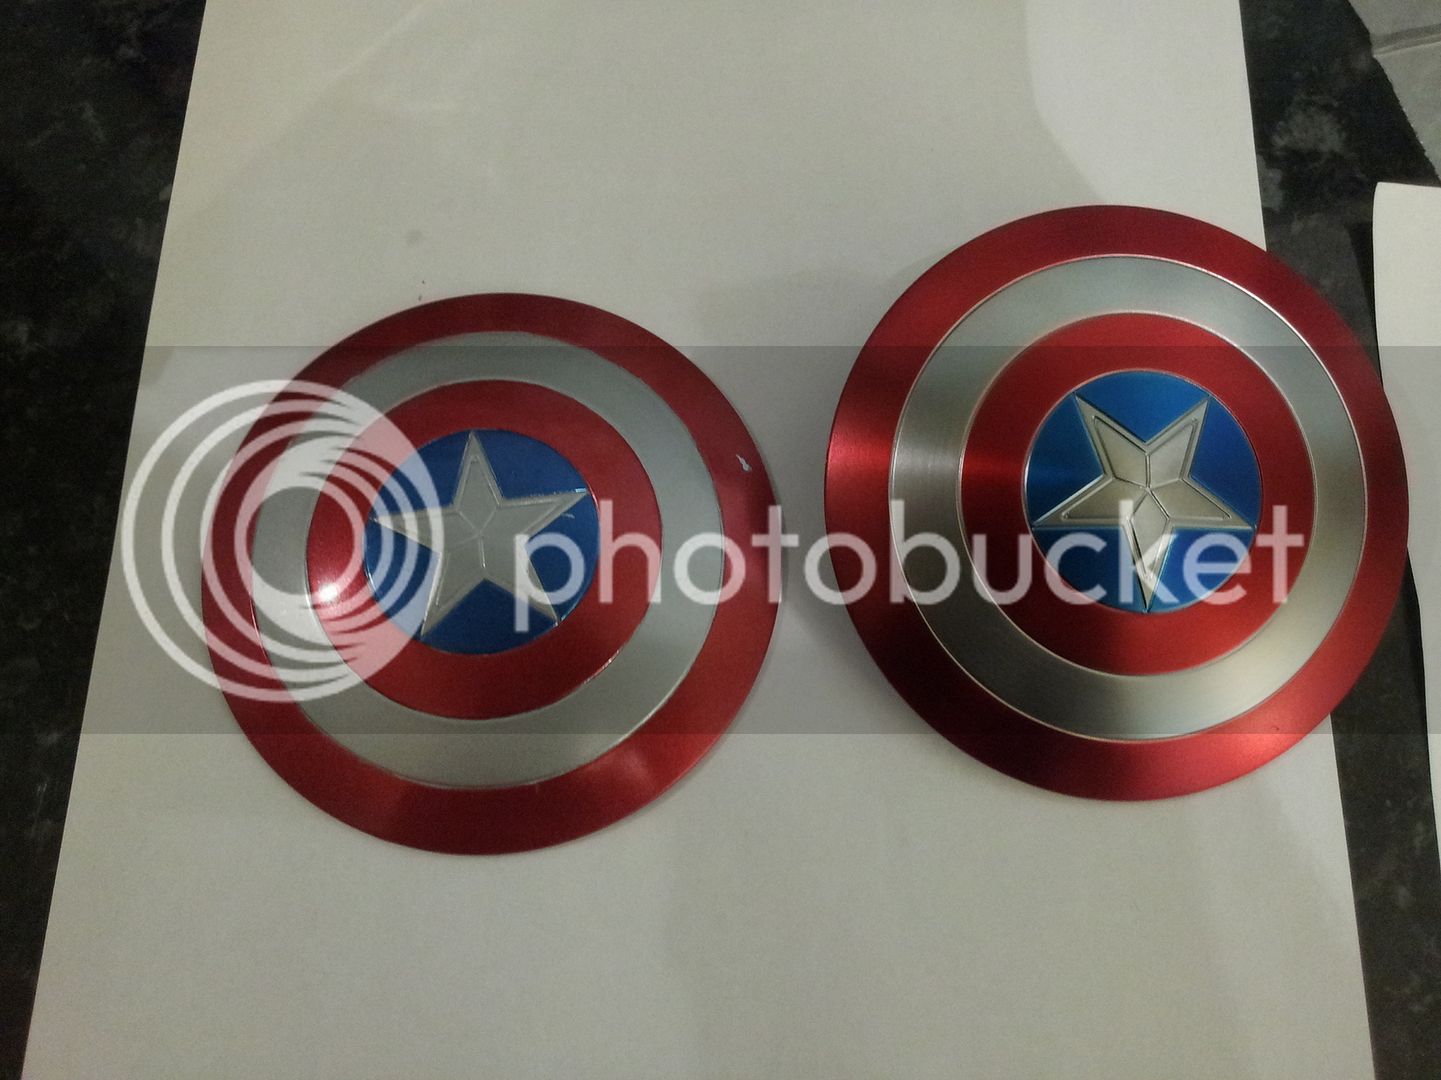
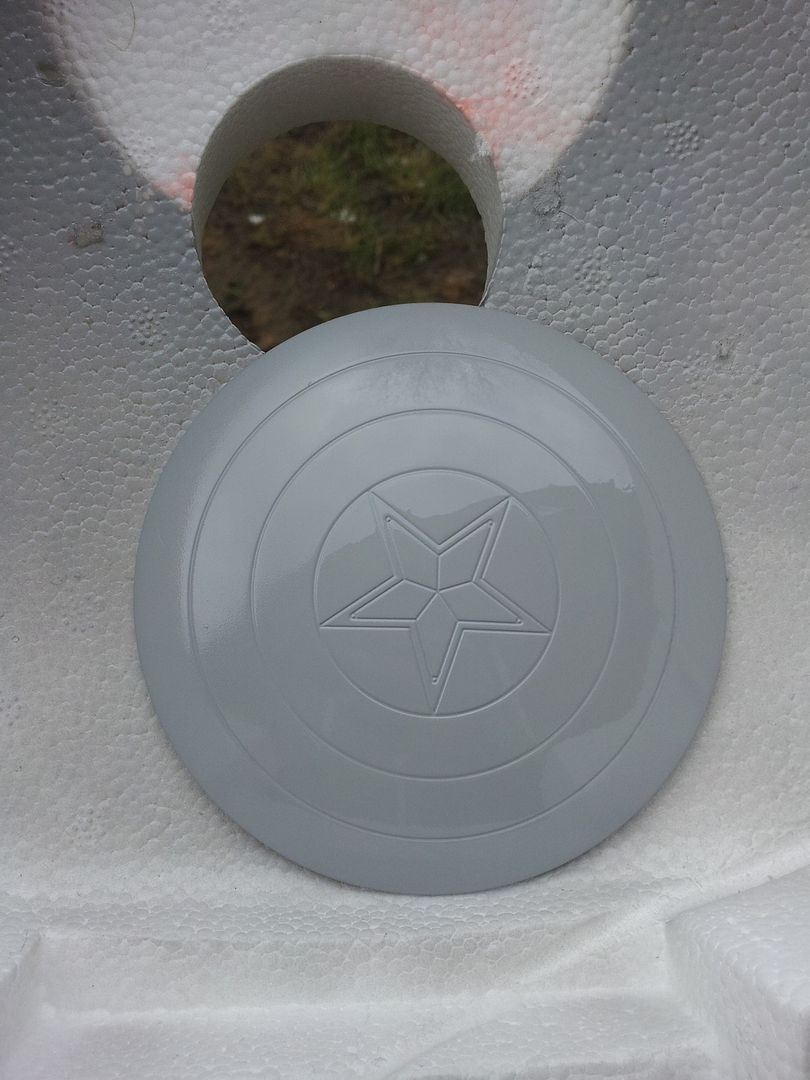
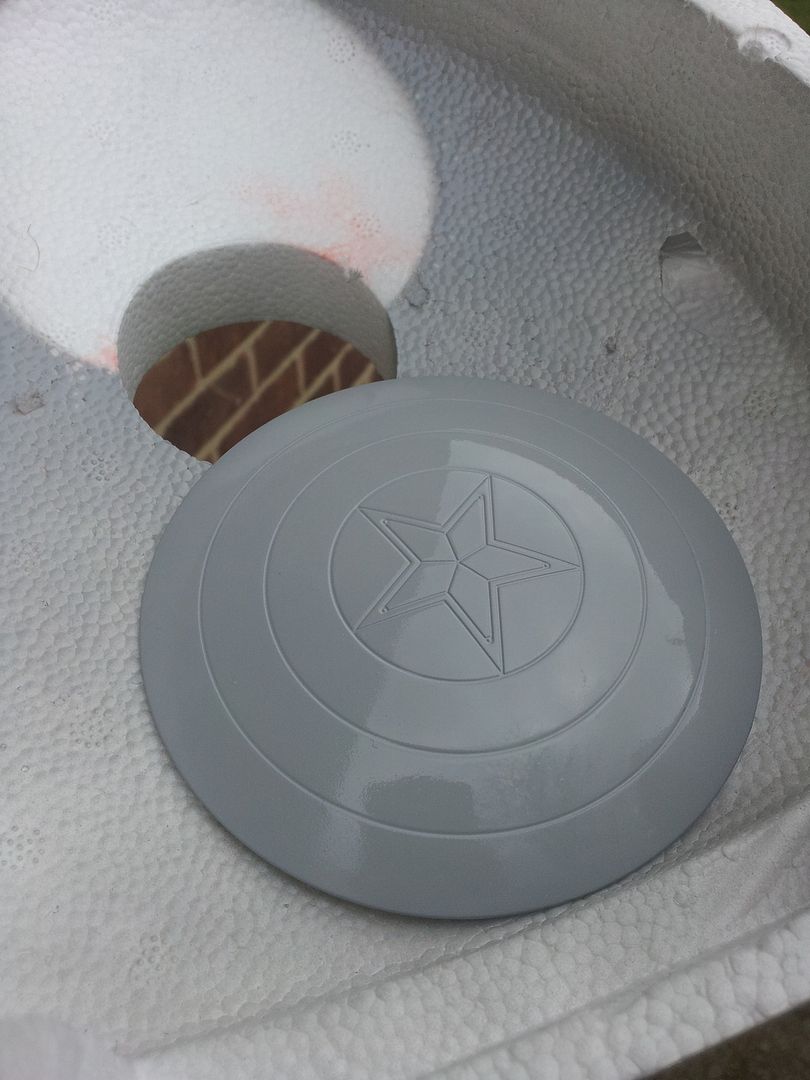
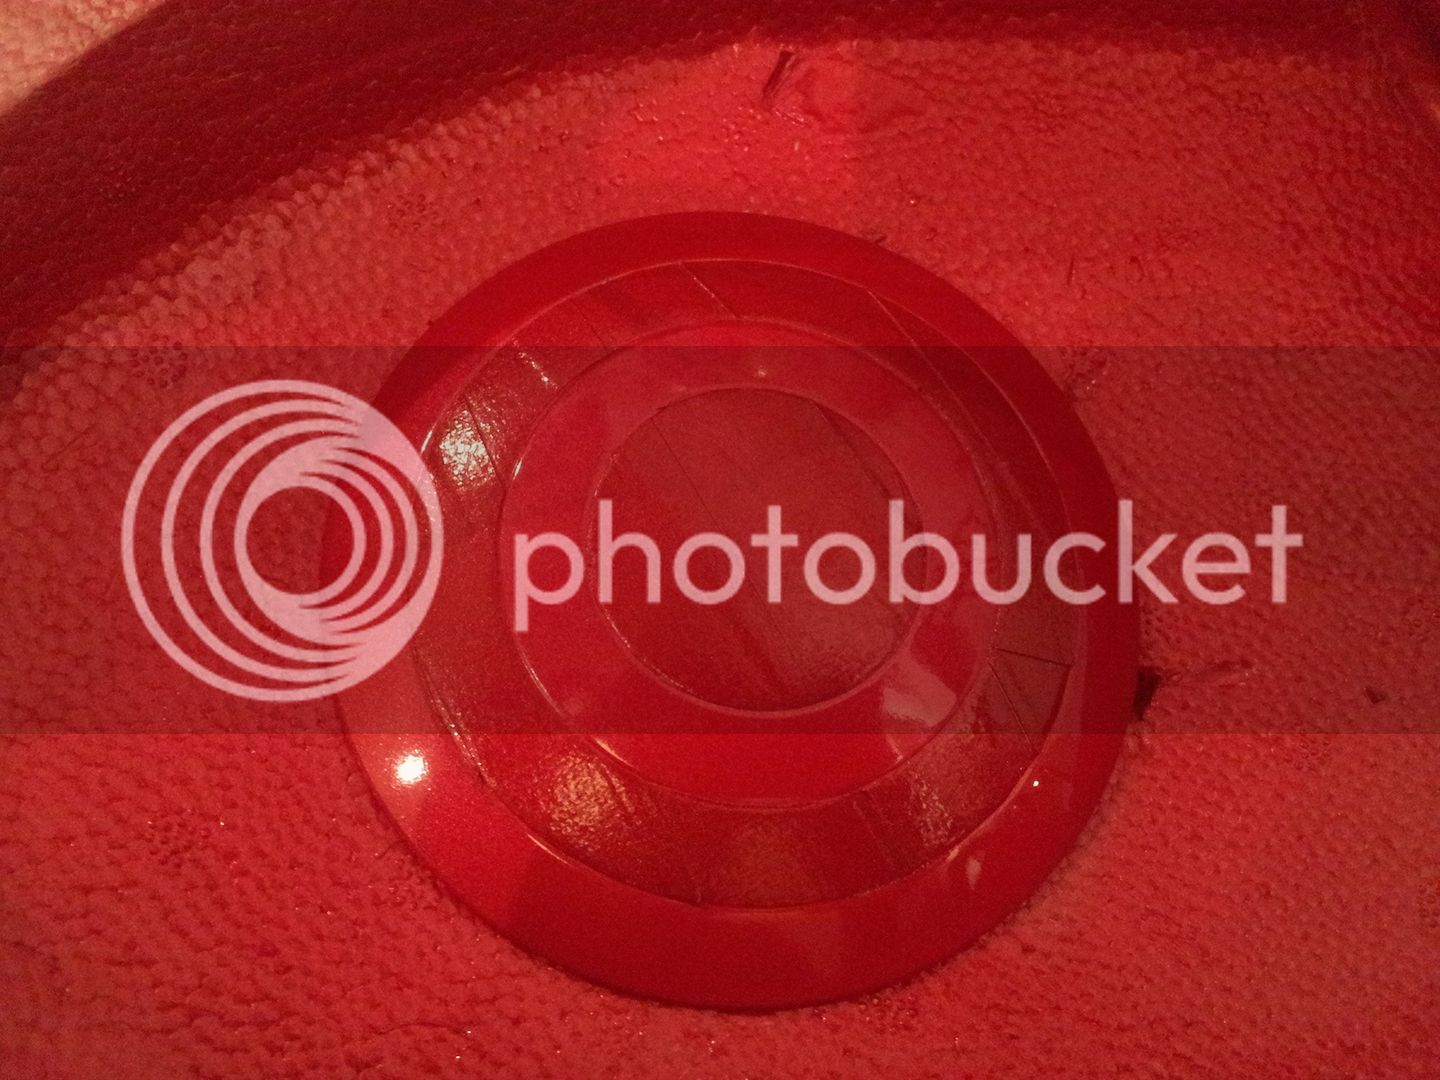
Shield is flaky, looks **** you want something like this (Well the one at the left anyway, the right was my first attempt)
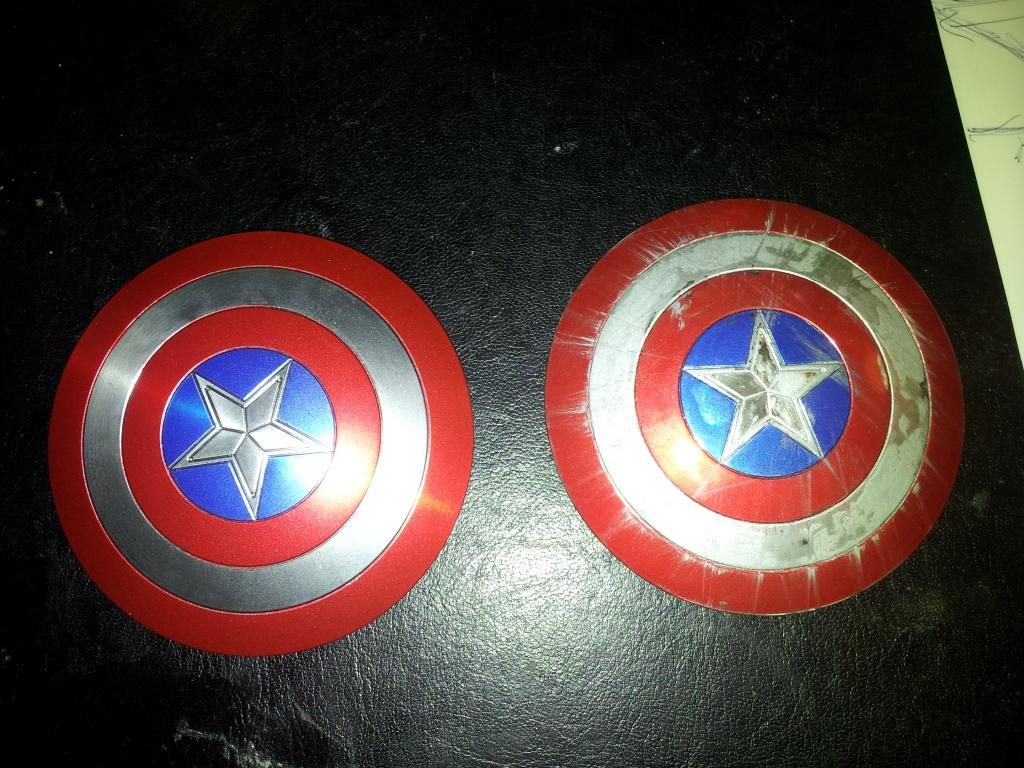
and have the shield to its former glory and less shiny? If you say yes to all of these then you need a repaint.
So now my corny opening is out of the way lets get to it. If your going for a full repaint this is what you need.
1. Frogtape I used multi surface (green tub) this might vary around the world, I live in UK. You can get this from B&Q in UK
2. Tamiya Spray cans. You don't have to use these but this is what I used, I can not guarantee the quality if you use other sprays
TS-18 Metallic red
TS-19 Metallic Blue
TS-79 Semi Gloss Clear
3. Craft knife (something like this https://www.powertoolsdirect.com/me...x/c/xcelite-xn-100-light-duty-craft-knife.jpg)
4. Some cheap nail polish remover containing acetone and some cotton wool pads Don't get anything too harsh as you only need to strip the paint
Ok So if you have all these lets go.
Step 1
First things first, I would recommend getting your frog tape and covering the underside of your shield to protect it and the straps for the shield.
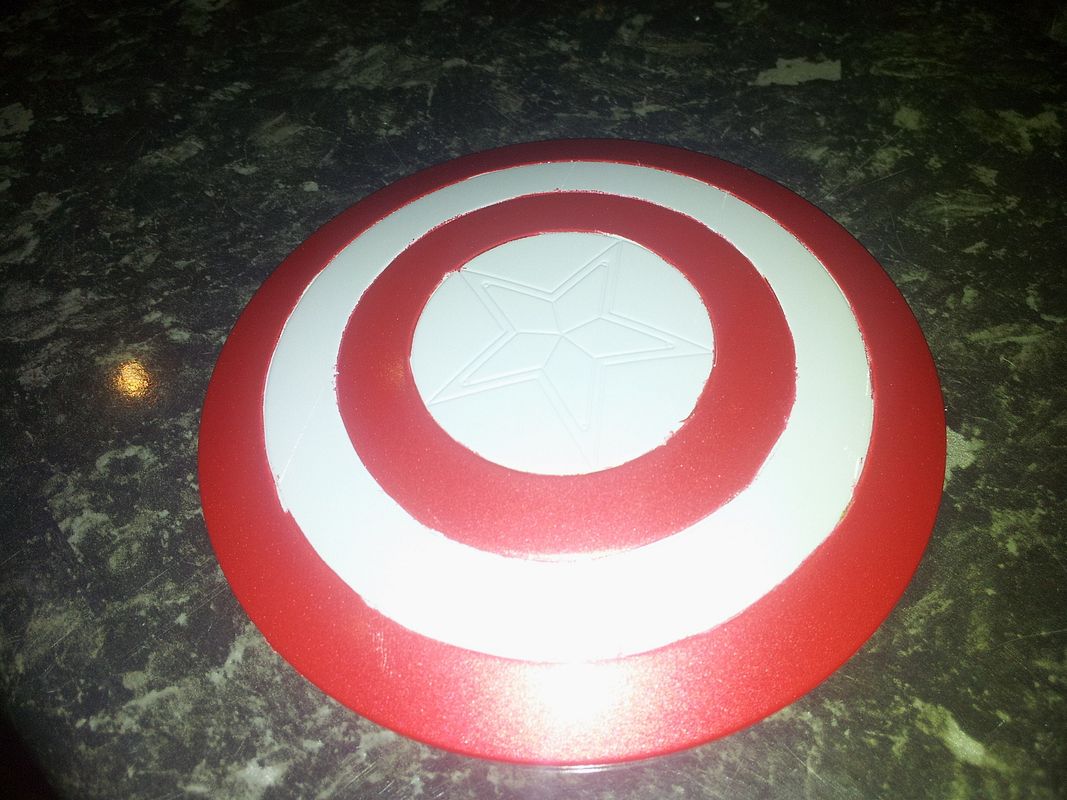
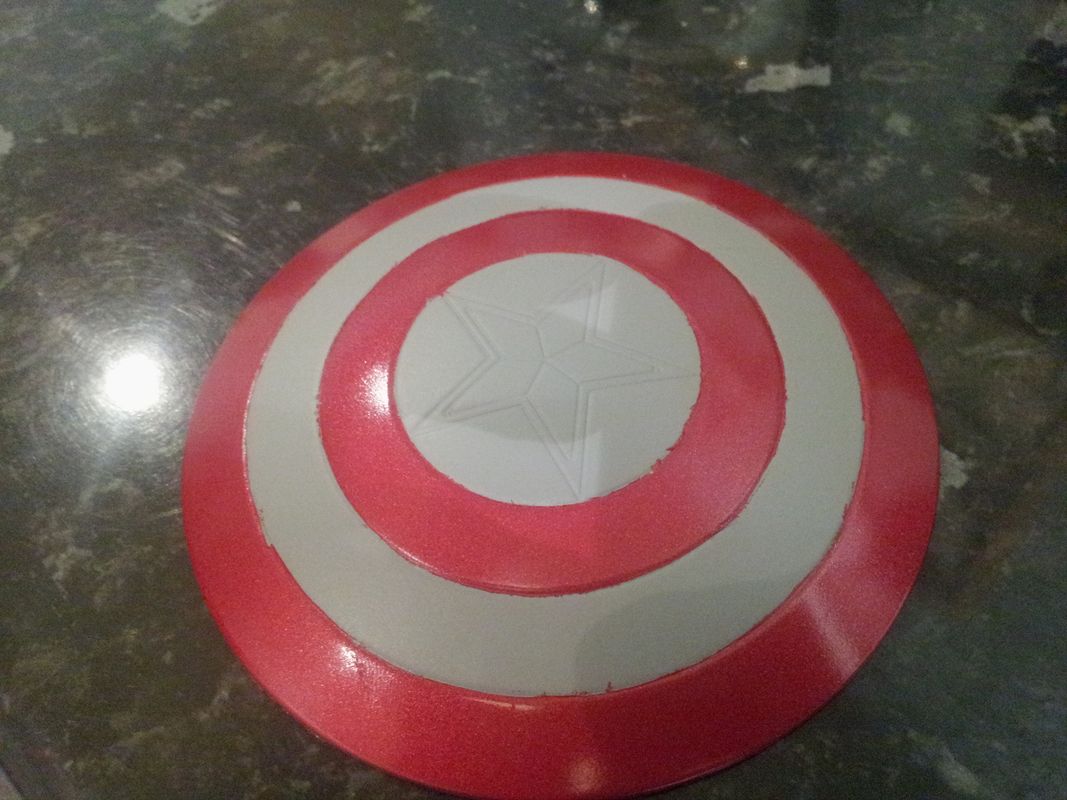
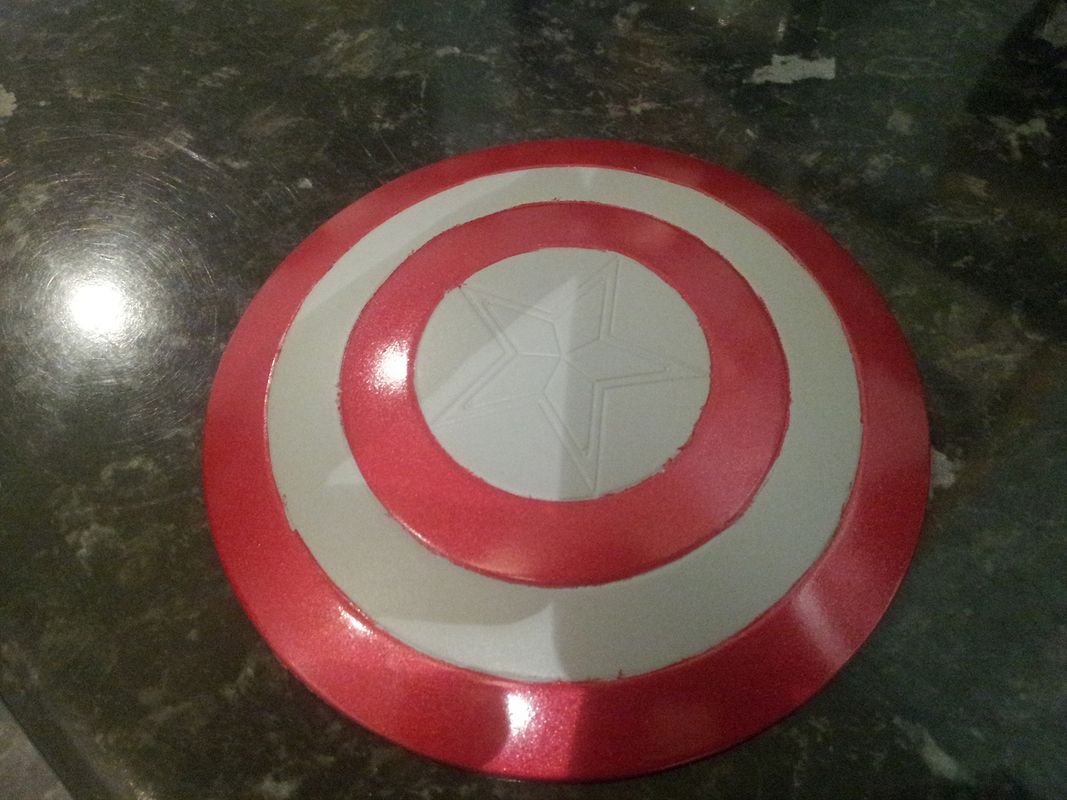
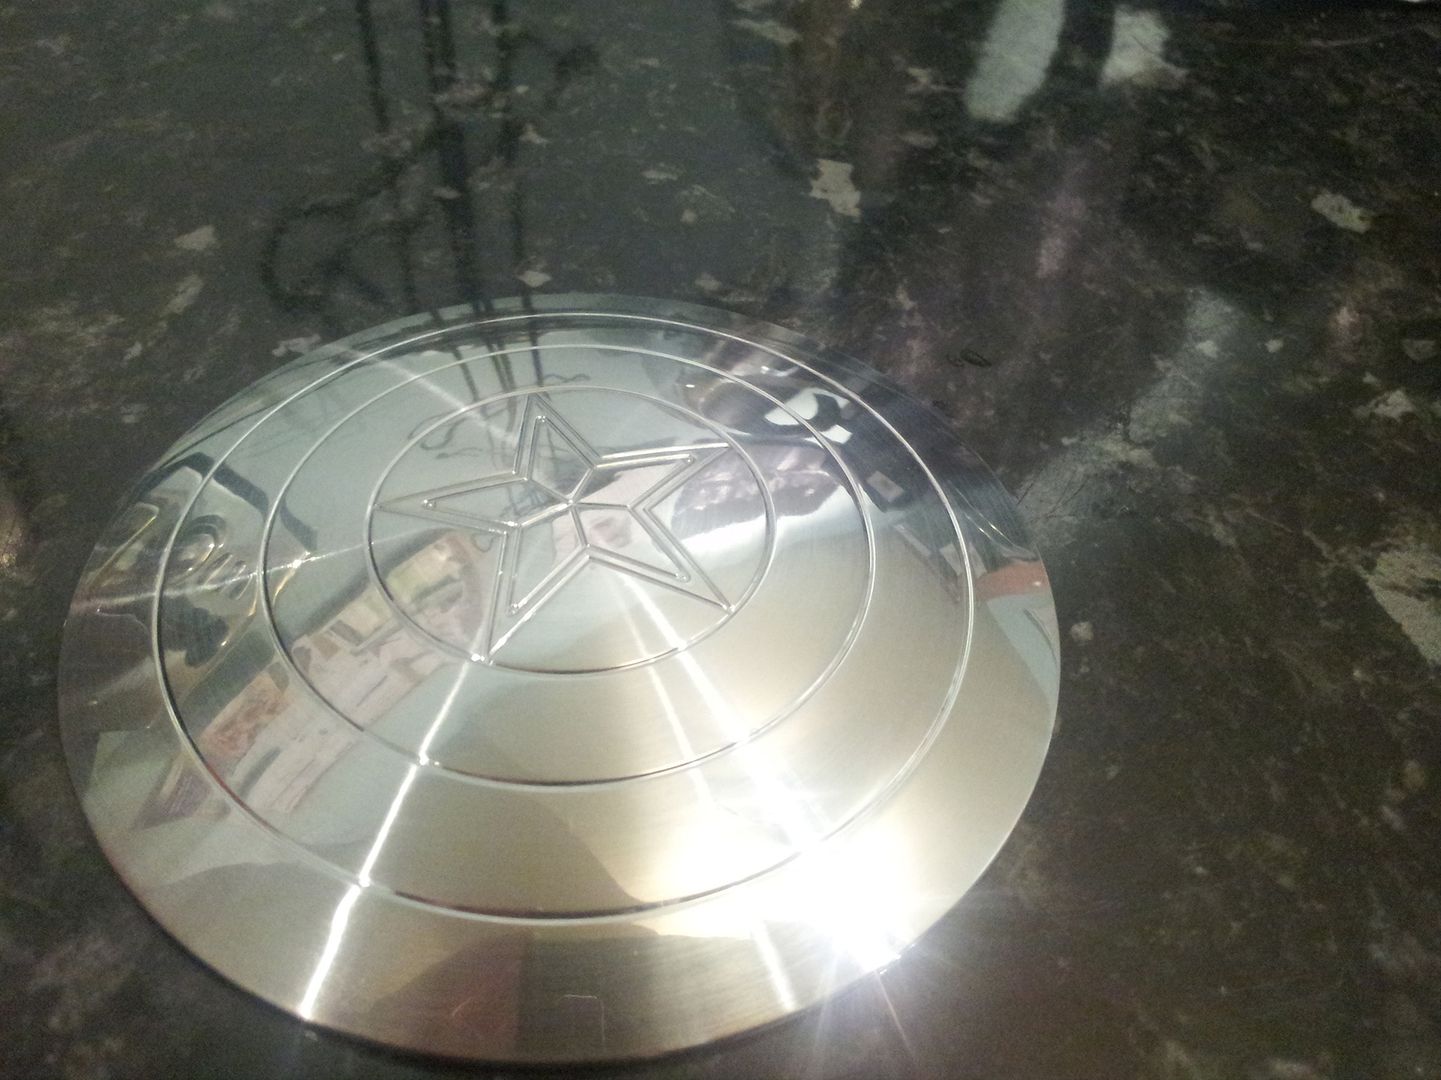
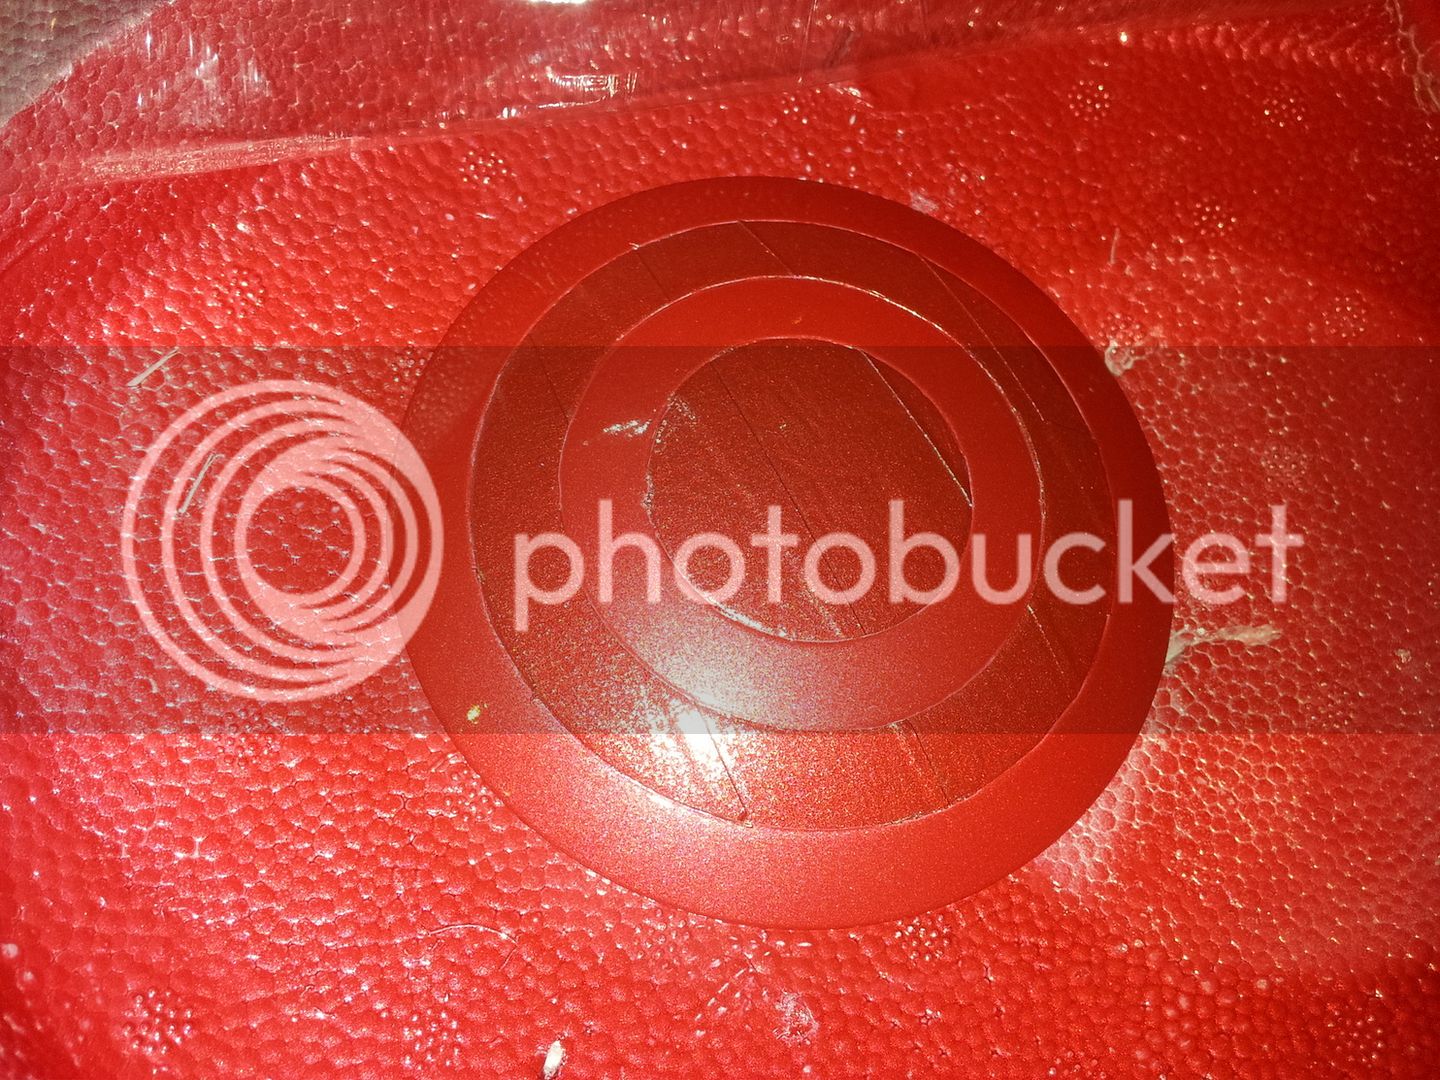
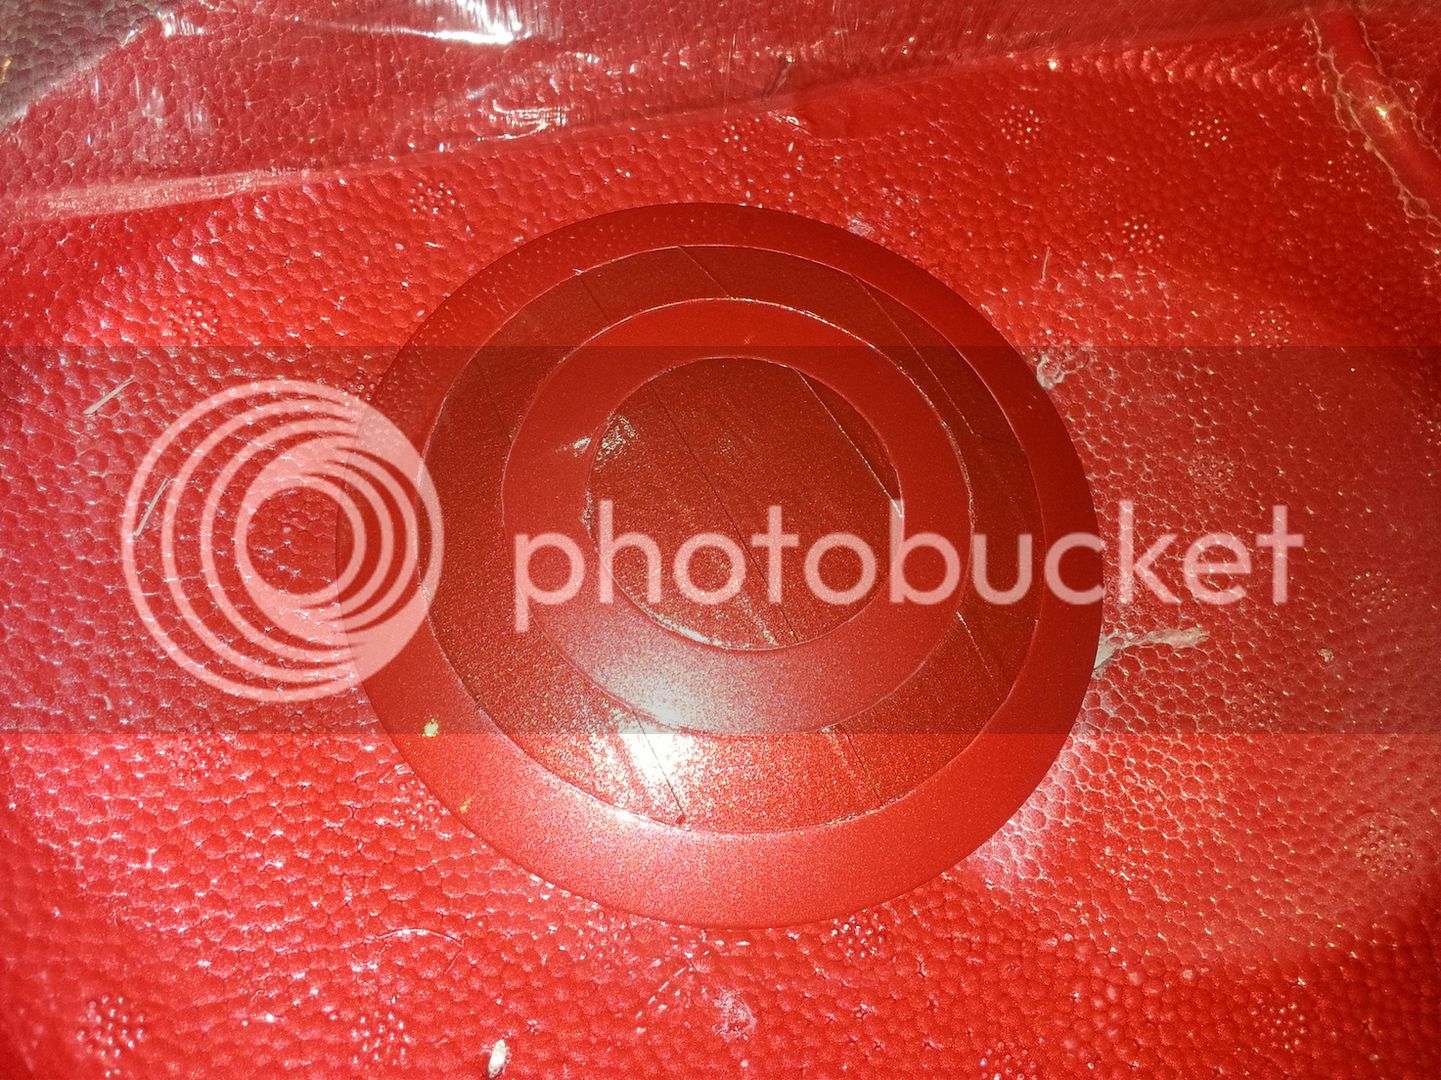
Now you want to strip all the paint off the shield, if it is flaking it won't matter losing whats left. So get your nail polish remover dab some onto your cotton wool pads and start scrubbing the front of that shield. Take your time there is no rush as rushing can lead to mistake which I had to learn the hard way. Try to get it all keep going until you are left with this.
Step 2
Now wash the shield with a cloth and some warm soapy water to clean any oil off the shield, try not to handle or touch the front of the shield after this, try some disposable plastic gloves or something.
Now get your frog tape and cover all the front of the shield and press it down. Try to lay the tape as evenly as possible but leave no gaps. using your nail map out the grooves in the shield so you can see the rings.
To start with we are only going to be spraying the outer ring and inner ring. The middle ring and inner circle will be done later.
Now that you have mapped out the rings and can see them through the tape take your craft knife and very carefully (and lightly as these are very sharp) run it along the first grove that make out the outer ring on the shield.
Be VERY careful not to cut yourself or the shield or the surface will be ruined, take your time with this as it is a delicate process.
Once this is done you can peel the tape from the outside so the outer ring is visible and ready for spraying. Now using the knife, guide it along the next groove then around the circle and then peel the tape away from the inner ring which will also be sprayed red.
What you should be left with is tape over the middle ring and the inner circle over the star.
Step 3
Now you will need a suitable surface the lay the shield down bearing in mind this will get spray paint on it so choose wisely.
I personally used old polystyrene packaging from an electrical appliance, it had a nice dip to it that the shield sat in nice. Use your own discretion for the surface.
Shake up your metallic red spray very well and spray at about 30cm spraying with stroke from left to right. Don't go over board with the spraying just build it up gradually. It should look even when your finished. I personally did one coat waited an hour then did a second light coat. I personally think one coat should be fine.
Now leave it for 24 hours preferably 48 hours to allow the paint to cure, try placing something over the top of the shield as a cover, a bit like a roof, don't cover it fully it will need to breath. I recommend this because it can be very easy to get dust particles on the wet paint and its a swine to get off.
Step 4
Now peel the tape off very carefully so you don't peel/chip the paint and it should look quite even.
Now the rest is easy, cover all the shield again and pay attention to press down the tape on the inner circle where the star is, don't worry too much about pressing the tape down too hard on the rest of the shield as you just need to cover it so the paint doesn't seep on to your lovely red paint job.
use your nail to map out the outer edges of the star and the groove for the circle.
Now again using the knife carefully, map out the circle and out edge of the star. Don't mistake the outer edge for the inner grove on the star. Once the tape is cut, peel it away. What you should be left with is tape covering the star with the gaps outside the star (where the blue will go) should be clear.
Now again following my above instructions paint it metallic blue. Leave for 24-48 hours.
Step 5
Now peel the tape and it should look very quite good depending on skill and if you taped it right.
Get your semi clear coat, shake well and spray lightly from left to right at about 30 cm. Do a light coat or two, it helps to protect your paint job.
Again leave it for a day or two and your done.
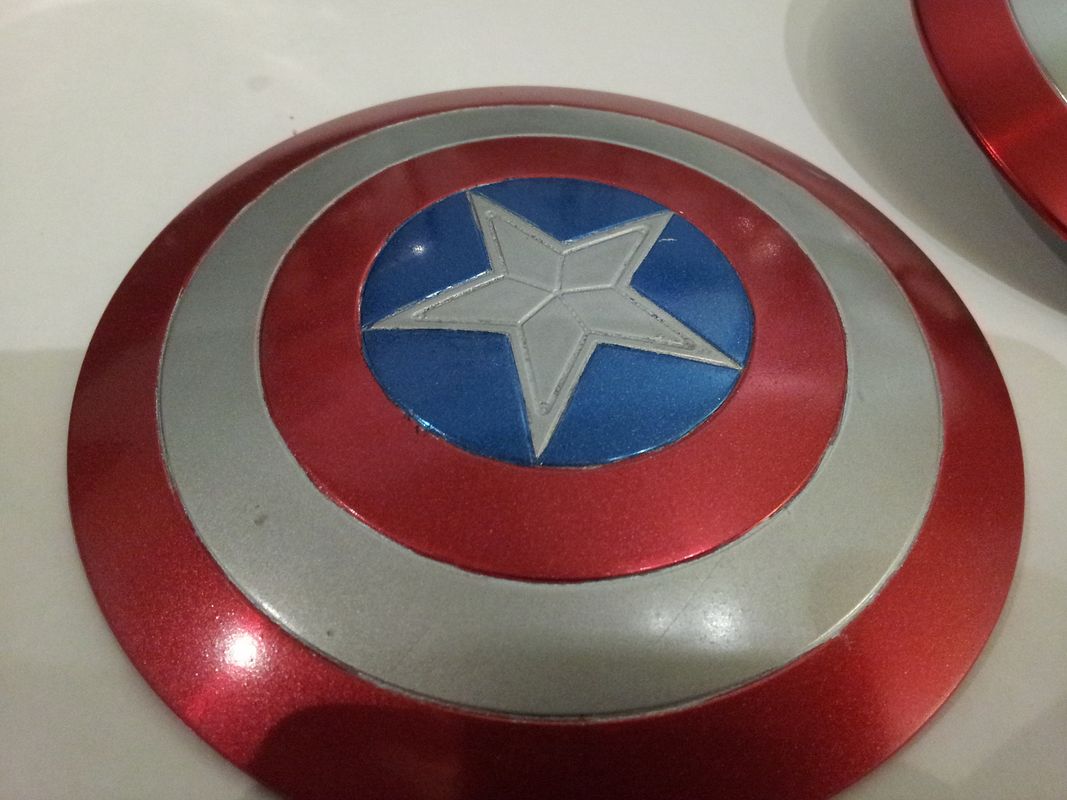
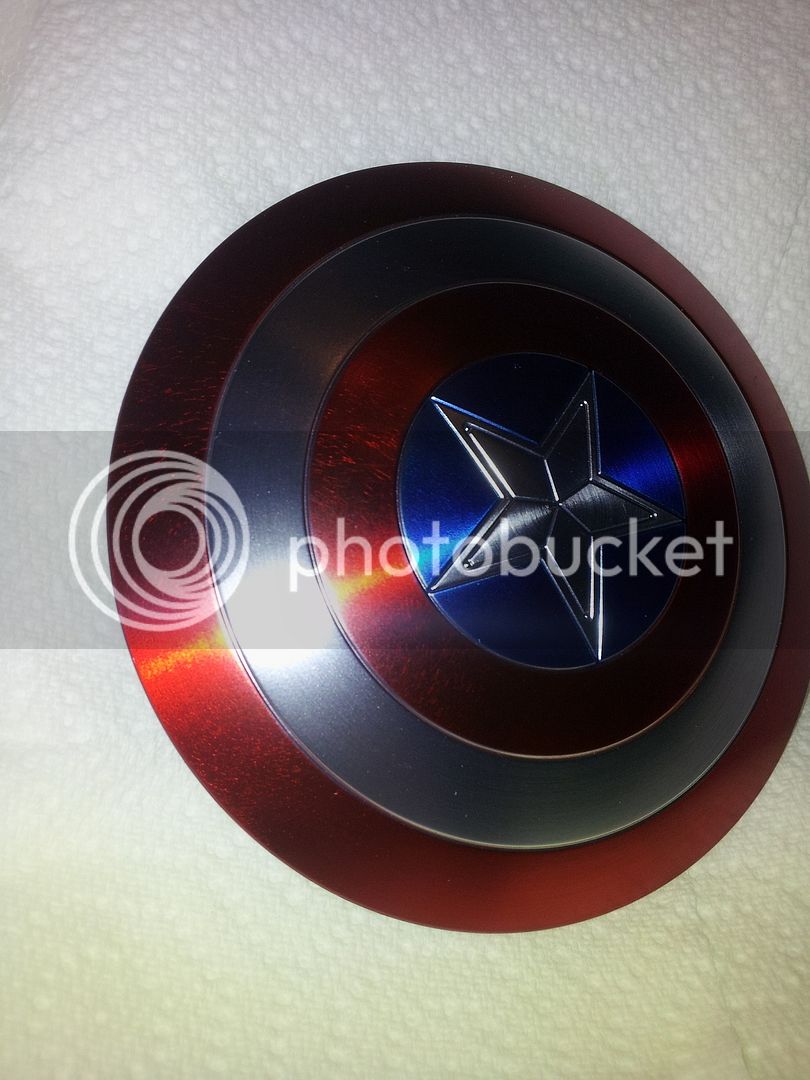
If you don't want to use semi gloss, go for a full clear gloss, if you want it very shiny. In all my picture of the finished shield it is with a semi gloss. Be wary of full clear gloss, too heavy a coat can ruin paint jobs, light coats remember!
Please share your results on this thread I would be interested in seeing your work. Any questions please do not hesitate to ask. Might be best to PM tho, I don't always visit this thread.
**original post**
Shared a few pictures in the release thread for Avengers Captain America so thought I would start a thread to show my progress as some peeps asked to keep updating.
So I bought a spare shield to try a clear coat and things did not work so well, it bled the paint work, so out came the nail varnish and I stripped the paint fully, thus my decision to attempt to repaint the whole shield after hearing so many horror stories about flaky shields.
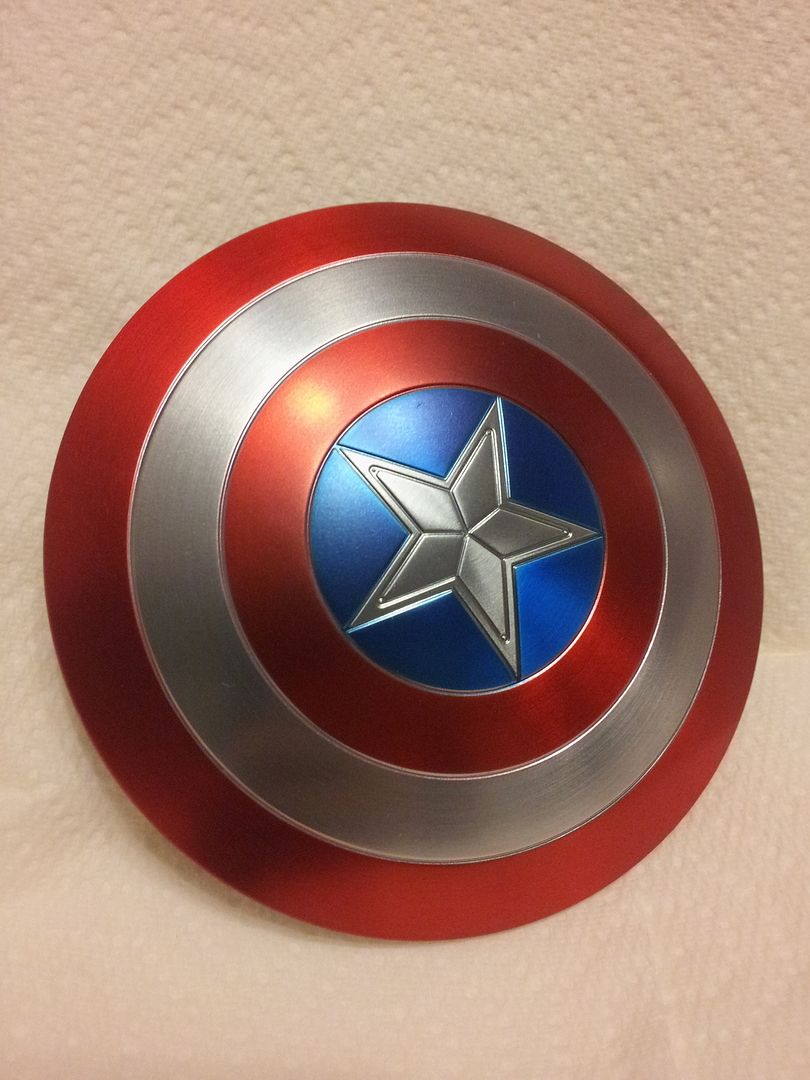
I did a semi gloss coat for my first shield and it worked out quite well, a nice well... semi gloss effect.
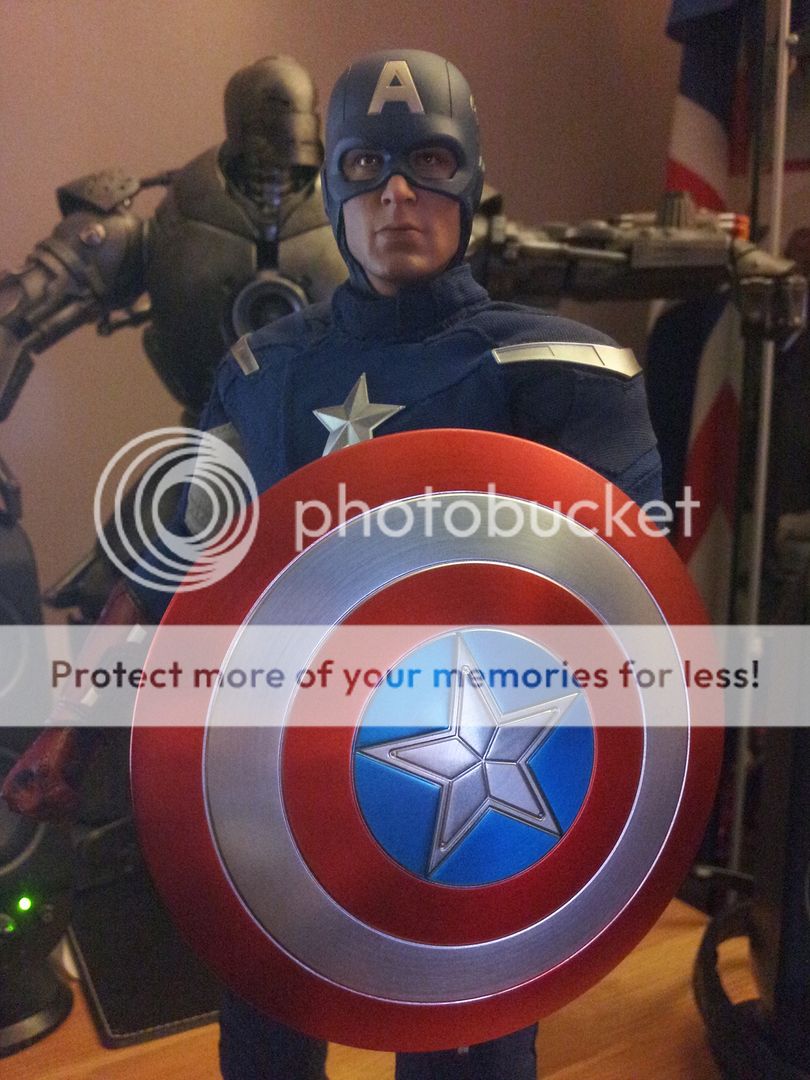
It worked quite well so I wanted to then try a full gloss clear coat and well, you know the rest.
So I stripped the paint on the second until I got a nice shiny metal shield
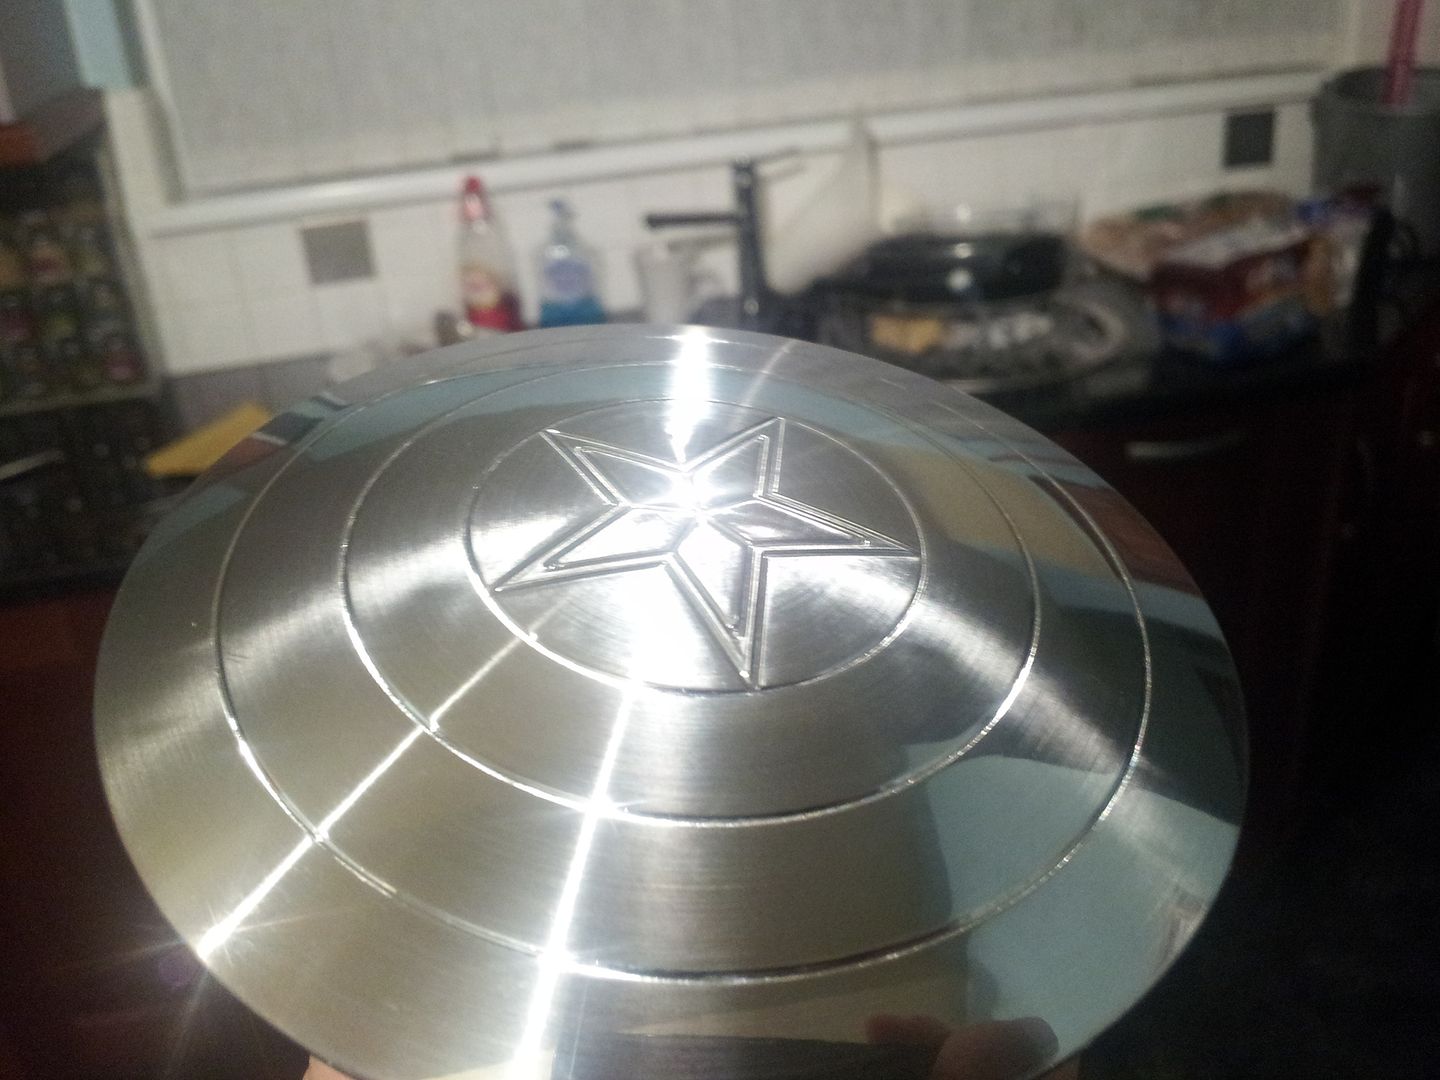
And that was stage one of operation repaint.
**Shield repaint guide**
Since I have been asked to repaint shields, which I am very uncomfortable doing, I will instead offer a guide so you can go at your own shields. Now I did not take pictures every step of the way so I will attempt to describe the best I can.
So.....
Step 1.
Shield is flaky, looks **** you want something like this (Well the one at the left anyway, the right was my first attempt)
and have the shield to its former glory and less shiny? If you say yes to all of these then you need a repaint.
So now my corny opening is out of the way lets get to it. If your going for a full repaint this is what you need.
1. Frogtape I used multi surface (green tub) this might vary around the world, I live in UK. You can get this from B&Q in UK
2. Tamiya Spray cans. You don't have to use these but this is what I used, I can not guarantee the quality if you use other sprays
TS-18 Metallic red
TS-19 Metallic Blue
TS-79 Semi Gloss Clear
3. Craft knife (something like this https://www.powertoolsdirect.com/me...x/c/xcelite-xn-100-light-duty-craft-knife.jpg)
4. Some cheap nail polish remover containing acetone and some cotton wool pads Don't get anything too harsh as you only need to strip the paint
Ok So if you have all these lets go.
Step 1
First things first, I would recommend getting your frog tape and covering the underside of your shield to protect it and the straps for the shield.
Now you want to strip all the paint off the shield, if it is flaking it won't matter losing whats left. So get your nail polish remover dab some onto your cotton wool pads and start scrubbing the front of that shield. Take your time there is no rush as rushing can lead to mistake which I had to learn the hard way. Try to get it all keep going until you are left with this.
Step 2
Now wash the shield with a cloth and some warm soapy water to clean any oil off the shield, try not to handle or touch the front of the shield after this, try some disposable plastic gloves or something.
Now get your frog tape and cover all the front of the shield and press it down. Try to lay the tape as evenly as possible but leave no gaps. using your nail map out the grooves in the shield so you can see the rings.
To start with we are only going to be spraying the outer ring and inner ring. The middle ring and inner circle will be done later.
Now that you have mapped out the rings and can see them through the tape take your craft knife and very carefully (and lightly as these are very sharp) run it along the first grove that make out the outer ring on the shield.
Be VERY careful not to cut yourself or the shield or the surface will be ruined, take your time with this as it is a delicate process.
Once this is done you can peel the tape from the outside so the outer ring is visible and ready for spraying. Now using the knife, guide it along the next groove then around the circle and then peel the tape away from the inner ring which will also be sprayed red.
What you should be left with is tape over the middle ring and the inner circle over the star.
Step 3
Now you will need a suitable surface the lay the shield down bearing in mind this will get spray paint on it so choose wisely.
I personally used old polystyrene packaging from an electrical appliance, it had a nice dip to it that the shield sat in nice. Use your own discretion for the surface.
Shake up your metallic red spray very well and spray at about 30cm spraying with stroke from left to right. Don't go over board with the spraying just build it up gradually. It should look even when your finished. I personally did one coat waited an hour then did a second light coat. I personally think one coat should be fine.
Now leave it for 24 hours preferably 48 hours to allow the paint to cure, try placing something over the top of the shield as a cover, a bit like a roof, don't cover it fully it will need to breath. I recommend this because it can be very easy to get dust particles on the wet paint and its a swine to get off.
Step 4
Now peel the tape off very carefully so you don't peel/chip the paint and it should look quite even.
Now the rest is easy, cover all the shield again and pay attention to press down the tape on the inner circle where the star is, don't worry too much about pressing the tape down too hard on the rest of the shield as you just need to cover it so the paint doesn't seep on to your lovely red paint job.
use your nail to map out the outer edges of the star and the groove for the circle.
Now again using the knife carefully, map out the circle and out edge of the star. Don't mistake the outer edge for the inner grove on the star. Once the tape is cut, peel it away. What you should be left with is tape covering the star with the gaps outside the star (where the blue will go) should be clear.
Now again following my above instructions paint it metallic blue. Leave for 24-48 hours.
Step 5
Now peel the tape and it should look very quite good depending on skill and if you taped it right.
Get your semi clear coat, shake well and spray lightly from left to right at about 30 cm. Do a light coat or two, it helps to protect your paint job.
Again leave it for a day or two and your done.
If you don't want to use semi gloss, go for a full clear gloss, if you want it very shiny. In all my picture of the finished shield it is with a semi gloss. Be wary of full clear gloss, too heavy a coat can ruin paint jobs, light coats remember!
Please share your results on this thread I would be interested in seeing your work. Any questions please do not hesitate to ask. Might be best to PM tho, I don't always visit this thread.
**original post**
Shared a few pictures in the release thread for Avengers Captain America so thought I would start a thread to show my progress as some peeps asked to keep updating.
So I bought a spare shield to try a clear coat and things did not work so well, it bled the paint work, so out came the nail varnish and I stripped the paint fully, thus my decision to attempt to repaint the whole shield after hearing so many horror stories about flaky shields.
I did a semi gloss coat for my first shield and it worked out quite well, a nice well... semi gloss effect.
It worked quite well so I wanted to then try a full gloss clear coat and well, you know the rest.
So I stripped the paint on the second until I got a nice shiny metal shield
And that was stage one of operation repaint.
Last edited:
")