1/6 VTS TOYS - Wasteland Ranger: The Road to Hell

Collector Freaks Forum

Help Support Collector Freaks Forum:

This site may earn a commission from merchant affiliate links, including eBay, Amazon, and others.
Status
Not open for further replies.
I'm actually going to use Jake's Modded head.
FR%20MAX_zpsqx0ms3km.jpg

mmfr%20head%201_zpsl3tksvif.jpg

I think the likeness is really good. Just waiting for it to come back from the painters.
 
Last edited:
Super new to the hobbie and to freaks, so excuse the lack of quality in the pics...
Just got this guy a couple days ago:
 

Attachments

  • image.jpg
    image.jpg
    39.2 KB · Views: 267
  • image.jpg
    image.jpg
    35.8 KB · Views: 264
how in the world does this shoulder pad work? can't seem to figure out how it's supposed to attach.
 
how in the world does this shoulder pad work? can't seem to figure out how it's supposed to attach.

The little strap part ties together under his arm pit; along with the little Velcro pad holding it it place (assuming you have the ammo vest on).

I struggled with it at first NGL. :lol
 
Yeah figured it out... not very intuitive...

The velcro doesn't even really work that well.
 
Can someone walk me thru on how to attach the hand gun holster to his thigh? I didn't get any instructions in my box......:gah:
Holster to the MOLLE drop holster rig or MOLLE rig to the leg? The former is a weave process - there's two straps on the holster, pick two parallel channels on the MOLLE rig and use tweezers to send the straps on the back of the holster under one horizontal loop of the leg rig, and one under the horizontal loop of the holster. You'll go back and forth until done. Look up some real MOLLE instillation videos on YouTube to have a better idea of what I'm describing.

The latter is just looped over the belt (or rather belt through the loop) with the top loop (buckle connection), and then the two straps go around the thigh.

Thanks bud, ill try that real quick.............:hi5:
 
I found some random video on YouTube reviewing/unboxing/preparing this figure.

Yeah that holster was tricky and I was lost before the video. Good luck!
 
I find all the hand wringing about the holster amusing. I'm not trying to disparage anyone, because I know not everybody knows about MOLLE gear. It's just that I started in this hobby collecting military figures almost 15 years ago and stuff like this is what we have had to deal with on a regular basis:

163432dt9dty7nmye7a8ey.jpg

You get used to it after a while. A good pair of tweezers are a must.
 
Maybe a bit late here, but here is a little tutorial I put together over at OSW a while back showing the technique I use for 1/6 MOLLE stuff:

We all know how frustrating it can be threading the MOLLE webbing on all those pouches for modern vests. Well, here is the method I use to make it a lot easier.

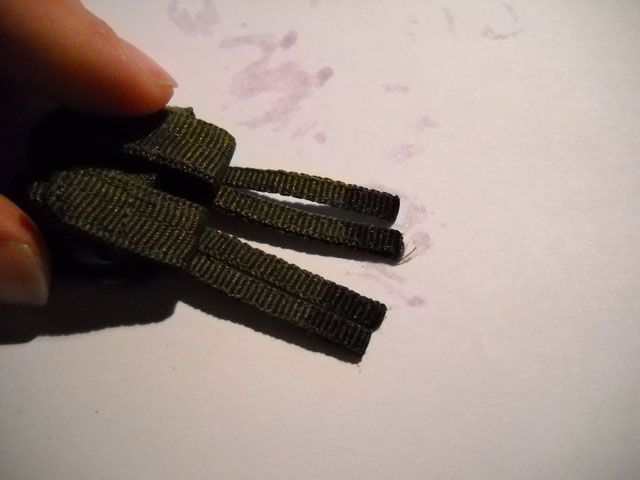
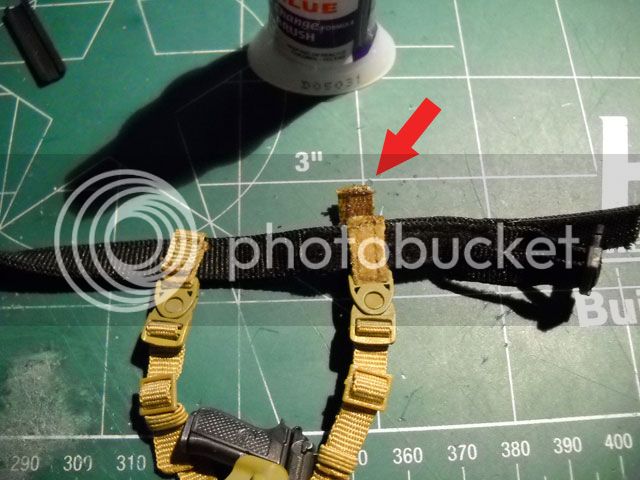
First, douse each end of the MOLLE strap on the pouch with superglue. I use the kind with a brush. Make sure it soaks through, then let the glue dry. What this does is make the ends of the strap stiff and easier to slide through the straps on the vest.

DSCN0444_zpsy01zi86h.jpg


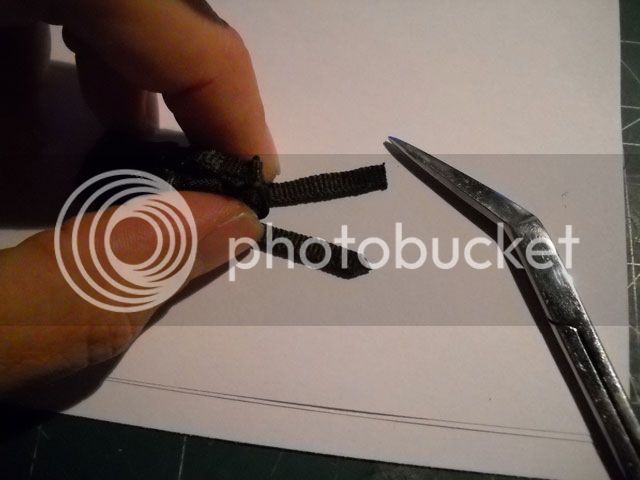
Once the glue has dried, snip the ends so they are kind of pointed. You don't want them to be too pointed, because if they are, they will jab through the cloth and catch on things. This makes it easier to get the strap into the narrow openings on the vest.

DSCN0449_zps7807vxqs.jpg


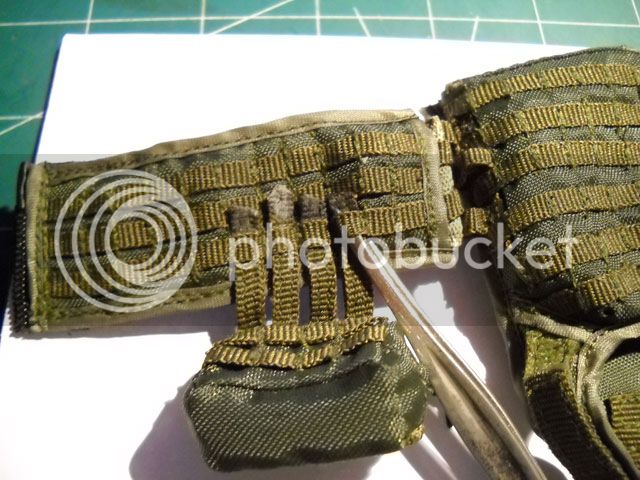
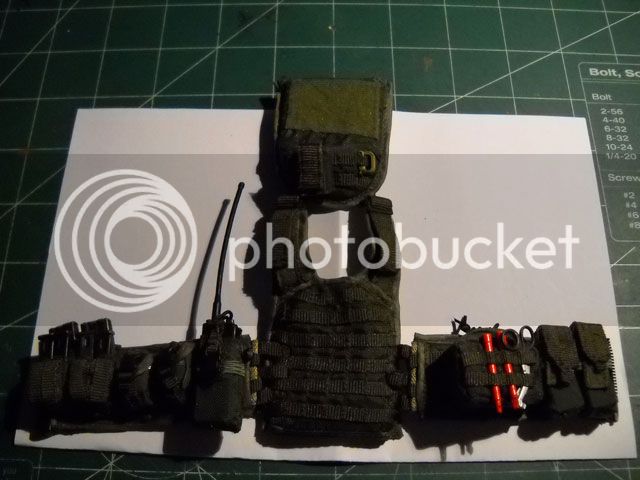
Now, thread all of the straps, alternating between the vest and the pouch. Tweezers are essential here.

DSCN0447_zps6bghv9fy.jpg


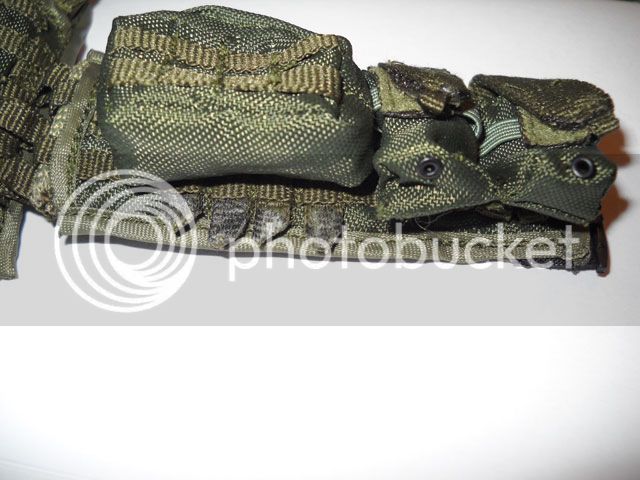
When you have all the straps weaved to the vest, sometimes the excess sticks out. What I like to do with the extra is fold it and stick it back through the strapping on the vest. This gives a nice clean look and also serves to lock the pouch in place even better. This is what I have done on the mag pouch in the picture. Sometimes there is not enough strap to do this and I just leave it, like the utility pouch in the picture.

DSCN0448_zpswz5ag4sw.jpg


And when you are done, you have nice clean looking vest.

DSCN0451_zpsmkn0ikpy.jpg


Another superglue trick is to put a dab on the hook side of those small velcro patches before pressing it to the loop side. This tames those tiny pieces of velcro that never seem to stay together and cause your figures to look like their gear is falling apart.

DSCN0442_zpslo0meifa.jpg


Well, I hope this is helpful to someone out there. I find it makes my figure builds go much smoother and the end result is a lot better.
 
Can you just use double sided tape? Haha. Seriously though got this guy in today and its not a good idea to unbox this figure with little sleep. Set him up halfway, but too frustrated for the fiddly stuff. I'll finish it up later.

Good looking figure though.
 
I find all the hand wringing about the holster amusing. I'm not trying to disparage anyone, because I know not everybody knows about MOLLE gear. It's just that I started in this hobby collecting military figures almost 15 years ago and stuff like this is what we have had to deal with on a regular basis:

View attachment 318619

You get used to it after a while. A good pair of tweezers are a must.

Also collected military figures for a long time before starting my HT collection. Funny to read all the comments on the molle webbing here. The one in your tutorial is even from back when the molle webbing was super thick on soldier story stuff. Made it even harder to weave it through than the stuff they use now. :slap
 
Status
Not open for further replies.
Back
Top