You are using an out of date browser. It may not display this or other websites correctly.
You should upgrade or use an alternative browser.
You should upgrade or use an alternative browser.
1/6 How it is made: DETOLF Death Star diorama
- Thread starter JazzInc
- Start date


Help Support Collector Freaks Forum:
This site may earn a commission from merchant affiliate
links, including eBay, Amazon, and others.
Success! Before I tried modding my Detolf, I thought I'd try the top lid from my second Detolf to see if that one has more room. Lo and behold, it fit without a problem. ") So I didn't have to mod anything, I just switched the two tops of my cabinets.
So I didn't have to mod anything, I just switched the two tops of my cabinets.
Took me the whole afternoon to rewire my Detolf, but I'm finally done. I added two vertical dioder strips (the first generation, less yellowish ones) for some more light.
Amazing work, Joost! I couldn't be happier with the setup, this is *exactly* what I wanted for my Vader, and you knocked it out of the park.
More pics later, but I couldn't wait to show the setup.

So I didn't have to mod anything, I just switched the two tops of my cabinets.Took me the whole afternoon to rewire my Detolf, but I'm finally done. I added two vertical dioder strips (the first generation, less yellowish ones) for some more light.
Amazing work, Joost! I couldn't be happier with the setup, this is *exactly* what I wanted for my Vader, and you knocked it out of the park.
More pics later, but I couldn't wait to show the setup.
JazzInc
Super Freak
- Joined
- Sep 1, 2013
- Messages
- 2,157
- Reaction score
- 654
Success! Before I tried modding my Detolf, I thought I'd try the top lid from my second Detolf to see if that one has more room. Lo and behold, it fit without a problem.
Took me the whole afternoon to rewire my Detolf, but I'm finally done. I added two vertical dioder strips (the first generation, less yellowish ones) for some more light.
Amazing work, Joost! I couldn't be happier with the setup, this is *exactly* what I wanted for my Vader, and you knocked it out of the park.
More pics later, but I couldn't wait to show the setup.
Well that looks epic! I love the pose on Vader!!!
Looks amazing Sulla9. Glad to hear you didnt have any problems
What did you mean by, you didnt have to use the side rails? You mean the metal profiles/brackets that holds everything together?
That is correct. The blast doors and wall are supporting the ceiling -- with no wiggle room whatsoever. I was going to set it up independently on a bookshelf, but I worried about it getting dusty.
Looks amazing, nice job. Did you also puti it at the very top?
Yes, LexLuthor! It is on the very top shelf of the detolf. I have the wires running through the top hole. It worked out well. Joost and his dad produced an AMAZING piece. Part of me wishes I got the big one he put out a while back as well as the budget version of this one.
Success! Before I tried modding my Detolf, I thought I'd try the top lid from my second Detolf to see if that one has more room. Lo and behold, it fit without a problem.
Took me the whole afternoon to rewire my Detolf, but I'm finally done. I added two vertical dioder strips (the first generation, less yellowish ones) for some more light.
Amazing work, Joost! I couldn't be happier with the setup, this is *exactly* what I wanted for my Vader, and you knocked it out of the park.
More pics later, but I couldn't wait to show the setup.
Great photo.............glad that removing the top of the detolf strategy worked for you. Cant wait to have mines set-up I dont have and 1/6 scale Storm Troopers so will most likely have Obi Wan and Vader displayed in mines
That looks fantastic. Definitely post some more.
JazzInc
Super Freak
- Joined
- Sep 1, 2013
- Messages
- 2,157
- Reaction score
- 654
Apparently there is quite a bit of difference in the measurements of the totals over the years, especially depending on how it's assembled which means that for some. I suggest emptying your DETOLF when you work on it so that if anything goes wrong, there's nothing in there to get hurt. One of my clients couldn't fit it on the top shelf of one of his DETOLFs but it fit perfectly on the top shelf of his other DETOLF. Very strange.
bbl
Super Freak
- Joined
- Jan 4, 2011
- Messages
- 1,633
- Reaction score
- 10
Apparently there is quite a bit of difference in the measurements of the totals over the years, especially depending on how it's assembled which means that for some. I suggest emptying your DETOLF when you work on it so that if anything goes wrong, there's nothing in there to get hurt. One of my clients couldn't fit it on the top shelf of one of his DETOLFs but it fit perfectly on the top shelf of his other DETOLF. Very strange.
Hi Jazz, i made it fit in the second compartment. The first was already taken by the budget version.
To all, this is simply wonderfull work from Joost. I'm very happy with them even though i made the mistake of not clearing the detolf first. The glass plates dropped down due to me trying to fit in the deluxe version. The iron frames just shifted and I ended up breaking my tamashi 3po and sideshow rd so please clean out your detolfs first people!
I looked again and it seems I also scratched the sides, top and floor panels in the same accident. I'm pretty frustrated at this point.
But again to everyone. Please support Jazz. Once its in your detolf it looks absolutely stunning! It's a wonderful piece of work.
Last tip. Leave a little bit of space to the sides otherwise the tape will prevent the sliding in from the sideparts.
Robert
Just checking to make sure.
I was going to put this together today, but is it possible to dissasdemble it afterwards to get it into the Detolf? Haven't got a detolf at the moment and was going to put it on top of my current cabinet. but I want to put it in one when I buy a Detolf.
I was going to put this together today, but is it possible to dissasdemble it afterwards to get it into the Detolf? Haven't got a detolf at the moment and was going to put it on top of my current cabinet. but I want to put it in one when I buy a Detolf.
JazzInc
Super Freak
- Joined
- Sep 1, 2013
- Messages
- 2,157
- Reaction score
- 654
Just checking to make sure.
I was going to put this together today, but is it possible to dissasdemble it afterwards to get it into the Detolf? Haven't got a detolf at the moment and was going to put it on top of my current cabinet. but I want to put it in one when I buy a Detolf.
Yes, you should be able to do that, just as long as you're careful with the double-sided tape when you are removing parts.
shadybunch
Just a little freaky
- Joined
- Jan 8, 2010
- Messages
- 17
- Reaction score
- 0
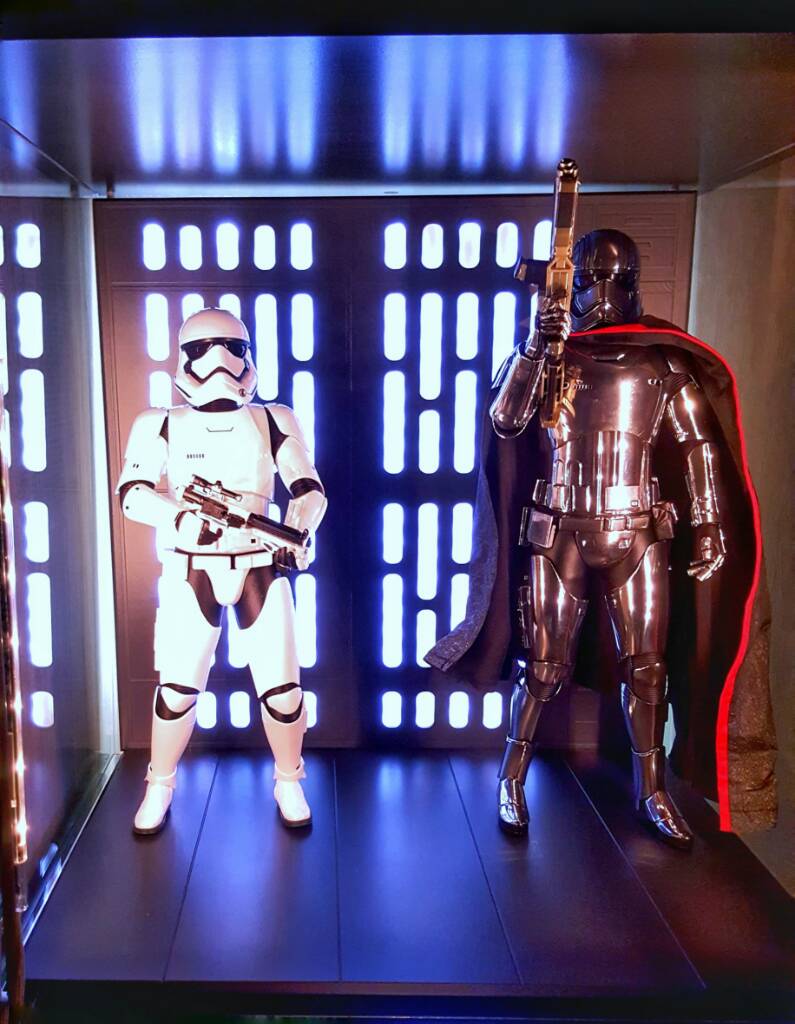
First of all - sorry for the totally badly lit ghetto Smartphone shot.
i bought the Deluxe Version without having a Detolf to place it in but i loved the first full Deathstar Hallway Diorama so much, i had to buy at least the smaller Version.
To be honest, the double-sided-tape solution did not convince me at first. But i can definitely say that this is a effective and safe solution - no wiggling or sense of insecurity either. Really great work JazzInc!
And for me... Probably i will protect the diorama with a custom made acrylic display case.

First of all - sorry for the totally badly lit ghetto Smartphone shot.
i bought the Deluxe Version without having a Detolf to place it in but i loved the first full Deathstar Hallway Diorama so much, i had to buy at least the smaller Version.
To be honest, the double-sided-tape solution did not convince me at first. But i can definitely say that this is a effective and safe solution - no wiggling or sense of insecurity either. Really great work JazzInc!
And for me... Probably i will protect the diorama with a custom made acrylic display case.
View attachment 323279
Please share a pic when you get an acrylic case made. I was thinking about doing the same thing.

I couldn't use it on my detolf shelf sadly, since the wife has claimed it for some trophies but managed to find a nice nook in my TV stand to place it for the mean time. Enjoying it as it is, and definitely viable since space is limited at my house. Definitely would consider an acrylic case as Sulla9 said to keep it dust free!
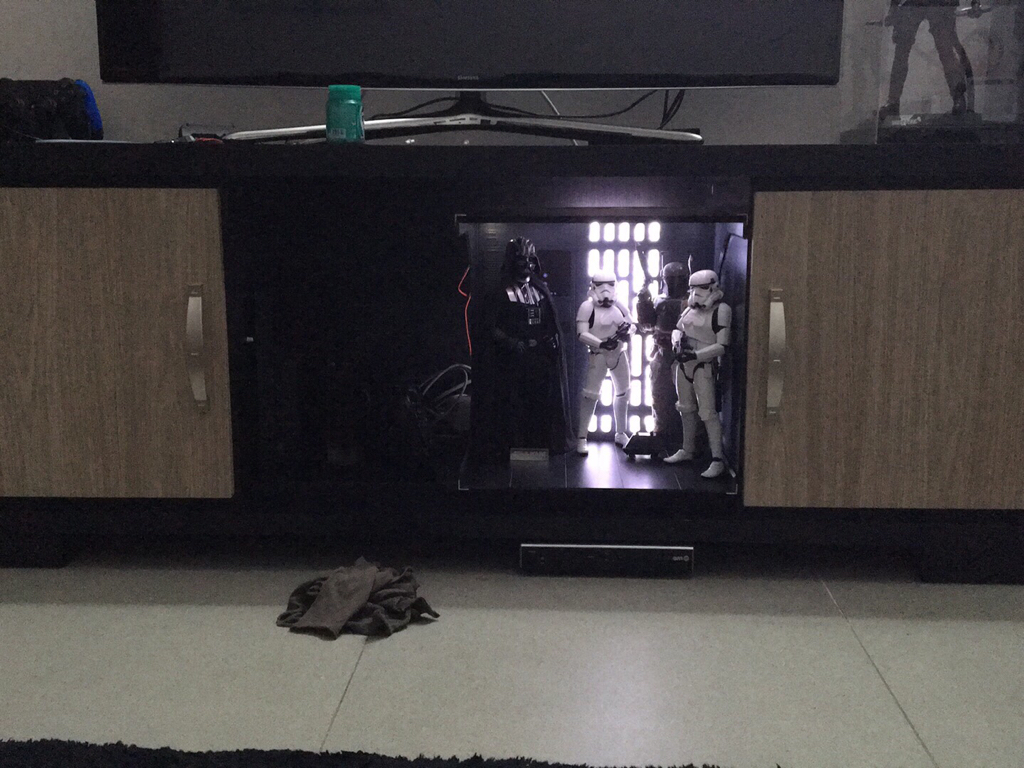
Honestly, superb work done by Jazz! His work is impeccable, and can't wait to see the next project!
Sent from my iPad using Tapatalk
JazzInc
Super Freak
- Joined
- Sep 1, 2013
- Messages
- 2,157
- Reaction score
- 654
I couldn't use it on my detolf shelf sadly, since the wife has claimed it for some trophies but managed to find a nice nook in my TV stand to place it for the mean time. Enjoying it as it is, and definitely viable since space is limited at my house. Definitely would consider an acrylic case as Sulla9 said to keep it dust free!
Honestly, superb work done by Jazz! His work is impeccable, and can't wait to see the next project!
Sent from my iPad using Tapatalk
Wow what a cool application and location! That's what I loved about the deluxe, it can go anywhere and stand on its own
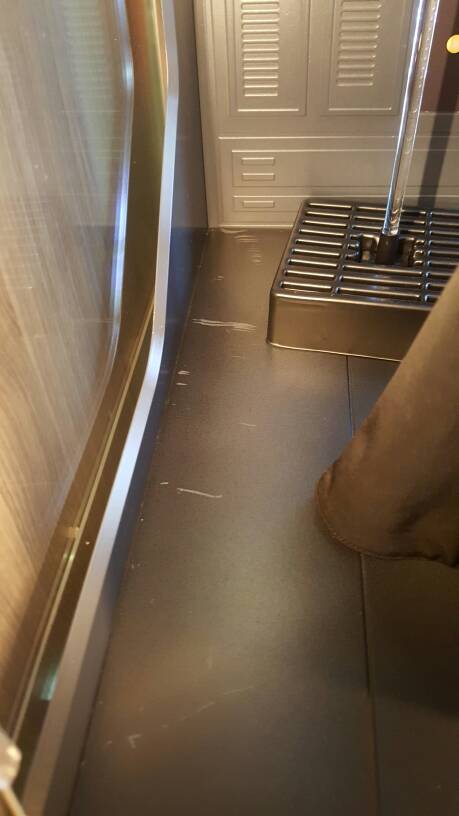
My Order arrived friday.
It was hard work, I bought a New detolf and deluxe dosent fit on the top. To Tide on the Side.
On the Secound it fits, but now i have a room between sideglasses and door about 1,5 cm.
Budget Version fits on the First very well.
Just a hour later and few scratches later, i Finished. I hope The Glas on the Side dont break.
Sorry for my Bad english.

But i will repaint it tomorrow.
Also this was fixed After 1 Minute and repainted

Overall i really love this dioramas
I got 2 Budget left, but i think i Only Use one more and will get princess leia Diorama.
It was hard work, I bought a New detolf and deluxe dosent fit on the top. To Tide on the Side.
On the Secound it fits, but now i have a room between sideglasses and door about 1,5 cm.
Budget Version fits on the First very well.
Just a hour later and few scratches later, i Finished. I hope The Glas on the Side dont break.
Sorry for my Bad english.
But i will repaint it tomorrow.
Also this was fixed After 1 Minute and repainted
Overall i really love this dioramas
I got 2 Budget left, but i think i Only Use one more and will get princess leia Diorama.
Natedog
Super Freak
Looks like you made need to relax your tolerances a bit Jazz. I noticed even you had some trouble assembling in your video. Perhaps the paint/finishing added just enough thickness to make things extra tight. Something to look into at least.
For my Detolf the floor, back and top Has to be 1 cm shorter on width and t Sidepanals 0,5 cm in height.
I think about to Dismantle and Order a arcylbox and put this on top. Becouse the back Glas dosent connect to the Sidepanals anymore from the Detolf
I think about to Dismantle and Order a arcylbox and put this on top. Becouse the back Glas dosent connect to the Sidepanals anymore from the Detolf
My regular sets arrived today 

Reading this thread, i've been very cautious setting those up. Granted this regular version is only two parts to connect, i did not encounter any major difficulty in the process. I slightly scratched one of the floor pieces while adjusting/choosing which configuration i was going for but nothing too noticeable and certainly not something that will detract from this gorgeous piece of diorama. Overall, from unpacking to light-up plugging, i took me three hours to have both sets displayed.
Step 1: Emptying and Cleaning the Detolf

Step 2: Checking content


To be noted i got two slightly different sets paint wise. A welcome variation as one feels like brand new and the other slightly weathered/used.
Step 3: Setting up


Having two sets, i decided for a "mirror" configuration to give a sense of variation. I get that Joost had to go for a single design for the back wall to keep the price point reasonable but i'd definitely consider another purchase if he'd ever offer another batch of regular with a variant.
Also, decided not to use the corner profile as i'm not able to remove the glass shelves on those Detolfs. They are fitted with LED lights and using corner profiles would certainly make it harder to set the dioramas properly.
Step 4: Adding the figures


Forgive the bad lighting. Wanted to show those back walls lit but it's too dark now to have a nice lighting to bring out the figures. Will take some more shots at daylight.
To conclude, i just want to thank Joost and his dad for their superb work. It's great to have you around to offer us this kind of items. They definitely enhance our experience as collectors by helping our figures shine in their displays.
Looks fantastic with the two side by side like that. Might have to consider another budget if there are any left. Is it really bright? Looks blinding. 
Similar threads
- Replies
- 30
- Views
- 3K
- Replies
- 9
- Views
- 4K
- Replies
- 9
- Views
- 2K
- Replies
- 39
- Views
- 7K
Latest posts
-
 Action Figure Final Fantasy VII Remake Collectibles
- Latest: gonzales.shem23
-
-
 1/6 Hot Toys - MMS681 - Episode II: Attack of The Clones - Mace Windu
- Latest: Brokenhandpuppet
-
 InArt: The Lord of the Rings - Gandalf 1:6
- Latest: Scout Trooper