You can try miliput, that is what im' using.")
yep that what I used as well. stuff works magic!


You can try miliput, that is what im' using.
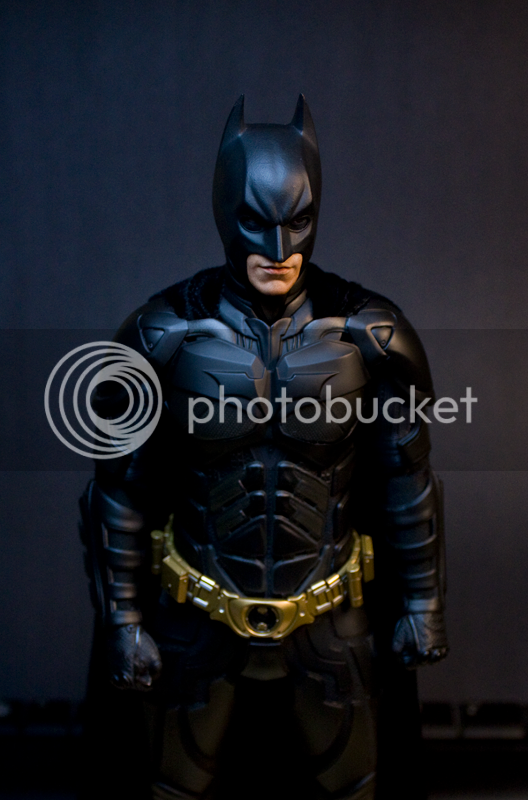
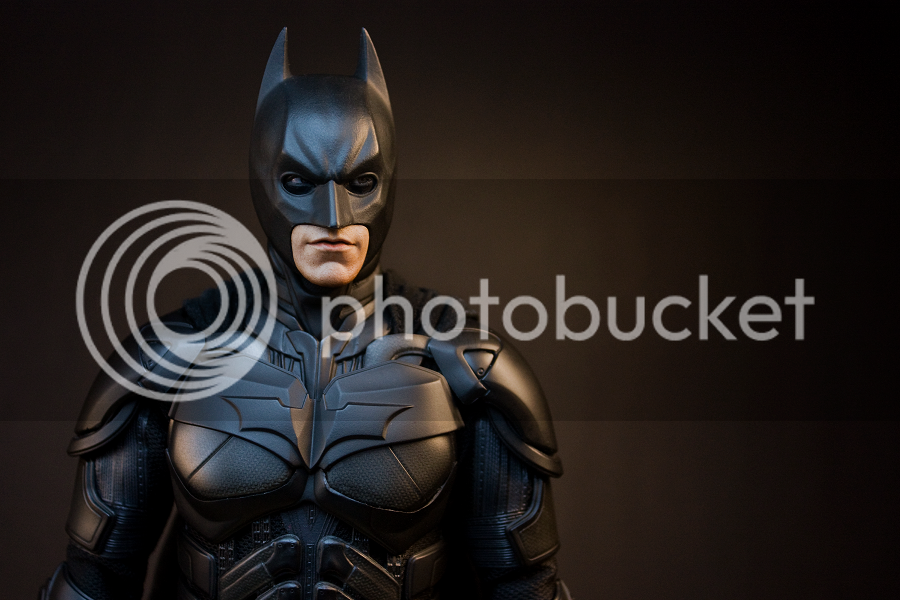
looks sick, i think it all pretty much comes down to the eye. i still think the dx 12 smirk sculpt actually looks nice in hand. some picture might capture it right depending on the lighting. But one thing i like about the medi cowl is, its more accurate in term of the cowl. and the medi cowl look smooth like the movie. hot toys cowl always has that bump to it. Because in the movie his cowl is very smooth. thats the only down fall of HT sculpt.
No videos, but there are some steps you can look at one page 1. Really, I pretty much followed what Rorywan outlined in his post, and then I put on the TDKR blu ray and paused the film whenever there was a close up of Bale's eyes squinting. Then tried to match it as close as I could with my limited ability, using some epoxy putty.
I did sculpt the eye lids. Went for the full squint. Some other folks here have done less extreme looks for their eye lid sculpting. All up to personal preference.
Full squint all the way mate, and your shoulder/cape mod looks awesome.
 You got the ball rolling on the eyelid sculpting mods, and to that I raise my glass.
Am acutally thinking of using a black sharpie for the eye lid mod.
.
Curious to see how that'd look!
My figure came with crossed eyes. What can I do to fix this?
Regarding the teflon areas: When you bend them they get pale "stress" marks on them. Well at least that is what it looks like from the front, but it's not actually what is happening.
Hot Toys have very cleverly molded these pieces from clear plastic with the textural detail on the back, when you bend one the paint comes off the back creating those pale marks,
just repaint the BACK of the teflon piece to get rid of it, dark grey or black, and they are gone.


I've been experimenting over the past couple of weeks with ways to make the shoulders not look so flat. I realized that the figure's shoulders are just that: flat, instead of having the natural slope of the trapezius muscles on Bale's shoulders. The fact is that the cape is forced to sit too far back on the shoulders and too far from the center of the collar. this is due to the location of the cape insertion holes. Using a custom cape kinda exacerbates the problem, due to the thinner, more realistic fabric used.
Here's an example of what I mean:
The cape covers most of the collar and conform to Bale's shoulders.
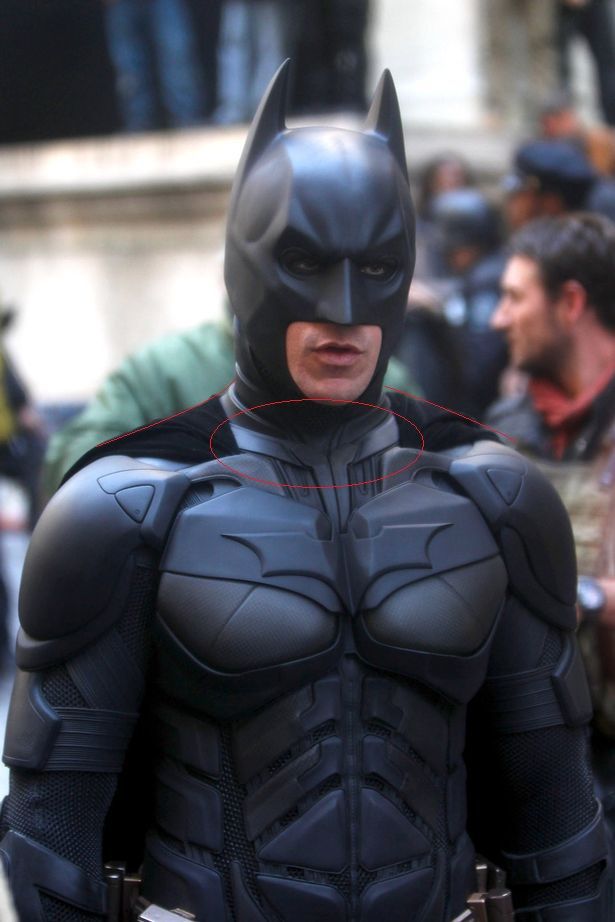
So I took drastic measures! I Modded the shoulders to allow the cape to sit closer to the collar and neck, like on the real suit. I did this by cutting a section of the armor out right below where the cape holes are set. The cape now sits lower on the body. Doing so creates a nice slope effect for the shoulders as well.
custom cape
stock cape (still required some futzing to get it to look decent).
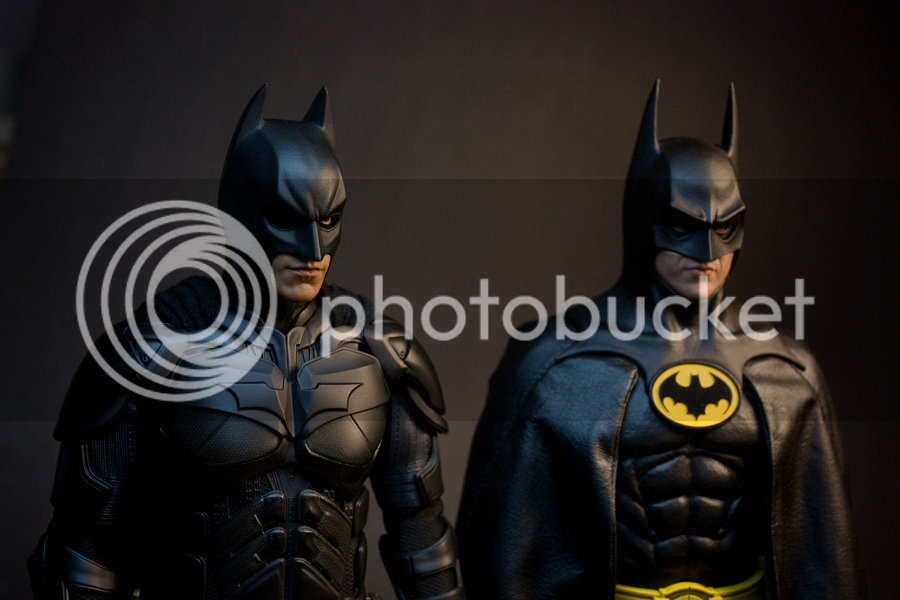

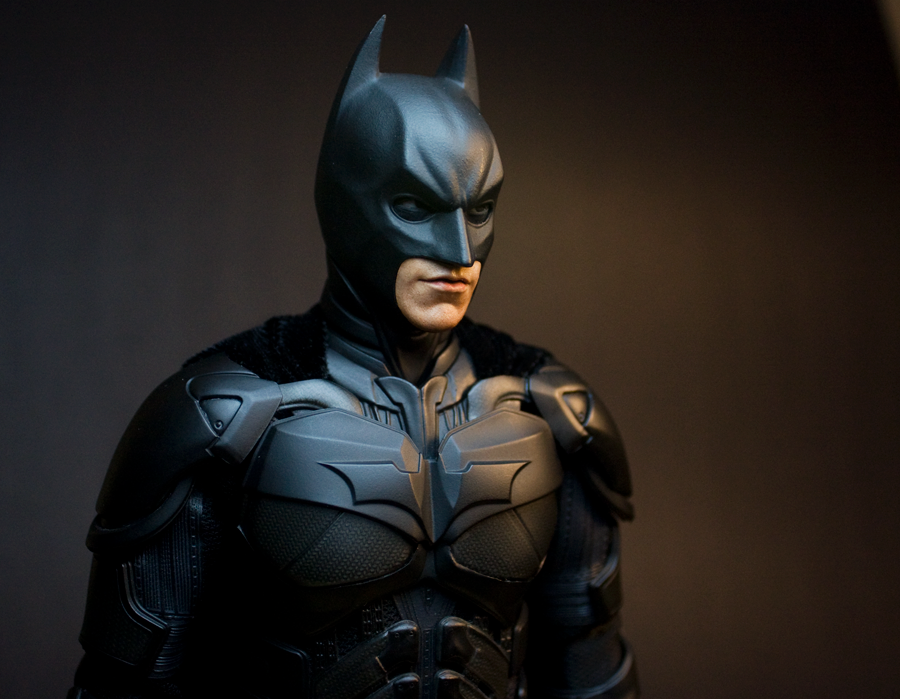
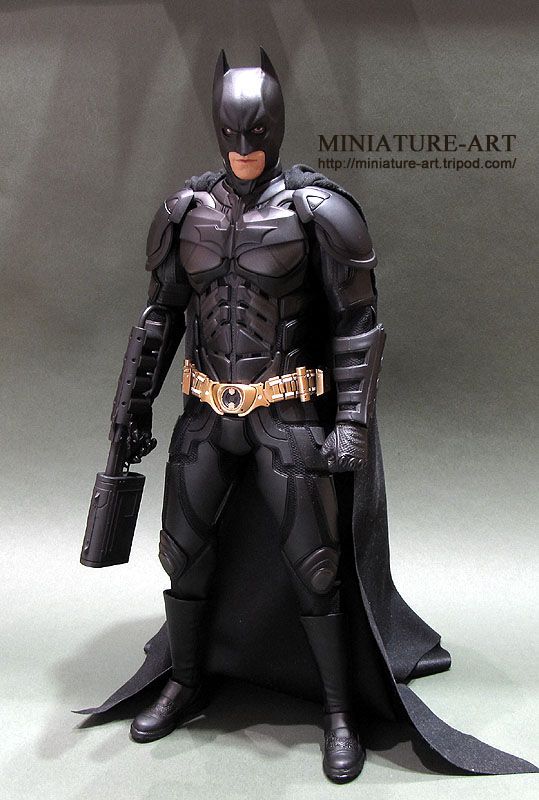
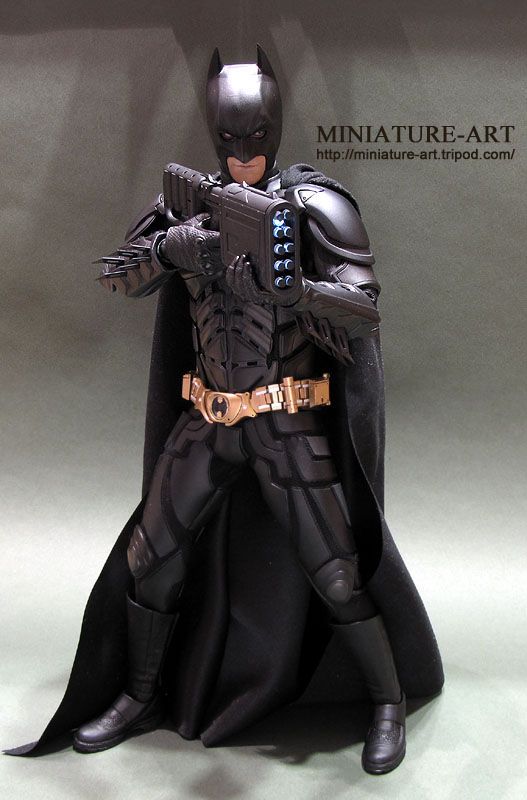
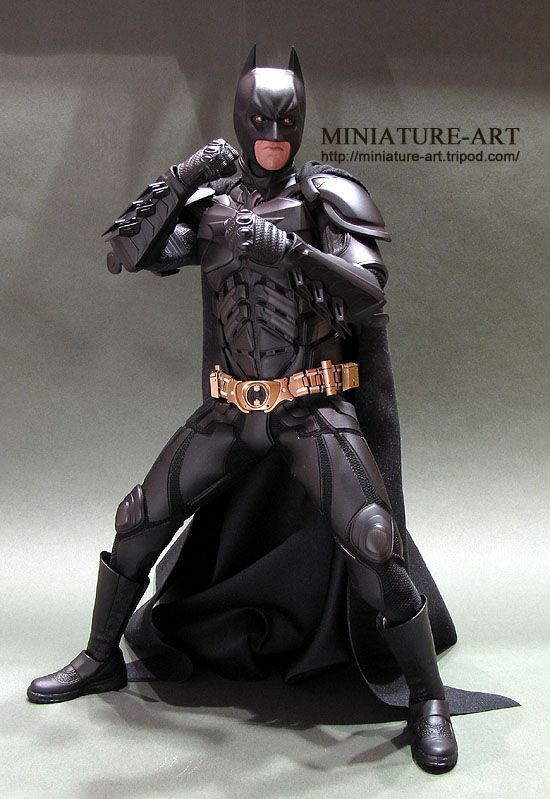
My DX12 arrived over the weekend, and it's an absolutely worthy upgrade to my old MMS71 Dark Knight. I really love the armor on cloth costume, it's a perfect miniature replica of the actual Bat-Suit.
Immeditely, I upgraded the figure with the Robbiethepainter faceplate, it really captures Bale's likeness, and his paint work is supurb. I bent the elbow guards in, widened the gauntlet at the wrist, and cut the cuffs off the gloves. While I have an iforgio cape, I actually like the stock one, which can easily be futzed and has the velvety exterior, and nylon interior like the real cape.
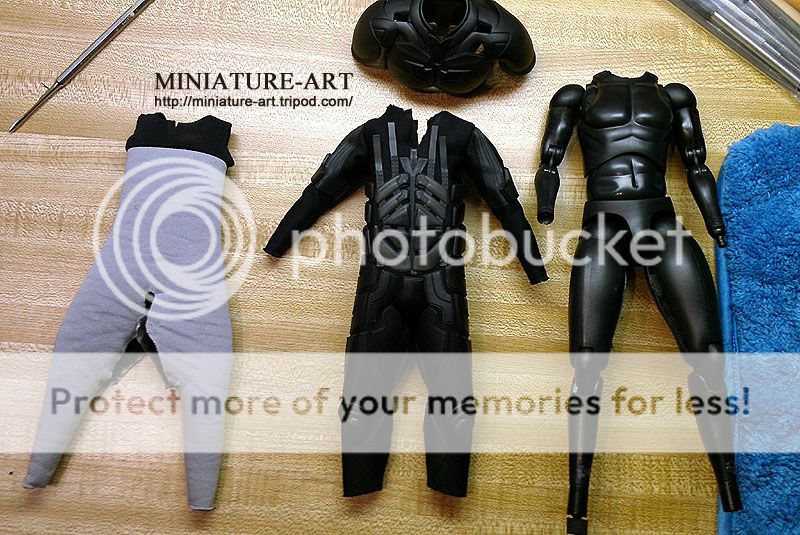
What I didn't like was the lack of lower body and hip articulation. So I decided to cut apart the batsuit to see why, only to find a foam padded undersuit. The undersuit is held in place with lycra shoulder straps, and glued to slots in the inner thighs of the True Type body. Also the shoulder and bicep areas are adhered to the suit with a sticky adhesive.
This deliberate destruction of such an expensive item isn't for the faint of heart, but if you are careful, the outer suit will come off with care and no permenant damage.
As seen in the picture, I cut an inch down the front and back of the black suit, and slipped the body out. When it was reassembled, the cut ends were reinforced with fabric glue to prevent fraying, and a strip of elastic lycra was glued under the cut ends to rejoin it. Glue for me as I cant sew.
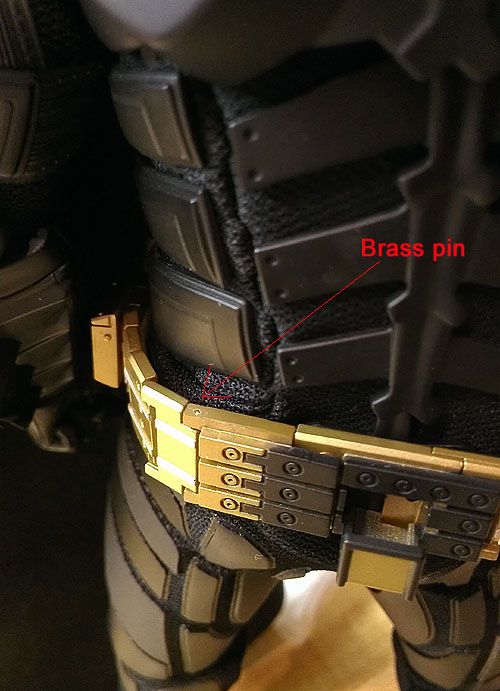
Because the undersuit is removed, the belt will fit too loose. I cut off a single link from the belt, then drilled and pinned it back together, so it articulates like a wrist watch:
And the strap under the arms were fitted with button snaps so I can easily remove the chest armor if I needed to make any future modifications:

As illustrated below, the range of motion is now quite impressive, allowing the figure to appear in a number of great fighting poses.

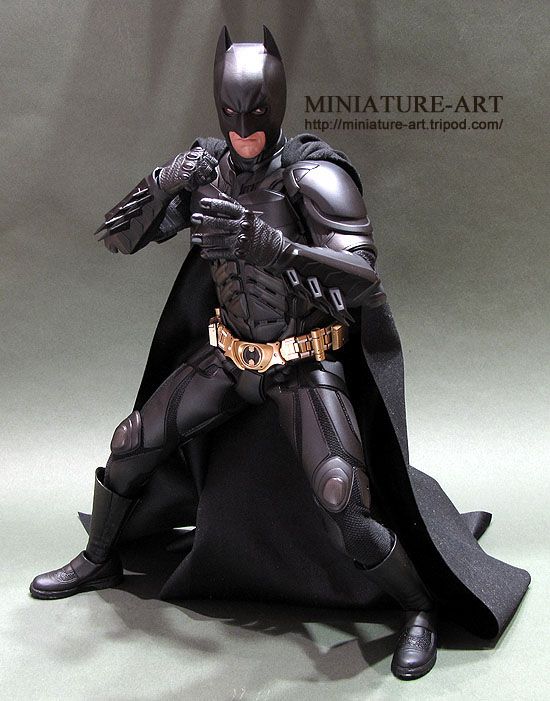
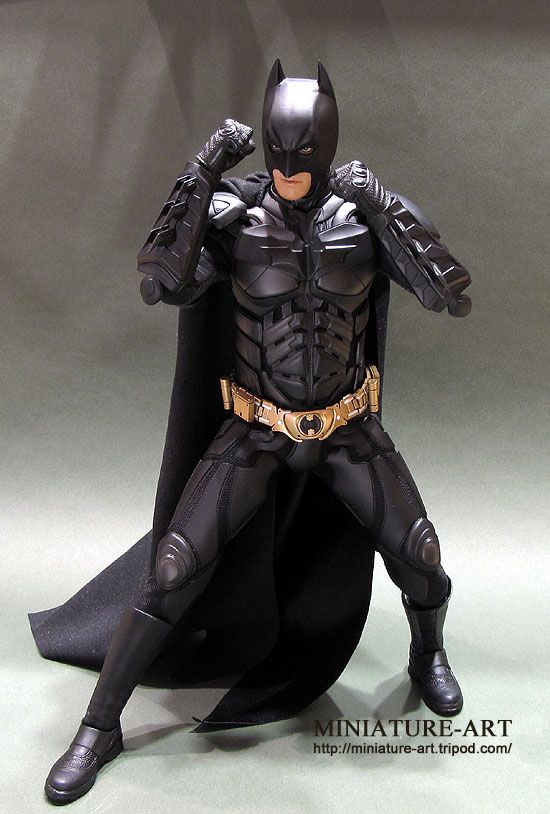
I can say that with the Robbiethepainter faceplate, and undersuit removal, the figure is perfect, and worth every penny spent. It's a great tribute to Nolan's Dark Knight Trilogy, and should be in every serious 1/6 collector's display.
BOBBY
PS- I did make use of the padded undersuit, I cut off the portion below the knee and stuffed it into the ankle area so it wouldn't appear too thin.


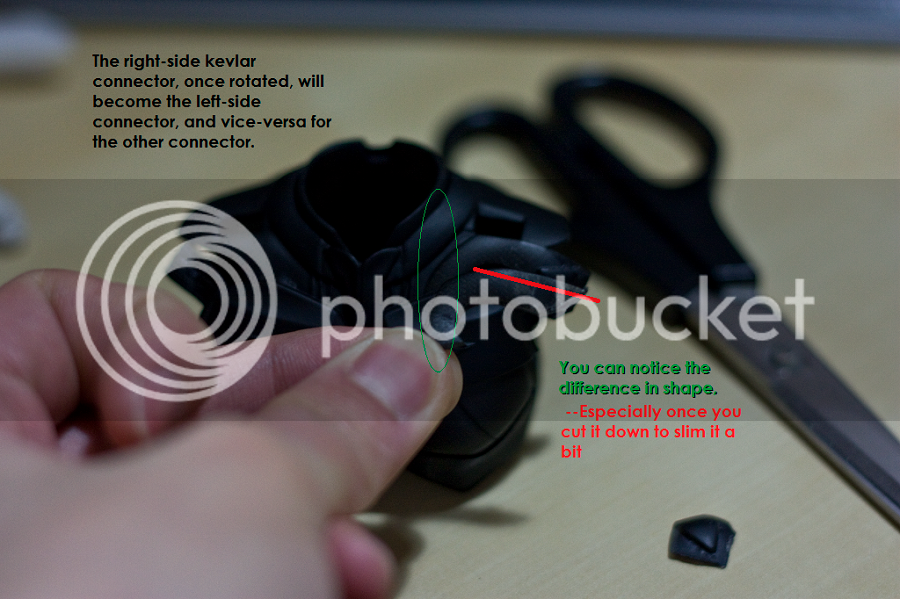
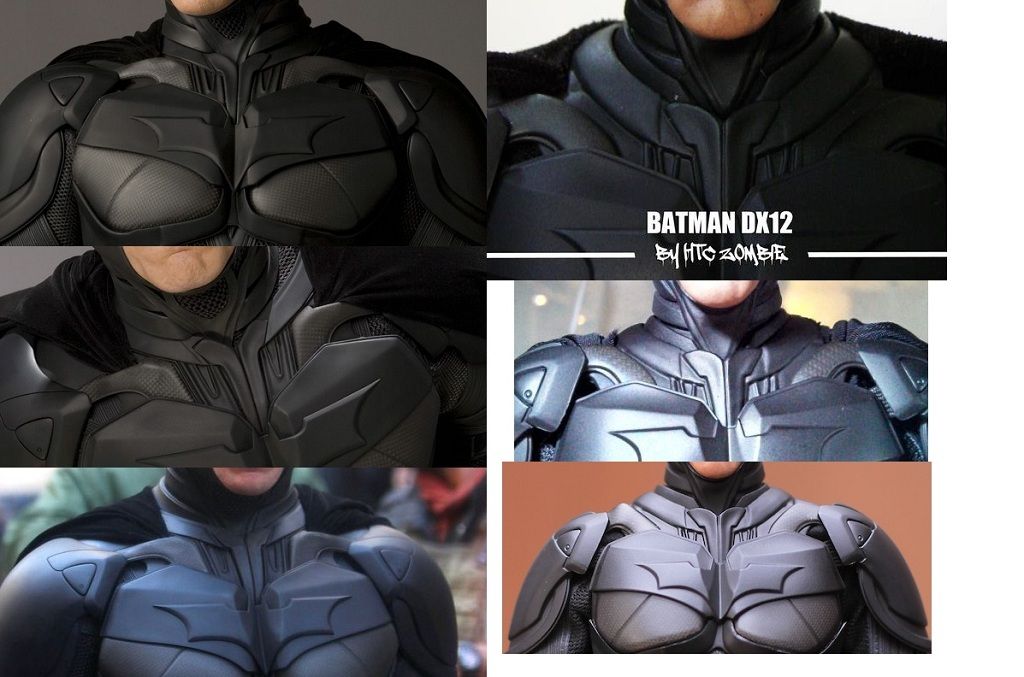
7. We're approaching the final step. If peeling the connectors away from the suit the first time stripped some paint off, use some flat black acrylic paint and coat the underside of each connector. Give it time to dry. Once dried, hold the connector up to a light to see if any light peeks through.
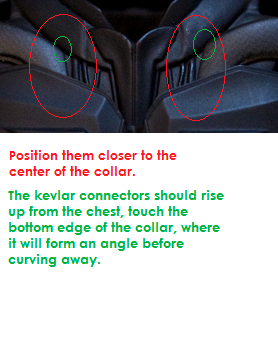
8. Now that the kevlar connectors are reshaped, we will reglue them to the chest armor first. Get it as close to the center of the collar as possible. Like Maglor recommended, use a glue that dries slowly, allowing you time to position them as you please. Glue them down to the lower layer of the chest armor.
9. Last step requires you to reglue them to the shoulder pads. This step is pretty simple. Just refer to pics of the actual suit to guide you to where the connectors should be attached to the shoulder pads. They should go directly underneath the "tips" of each pad. You may need to shorten the ends of each connector to hide the dried glue damage underneath the shoulder pad.
Added to page one.
What kind of glue did you use?
Enter your email address to join:
