Newbie Attempt at Dio

Collector Freaks Forum

Help Support Collector Freaks Forum:

This site may earn a commission from merchant affiliate links, including eBay, Amazon, and others.
Absolutely great work ! As good a piece as I've seen on the boards , get some paint on it and weather the sucker ! ( And while you're at it , how about some kind of "recipe" to let us know what kind if stuff you used ? )
Thanks, Thundergod!

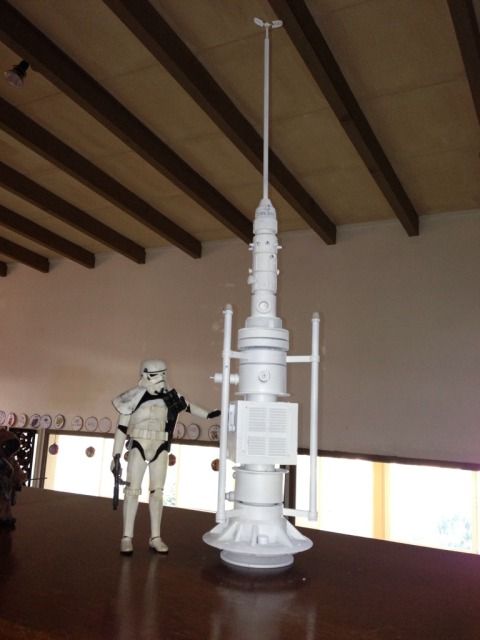
Ah yeah, the recipe. It wasn't very creative until i hit some stumbling blocks then i had to sand some pieces and get creative to get the look right.

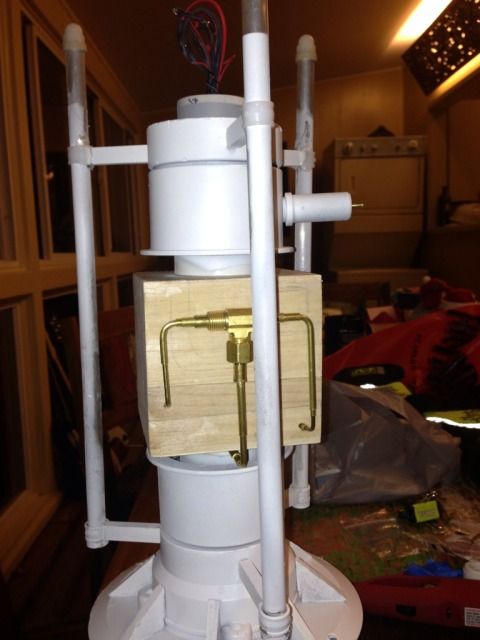
Here's what I started with, basic building blocks. I don't have the names yet, but all parts purchased at Home Depot:

4D986342-7408-4375-908F-B3456774381D-11951-000007646472DB32.jpg


5515B43A-428F-4126-8B4A-1D6BE700F570-11951-0000076461EB5363.jpg


D65CA37C-4E84-4AFF-9B1F-F8D4AFCEBE1E-11951-000007646C249C3D.jpg


97DA3FBC-96AF-42DC-AAA9-6A5F89020C36-11951-0000076471842AAA.jpg

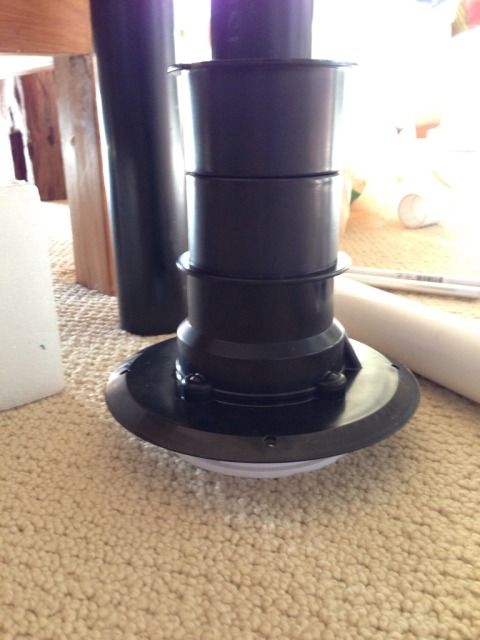
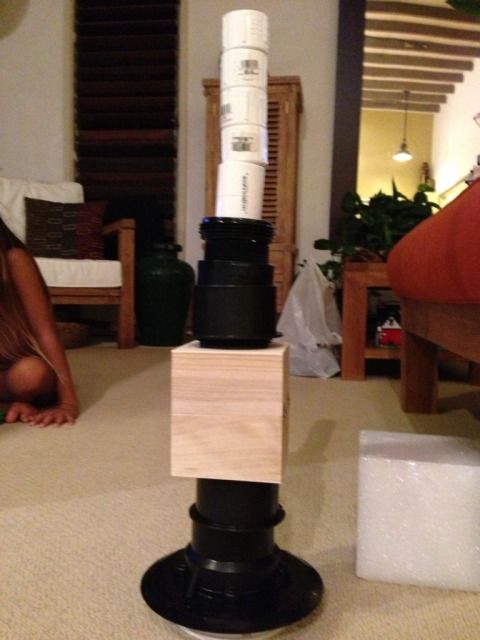
I cut a tape roll in half and it fit perfect over the ABS.

B7F2F57F-6B58-4495-B41F-822C60F2BCB3-11951-00000764764EA2A8.jpg


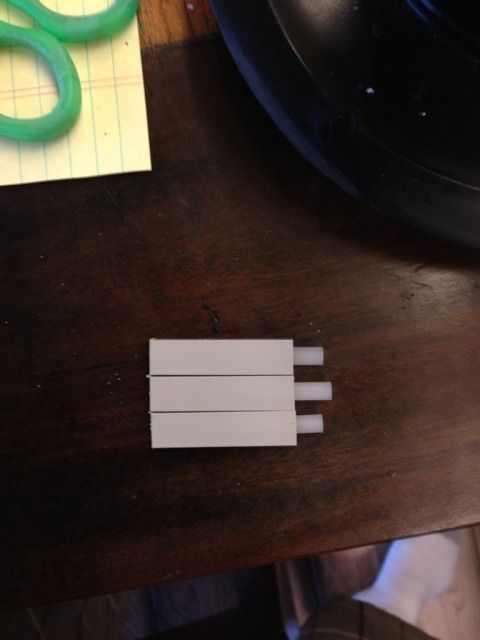
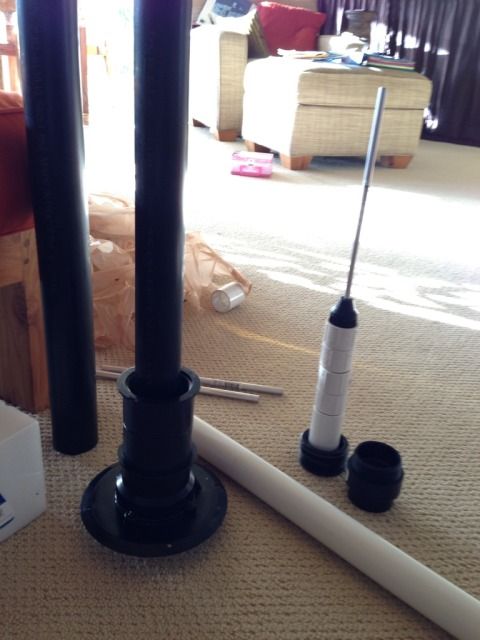
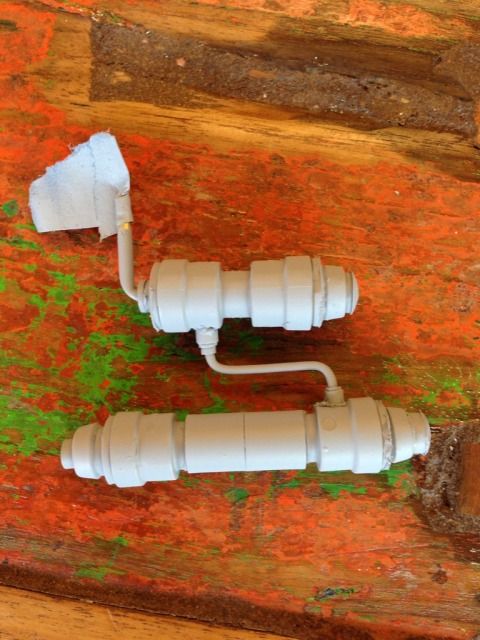
Then I bought these plastic construction pieces from a hobby shop. They are hollow so I could run wires through them and peg them into the body with these nylon spacers.

232802EF-0D0B-45D3-8DBD-C4B70566FB70-11951-0000076478B12FBF.jpg


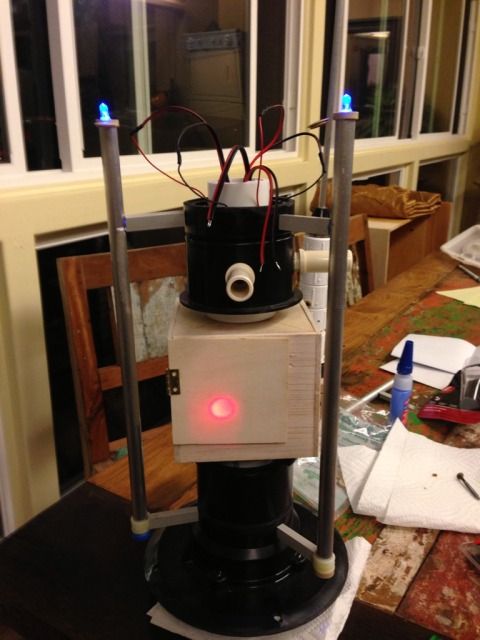
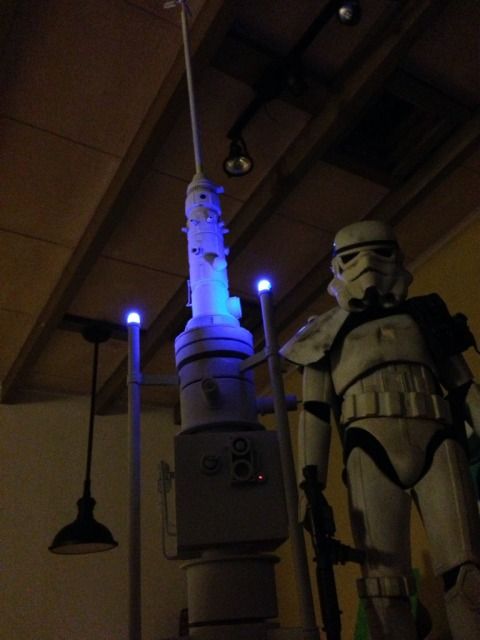
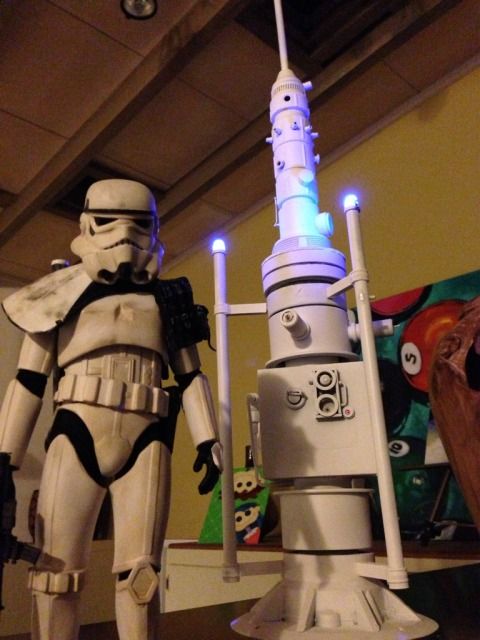
Then I wired it up with a 9v system circuit board 4 peg LED. Wiring was wrong here, I had to redo it....lol. I forgot to go through the holes I made in PVC core, :slap

3885096C-45EB-4B47-992F-CFFB4B30988A-11951-000007648428109C.jpg


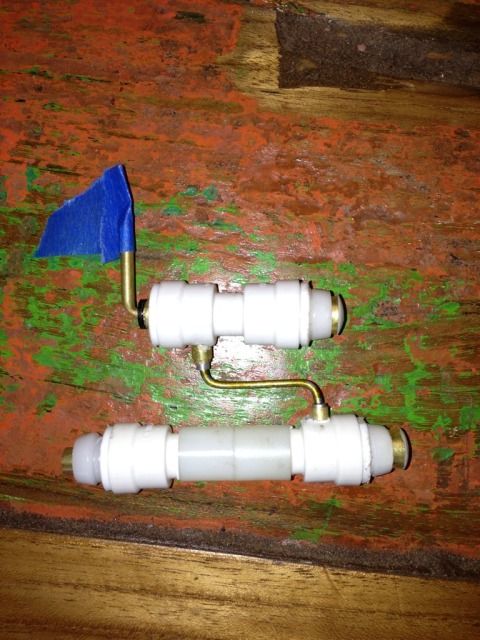
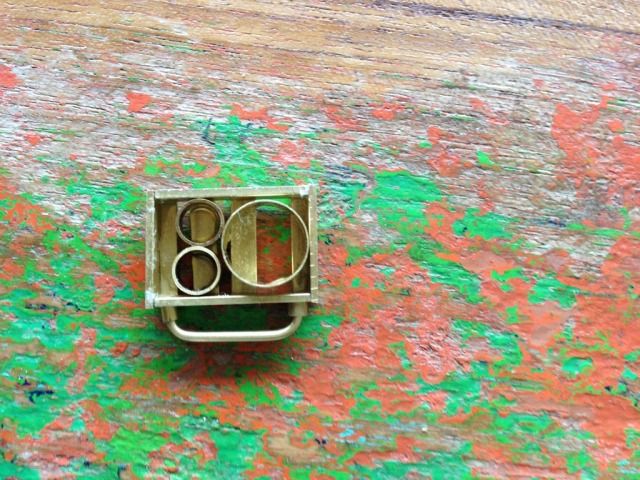
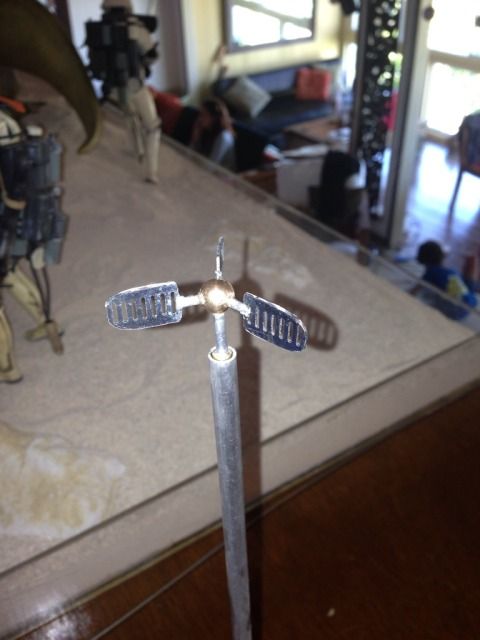
Additional nylon plumbing parts and random bits for the details. Time for creative freedoms on this stage:

F7A1294E-FEBB-42D1-AAA3-A3D7E9B0E8DB-11951-000007648162611A.jpg

I also got a bag of brass pipes for 3 bucks at the local hobby shop.

81839C1E-2E9E-4759-A1FA-1E2E3998DAAD-11951-000007647E3E14CF.jpg
 
F4B6E13A-19E5-4D81-91DE-A51805C354BA-11951-0000076487604697.jpg


Constructed with bits and glued.....

4B111A2B-BA64-44E4-80FD-A07D0C7485A4-11951-000007648A484EE5.jpg

D942BEFC-397A-4562-855F-72EA1FD54718-11951-000007648D147B10.jpg

I used hose claps for the Humidity Sensor..
 
Looks awesome Solo_bones. I always pictured a Sandtrooper sniper hiding behind one. They have sniper plates attached to one of their leg armor - so I read. :)
 
Great work! I LOVE it and I need one!
Putting a parts list together is a must for this thread.:lecture
 
Fantastic job!:clap
Whoa...that's insane coming from the dio master/artist.

Super stoked on all your work Feroze. Thanks for dropping by. I can't stick my head in this one but I can almost make a sand angel on my Dewback dio. :)
 
Great work! I LOVE it and I need one!
Putting a parts list together is a must for this thread.:lecture

Ah, the receipts were many, and there was so much trial and error I have a lot of spare parts left over that i never used or tried and fried.

Here's what I came up with based off of what i Googled and compared to my receipts. I did not include the PVC tubing that connects all these parts, namely the T-KAP body and to the top portion.

(2) 3" T-KAP ABS Cleanout adapter 021449974820

(2) 2" X 1-1/2" ABS DWV Flush Bushing, Spigot x (go inside T-KAP's) 039923197603

(1) adapter male 2" ABS 372872 (389116)

(4) 1 x /34 threaded pvc D-2466 (top portion of MV) *8 Although doing it over I would just use 1" couplings and cut them put 3/4" pvc in the middle and to space them out.

(1) union 1-1/2" FxF SCH 80 PVC

(3) PVC Coupling 1" SxS PVC 012871625015

(2) 2" ABS coupling HXH

(2) 1-1/2 X 1-1/4 PVC BUSHING SPGXS

If anyone wants more detail, let me know and I can disassemble one part that i haven't glued yet so you can see what did.

To get the T-KAP centered I had to grind some PVC tube down so it could clamp over it and fit into the drain, which is at the bottom of the base. I couldn't find the drain on the receipt.

7FC6233A-DCCA-4F01-B0C5-0163F4811556-11951-00000774BA85D98D.jpg
 
Last edited:
Amazing craftsmanship, and thank you for the parts list. I Hope to see more of your work in the future.
 
Amazing craftsmanship, and thank you for the parts list. I Hope to see more of your work in the future.

Ahh,, too kind, too kind. But thanks a lot. I appreciate it. Looking back I'm a little bummed I didn't try harder to make it just like the real thing.
 
All the effort definitely paid off! Its a very, very cool piece and so obviously Tattooine. It's a must have for your overal display and you nailed it!
 
All the effort definitely paid off! Its a very, very cool piece and so obviously Tattooine. It's a must have for your overal display and you nailed it!
Thanks, Mando. I was working on it and then decided to watch ANH and I saw in only one scene that these light up at night...i was so devastated because it forced me to change my plans on how I was going to connect the chiller bars. Now the lights are almost the coolest part, definitely added a level of cool.

4D3A3E30-D600-4E72-8417-1E174799E959-11951-0000072812EAC871.jpg
 
Last edited:
Thanks for sharing your part list. You really did an amazing job. Did you scratch build the vents (on the cube portion)?
 
Tatooine fan here as well.

Great job! The lights take it to another level. :hi5:
Thanks, Centurion, something words can't describe about that place. ANH just nailed it on the believability.

Hope you get your Dewback soon! Thanks again, friend.
 
Great work mate looks awesome. Now that you are hooked you will always be planing new things to build.
Aw, this one snuck by me. Thanks, Hewer.

Yeah, I am hooked.......damn. Didn't think it would happen.:monkey2
 
Back
Top