Modification/Customization for the DX12 Batman Figure

Collector Freaks Forum

Help Support Collector Freaks Forum:

This site may earn a commission from merchant affiliate links, including eBay, Amazon, and others.
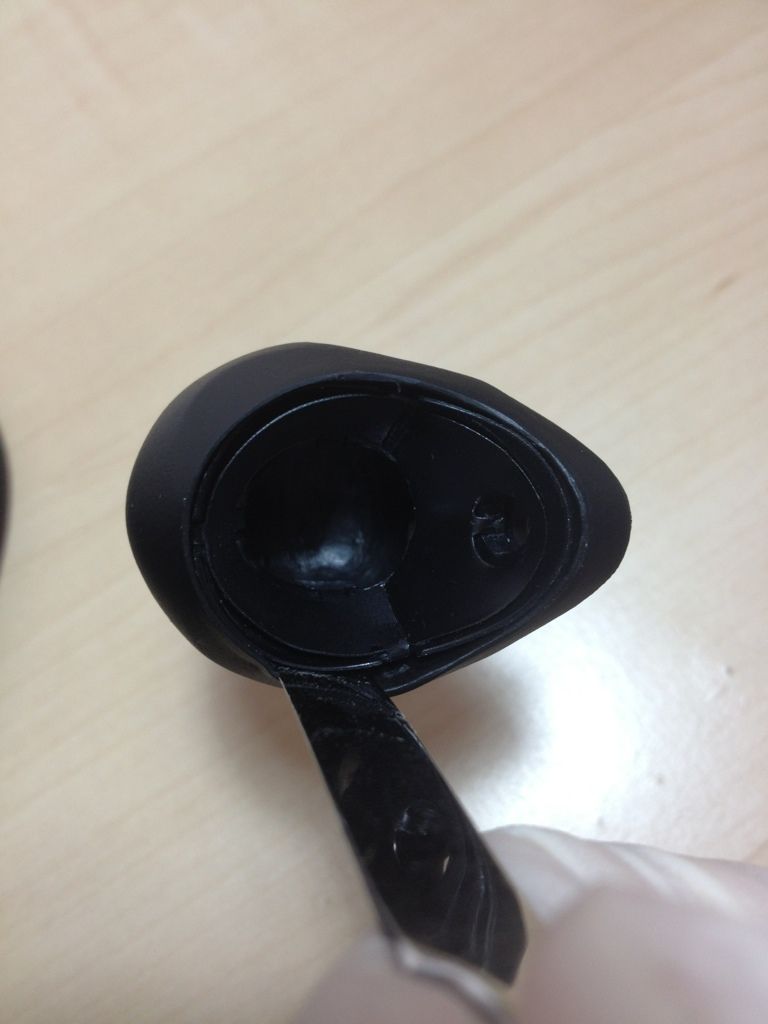
Did the squint mod and here's the pic as promised.

IMG_1190_zps01cc65b8.jpg

Painted the eyelid or....?
 
My contribution to the thread, I hope some will find this useful. :peace

I basically followed rory's tutorial and try to understand it before operating on the DX12 heads. upon opening one, it seems I have found a faster and easier solution to taking of the inner metal and the plastic part.

I used this tool to basically jam it in between the cowl and the plastic part, without taking off the metal part, as the metal part's edges are kinda folded and glued and I don't think its possible to take it off without taking the plastic part first.

After successfully jamming in the thin metal tool, I just slowly go around and break the glue bond in between the cowl and the plastic part, occasionally heating the rubber part and cowl so that its easier. I took off the PERS using the same tool as well, do this before so that you have plenty of space to work with. Btw, the metal tool have a blunt edge, do NOT use a sharp edged tool as you might accidentally slice the cowl. Take your time to go around the whole head, and try sticking a finger inside and try to see if it can already be lifted up, it should come of easily.

I hope the pic will help out in illustrating what I mean:

C690648A-66DD-491B-81F3-1EE86C98A73D-2522-0000036905CC5172_zps04c96771.jpg

772B3E9F-66E7-41F4-AB61-9DB5A0A53632-2522-00000368FF37F8A6_zps17345ae9.jpg

07D485A9-3489-466E-9196-1A4FBED8BF7C-2522-00000368F4FE08A2_zps61cfd8bb.jpg

14EAC5E8-2DA7-4137-973A-FE493E94E11D-2522-000003690B0180FA_zps4c3b62e2.jpg
 
Nice tutorial.
Tempted to do mine as well while waiting for the MRM Cowl.

Here is my mod so far.
50936275.jpg

img8949.jpg


1. Gloves Mod + Widened Gauntlet opening and bent elbow pad.
2. Ankle widening.
3. Shoulder pad separation and heat mold.
4. Shoulder lift to shorten the neck.
5. Kevlar connector mod.
6. Fat suit removal on the thigh.
7. Robbie's face plate.
8. Cape opening on shoulder.
9. Tony Meis' DKR Battle Version cape.

img8959wi.jpg

Ankle widening

img8960z.jpg

img8955t.jpg

I cut the fat suit and stuff it onto the forearm to make the gauntlet fit more snug.

img8958lv.jpg

Cut the little notch on the shoulder to make the cape sit closer together (might need to cut the bottom part as well like Plasmid's to make it sit more closer to one another).
 
Last edited:
Nice tutorial.
Tempted to do mine as well while waiting for the MRM Cowl.

Here is my mod so far.
50936275.jpg

img8949.jpg


1. Gloves Mod + Widened Gauntlet opening and bent elbow pad.
2. Ankle widening.
3. Shoulder pad separation and heat mold.
4. Shoulder lift to shorten the neck.
5. Kevlar connector mod.
6. Fat suit removal on the thigh.
7. Robbie's face plate.
8. Cape opening on shoulder.
9. Tony Meis' DKR Battle Version cape.

img8959wi.jpg

Ankle widening

img8960z.jpg

img8955t.jpg

I cut the fat suit and stuff it onto the forearm to make the gauntlet fit more snug.

img8958lv.jpg

Cut the little notch on the shoulder to make the cape sit closer together (might need to cut the bottom part as well like Plasmid's to make it sit more closer to one another).

Very nice! one of the nicest i've seen so far actually. The shoulder pads look so much better. I personally like the stock cowl
 
eyelids2.jpg

eyelids.jpg


To all those wanting to paint the eyelids but don't feel you can.

I felt the same, i wanted to try to paint the eyelids but i wasn't confident in my painting skills. I saw a few people say try using eyeliner which switched a light on in my head.

I used my girlfriends liquid eye liner and it was perfect, it's a matte finish and it comes with a sorta firm foam applicator thats tapered to a really small end. Perfect for this job and the big bonus - if you screw up just use a cotton bud to correct it. No biggie

Pics shown are the results i got. Another plus is if you wanted to you can apply layer after layer and it will almost give him the illusion he's squinting

EDIT: look how bad the mouth piece fits :slap
 
That looks awesome, idude :clap

any chance of a close up and maybe a tutorial/tips on sculpting the eyelids?

Thanks man! :yess:

I'll shoot a close up in a bit and explain what I did since I don't think I took any photos during the process. :(

Sculpt looks great iDude. Did you make the eyes independent for rolling or are they still parallel?

Thanks buddy. I kept them parallel. I still use the little tool and ball joint to move them.
 
So here is my sculpted eyelids close-up. iPhone pic so sorry in advance.


Tools

No joke this is what I used. I put a dab of it on some paper. Then I used a wooden barbecue skewer for kebabs since I didn't have any toothpicks. Same concept, just bigger.

5954888a-159c-46b2-a760-a79dcc9a1c21_300_zps2dbd2308.jpg


Tips/tutorial

Here is what the PERS plate looked like before I did any modifications to it. I googled some images of Christian Bale as Batman for reference and decided that I didn't want to make them super squinty. As Rory said, the bottom eyelid is sculpted well so I left that part alone.


So I only sculpted where the red is. Bale usually has his head titled down with his eyes peering up so this is the look I was going for.


I would dab the skewer into the liquid nails, and just start applying or painting it on. Make sure to only get a little dot and work with that. I started from inside the eye and moved towards the outside. It only took me about 15 mins to do it and get it the way I wanted it. The stuff dried within an hour, I painted it and that's it.

Final Product


If you have any other questions, PM me.
 
Last edited:
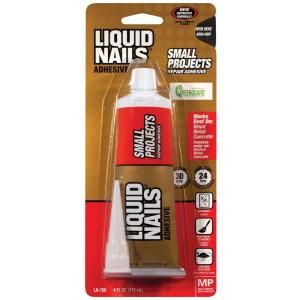
Never heard of liquid nails? What is it? Easy to use?

It is an adhesive for tons of different materials like wood, corkboard, drywall, concrete, etc. You can get it from any hardware store or department.

Very easy to use. It dries very slowly so you have a lot of time to fix any mistakes or re-do anything.
 
I am not sure. I guess covered it up. I didn't know it had one I guess. :dunno

Thats what kinda bug me :lol

I think the top part of the eyelid need to be shaved down, and then resculpt a bottom eyelid in order to do the squint. But then, I'm not even sure it will look natural. :panic:
 
Thats what kinda bug me :lol

I think the top part of the eyelid need to be shaved down, and then resculpt a bottom eyelid in order to do the squint. But then, I'm not even sure it will look natural. :panic:

I don't think so. The top part of the eyelid is just a flat piece, the bottom part as the nice double sculpt to it to show where the cheek meets the eye. I think most people have been doing it the way I did.
 
It is an adhesive for tons of different materials like wood, corkboard, drywall, concrete, etc. You can get it from any hardware store or department.

Very easy to use. It dries very slowly so you have a lot of time to fix any mistakes or re-do anything.

Is it liquid? Interesting.
 
Is it liquid? Interesting.

Not really. It looks exactly like Elmers white school glue. It's like a cream. This is the first time I have ever used it. I didn't have sculpting clay available and don't know where to find it over here in Japan so I found this. I read that it hardens in hours so I grabbed it.
 
Back
Top