The Chev
Super Freak
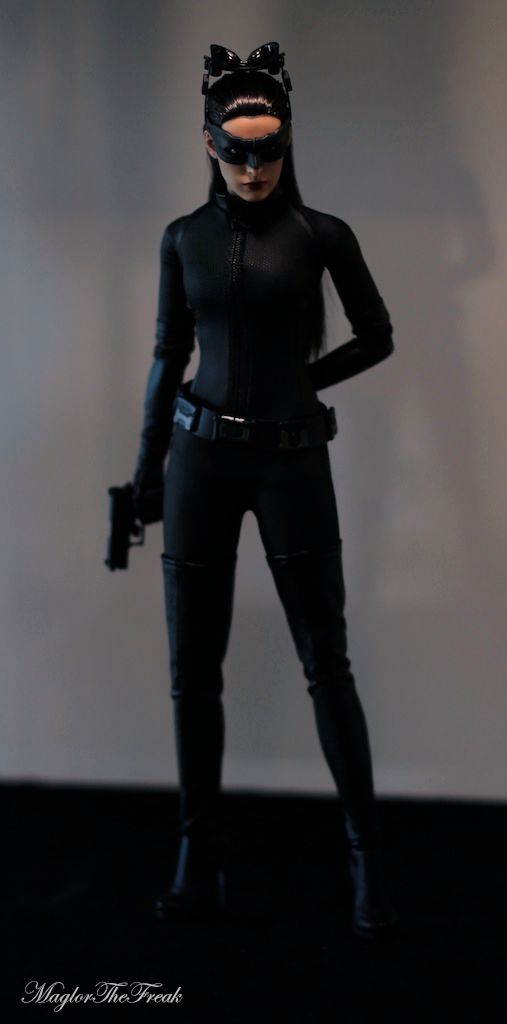
So, i'm debating getting Selina Kyle. I liked her in the movie, but I told myself she was the one figure I could live without. She looks cool in a number of pictures. I need to decide now, cause she's already going up in price.


So, i'm debating getting Selina Kyle. I liked her in the movie, but I told myself she was the one figure I could live without. She looks cool in a number of pictures. I need to decide now, cause she's already going up in price.

As with most things in demand, get whilst the getting's good. Not only that, but she's a fantastic piece.
Never mind the haters.
Granted, I have a very small 1/6 collection (10 figures or so), but she's easily one of my favorites that I do have.
I can get it 250 locally, unless I can get a better deal somewhere else.
")
I can get it 250 locally, unless I can get a better deal somewhere else.
I know you guys are going to hate me but I swear I had it book marked somewhere but if any one has a link anywhere could you point me in the right direction on directions for how not to break this mask? Thanks in advance.


could you point me in the right direction on directions for how not to break this mask?
Honestly, the main thing to keep in mind is handle with care - which means be very delicate - DO NOT RUSH, do this when you have some time and patience.
The steps below are based on all the best tips I've read here plus my own experience following them. I've now put the mask on 4 separate times.
1. Consult the instruction sheet included with the product and note the direction which you're supposed to rotate the goggles back on their support. When looking at the front of the mask, the goggles rotate UP and BACK away from you.
2. Do NOT unclasp the mask at the back - ignore the part of the instructions that tells you to wrap the mask around the head and clip the clasp back together - you will get frustrated with this quickly.
3. With the mask assembly loose and off the figure, rotate the arms that hold the mask back/up to a vertical position - do this SLOWLY and very carefully, a tiny bit at a time. If you can't do both sides at once, do one at a time, about ONE mm each time.
4. Rotate the goggles toward the back so that the virtual cat ears are pointing straight up. Note that there are bulging pieces on the sides - these must not pass back under the side supports or you will break something - the side supports should not bow or bend when you do this. Again, SUPER CAREFUL.
5. Slip the whole thing onto the figure's head while holding the hair back. It's easier to wet and comb the hair with a toothbrush first. You will also fit the mask over the nose/eyes before you finish pushing the sides and back down.
6. Gently push the sides down so they touch the top of her ears, while at the same time also pushing down around the back strap. Do this a tiny bit at a time going around the head to make sure everything is aligned.
7. You can pull on the hair below the mask (around back and to the sides) to make it more snug at the top of her head.
8. If everything is not the way you want it, such as mask misaligned to one side or the hair can't be smoothed out by pulling around under the mask, then STOP and do NOT make any adjustments to the mask, especially any sideways pushing or rotation. Remove the mask now by pushing straight up on the strap at the back, sides and the mask and start over.
Just do what i did.
*Don't* break the goggles.
Treat them like 1/6 scale items that are fragile and you'll be okay.

Just follow this dude instruction and you will be ok, short and to the point
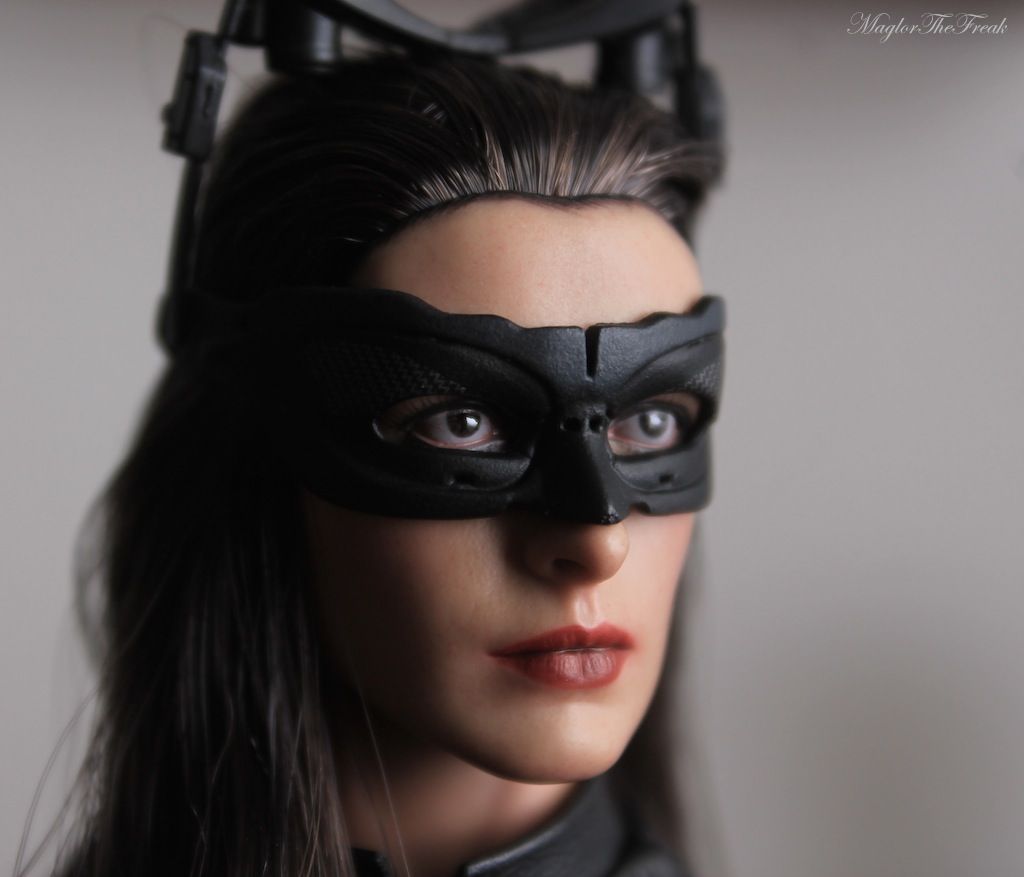
Is that the Hot Toys Head?
I haven't posted a lot of pics of her yet, but you're welcome to use them.
Here are my favorites:
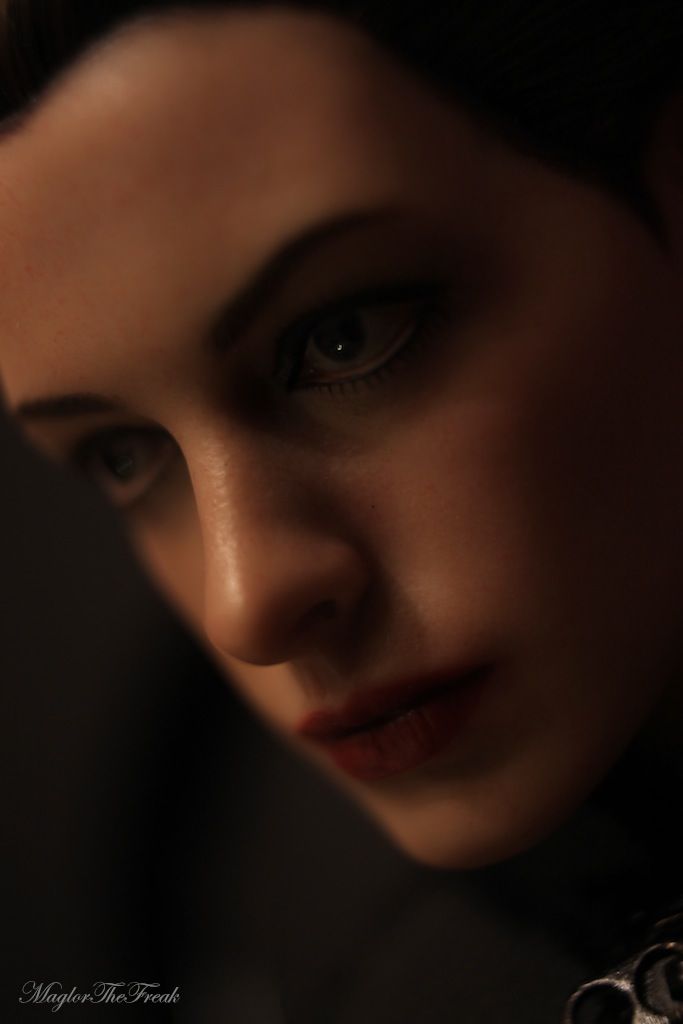
Not sure why that last pic doesn't get more love. Gonna toot my own horn here: she looks more like Hathaway in that pic than any other I've seen. A workmate said it was "uncanny".
 .
.Got my replacement set of goggles today
Enter your email address to join:
