You need to pin it! + add an adhesive. Pining it refers to adding a structural support inside, as a metal rod. The adhesive, won't hold on itself under manipulation.
Materials needed:
Fast cure epoxy putty (5 min)
Fast cure epoxy glue.
A small metal pin (brass tubing, metal rod, small nail, etc)
Sanding pad (230 grit or similar nº)
Isopropil alcohol (for degreasing)
Masking tape
Scissors, small pliers, etc.
References:
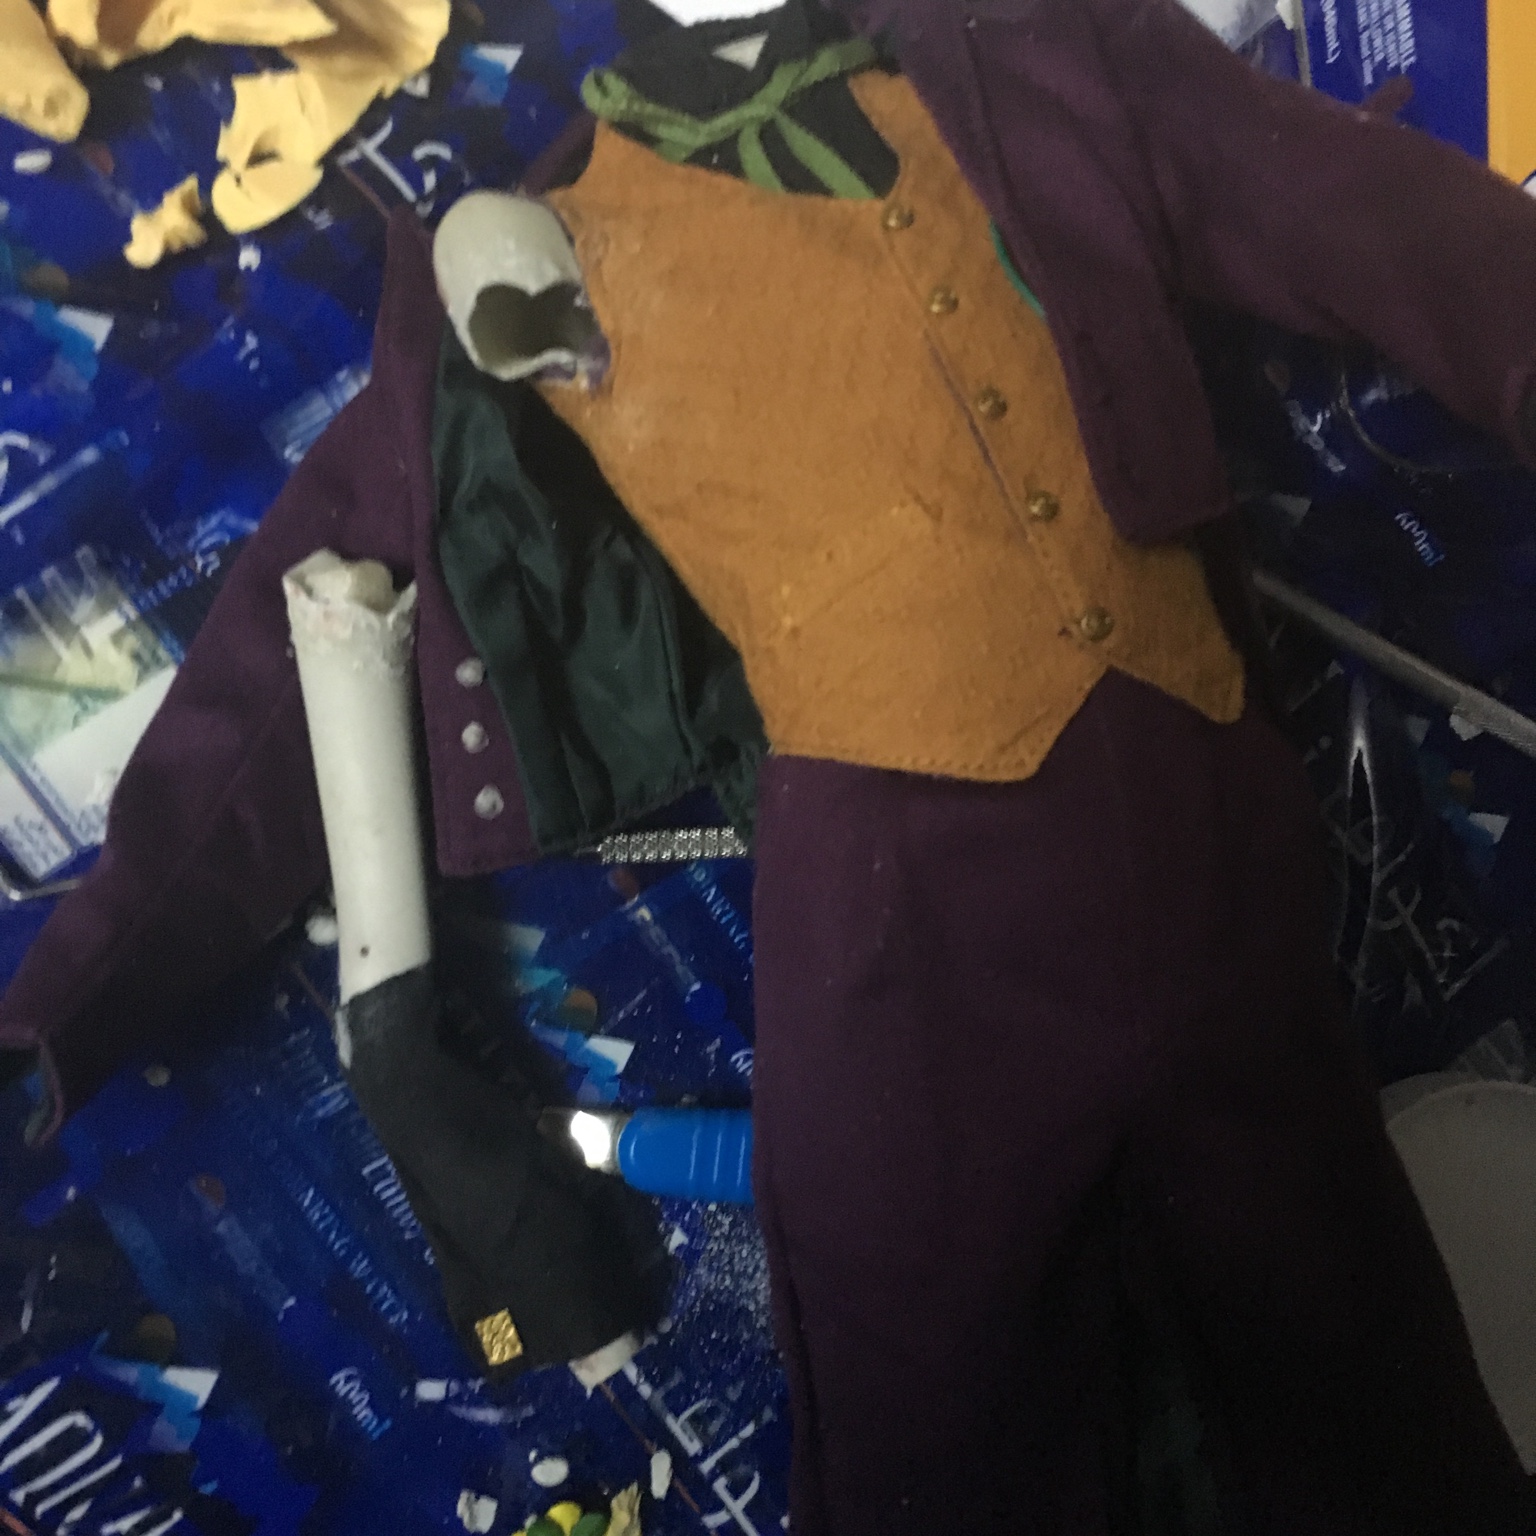
A1- Broken limb. shoulder
A2 - Broken limb. arm
Protect the rest of the clothes with masking tape/plastic film or undress it. Don't forget to do this, you can definitely ruin the rest of it for good.
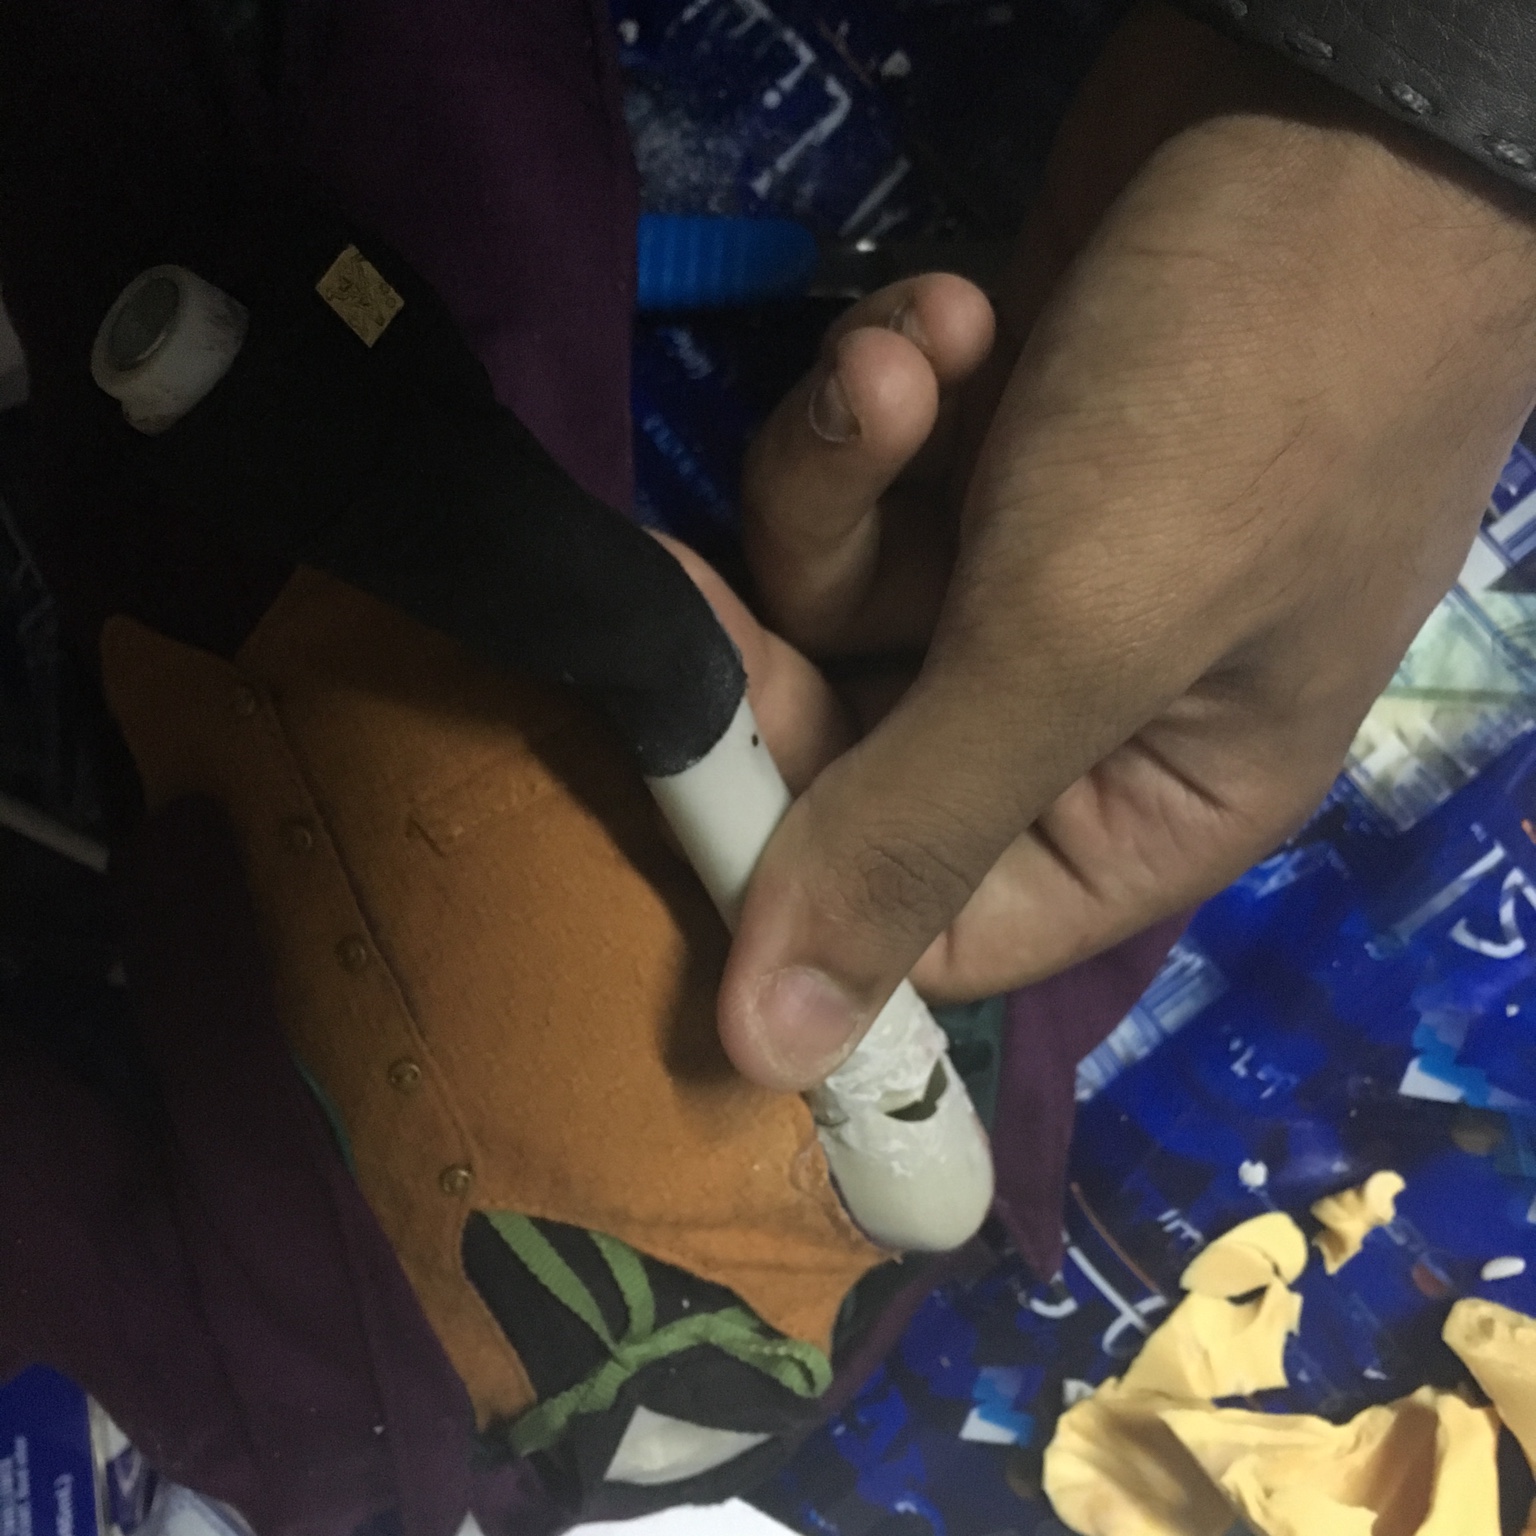
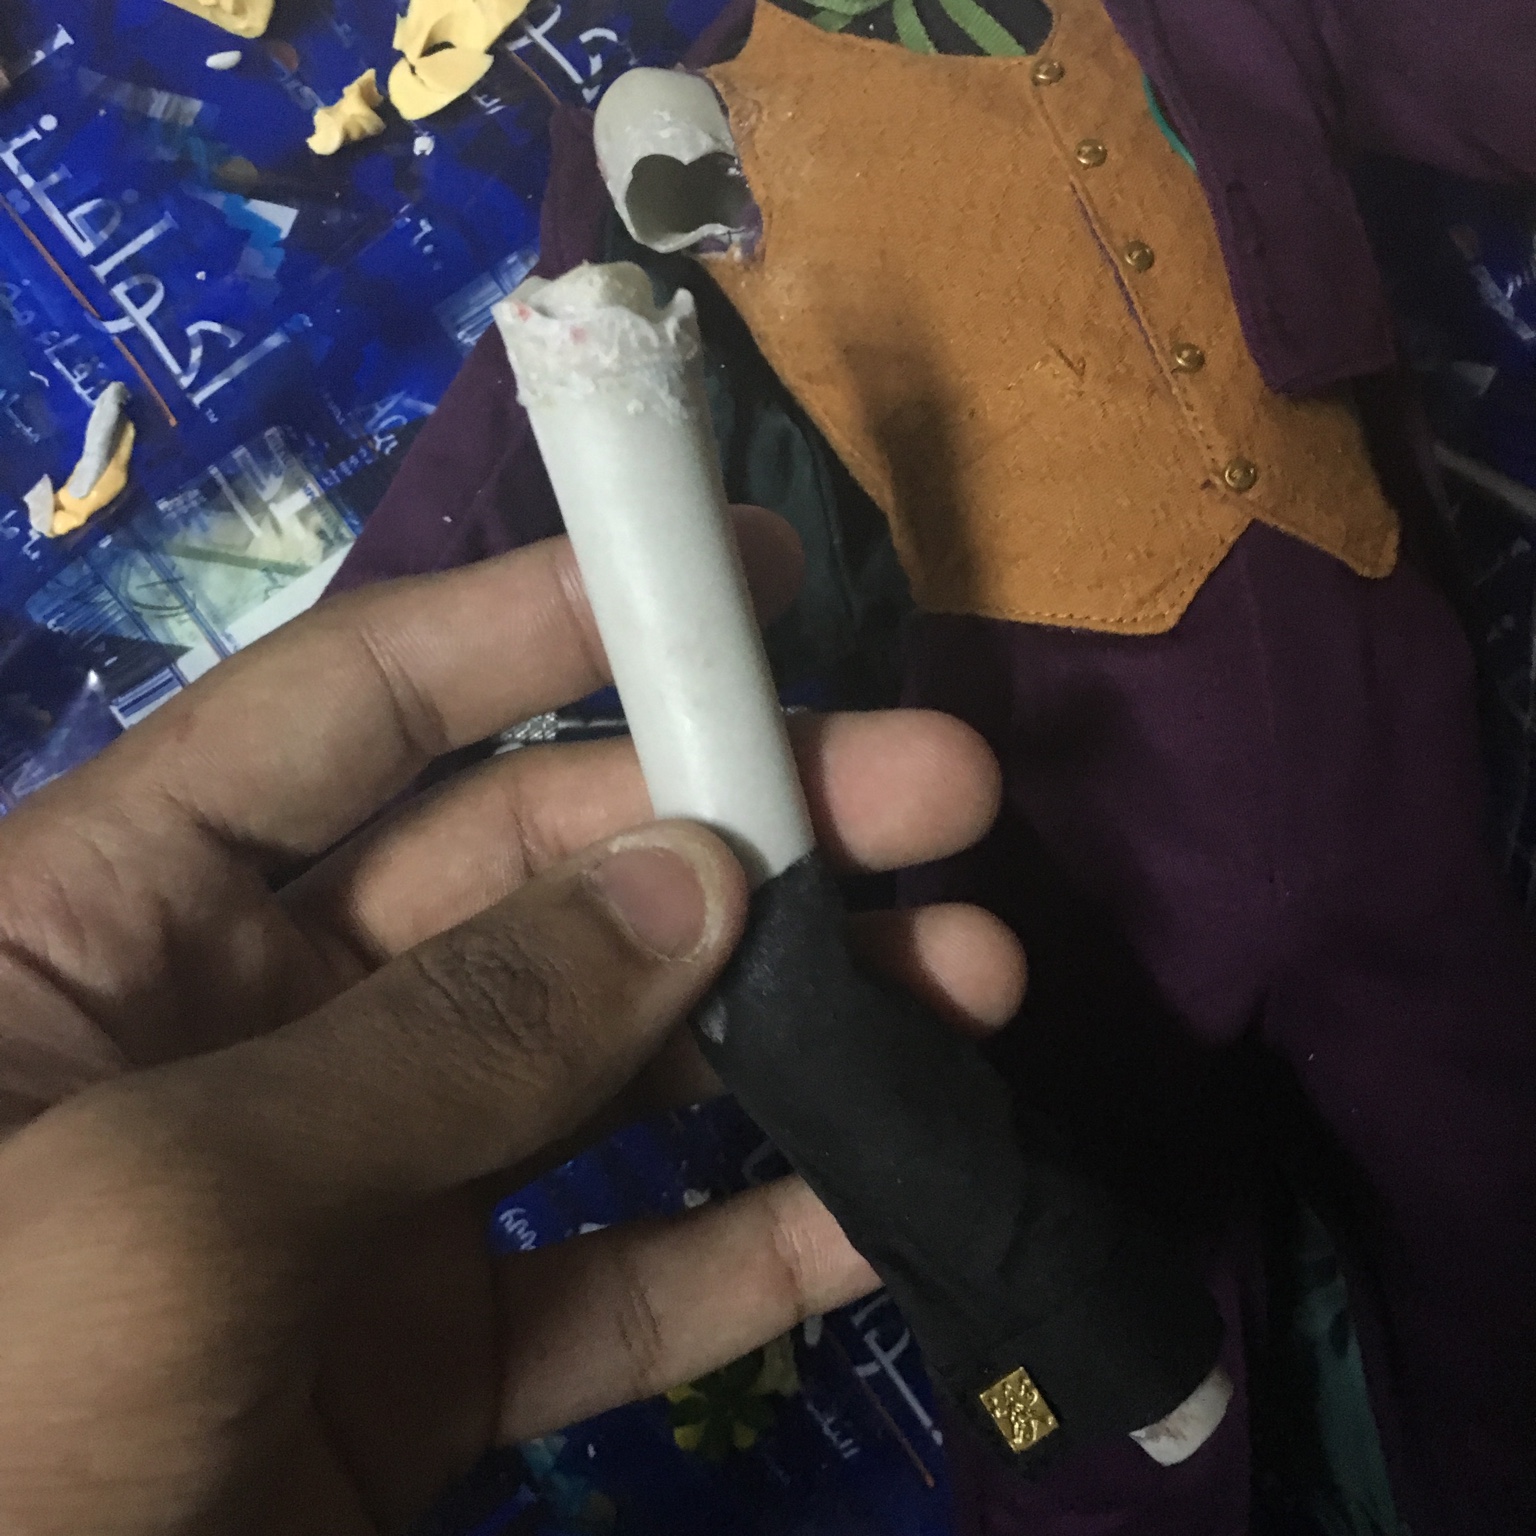
First clean the glue residue on the broken extremities, sand and degrease. Make sure end of the crack on both parts match. You may need to sand or cut some of the pointy edges. They could later on be filled with epoxy.
Both A1 and A2 are hollow. If not, make space. Stuff them with epoxy putty, one limb at a time. After the first is done, with still uncured epoxy, affix a short nail or metal rod cut to size so it can be put inside the other fractured part (part of it should be on the putty and part free). Then fill the other limb with epoxy putty, and insert the nail. While the second limb cures, fix the arm at the fracture point with tape, on the outside, so it will hold still.
Once everything is set, paint the outside of the crack with epoxy glue to reinforce it (optional)
View attachment 251072