1/6 Batman 1989: Batmobile Collectible Vehicle - Specs & Pics

Collector Freaks Forum

Help Support Collector Freaks Forum:

This site may earn a commission from merchant affiliate links, including eBay, Amazon, and others.
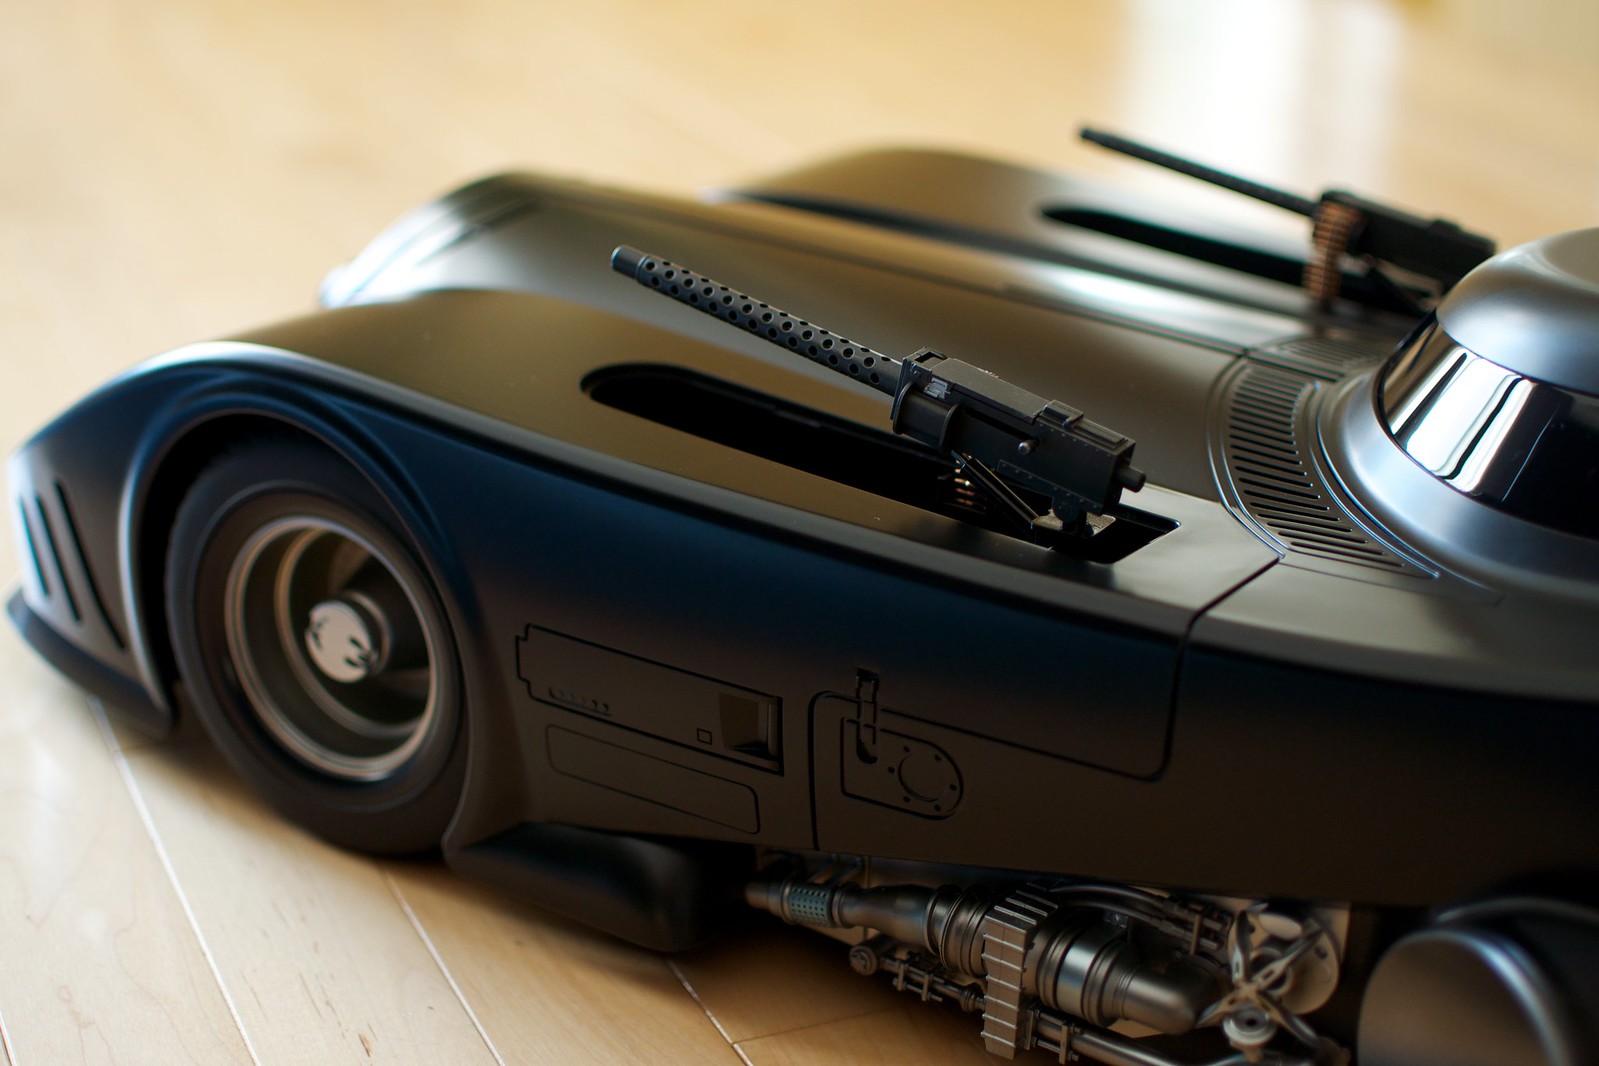
"Check it out! We're gonna disassemble his Batmobile, and turn it into an H-Bomb on wheels!"

8ugm.jpg

The three largest main parts of the Hot Toys Batmobile. Body shell exterior, chassis frame, and cockpit.

xj7t.jpg

The main reason it's so tough to seat DX09 Batman in there is that the cockpit interior is too small. The front wall of it ends way earlier than it needs to.

91d7.jpg

Here you can see it seated in the chassis tray. Look at all of that wasted potential legroom space between the front of the cockpit and the back of the front wheel wells. LOTS of room in there for an R/C motor and servos.

elvo.jpg

Just another angle of all three main parts laid out. You can see that a pull-out engine wouldn't have interfered with the front steering axel. And if they wanted to, they could have even connected the steering wheel to the steering. If Hot Wheels could do both of these features at 1/18 scale, there's no reason Hot Toys couldn't at 1/6.

zrzh.jpg

The bottom of the cockpit. The plasticky looking seats can easily be unscrewed and covered in faux leather, if you want to customize this for more detail.
 
Learned my lesson.

No more first in line for anything.

The advantage and thrill of getting something first comes with a huge risk no longer worth taking.
 
Learned my lesson.

No more first in line for anything.

The advantage and thrill of getting something first comes with a huge risk no longer worth taking.

I find this true. Like those bug-plagued first batch of gadgets that people line up overnight to get. Sometimes good things really come to those who wait. As long as you end up having the item, doesn't matter being among the first as people won't know you were first to have it anyway.
 
I'm wondering why they couldn't send the batmobiles back to HT for credit? HT should have some blame on this, not right for vendors to be left holding the bag.

Has anyone looked under the headlights to see why one side is much brighter than the other one? I'm thinking about trying to fix that just wondering if anyone has looked yet.

That is how it is on the 89 batmobile, it is split.
 
Finally, received and unpacked mine today! No scratches or smears. Brilliant piece of work from Hot Toys. I have no where to put it, I have a destrcutive toddler, and it may have to be packed away again but I enjoying this item for now and am humming the batman theme everytime I look at it!:yess::clap:clap
 
Nice one glad they listened and are sorting out the packaging now. Glad I'm getting mine in later batches now.
 
DarkMagic thanks so much for posting those pics! I was considering taking mine apart for a repaint as I have already done a few modifications (upgraded afterburner LEDs, etc.) but was a little intimidated by it. Seeing your pics have helped a lot in showing me how to disassemble it.
 
Huge, HUGE props to Lee in MI & phobicsquirrel for their advice on reducing the scratches! I just tried it myself and I am VERY pleased with the results! The scratches aren't completely gone, but they sure are better than they were before. Thanks so much for the advice guys!

I will be posting a video in a bit showing the process on my car- But for now, here are a couple of before and after shots. :)


Sallah
 
Glad it worked out for you Sallah!

I know without a complete refilling, buffing and repainting the scratches won't be completely eliminated from the piece but man does it improve it to a stomachable level. The scuffs are all but gone completely. Photos look great!

What do the boys think of the fix?
 
The scratches are still visible enough that it almost doesn't seem worthwhile to use the polish.
 
DarkMagic thanks so much for posting those pics! I was considering taking mine apart for a repaint as I have already done a few modifications (upgraded afterburner LEDs, etc.) but was a little intimidated by it. Seeing your pics have helped a lot in showing me how to disassemble it.

Glad to be of help. :hi5: Of course make sure you lay something soft and thick on your work area (I use a duvet folded in half) to prevent it from getting scratched up when you flip it over to undo the screws. There are six large screws and a little more than 20 (22, 23?) small ones that have to be removed to separate the chassis so keep them in a screw tray or something so you don't lose them. I'm about to Dremel a huge chunk of the front wall of the cockpit off and smooth out the edges. I may glue some faux leather to the seats tonight too if I have enough material laying around and it doesn't make it too thick.
 
The scratches are still visible enough that it almost doesn't seem worthwhile to use the polish.

Well, to each his own of course. :) But in my view- Some reduction is better than none at all. Plus, you have to think that these are closeup views of a large item. In full view, the untreated scratches were pretty visible. After treating them, I can only see them when I get really close.

Sallah
 
DarkMagic thanks so much for posting those pics! I was considering taking mine apart for a repaint as I have already done a few modifications (upgraded afterburner LEDs, etc.) but was a little intimidated by it. Seeing your pics have helped a lot in showing me how to disassemble it.

I want to mod this heavily, like cutout the headrest and put some mesh wiring on it, and have some ideas regarding LED's, BUT I am not that familiar with LED's, since I want to upgrade the dashboard with more lights and have a mini lcd display that would work.
 
I want to mod this heavily, like cutout the headrest and put some mesh wiring on it, and have some ideas regarding LED's, BUT I am not that familiar with LED's, since I want to upgrade the dashboard with more lights and have a mini lcd display that would work.

Yeah, I ever since reading Spanbauer's ideas here, I've been thinking this thing could stand a lot more detailing.

On the real car, there's variations in the paint that give it a metallic feel. The Hot Toys car lacks that feel as its simply one consistent piece of matte plastic. Regarding the "soft" detailing of the actual car, like I said some of that is inherent in the original design but there's much more Hot Toys could have done with what's there. Here's a fantastic photo I found of the actual on-screen car used in the original film, on display during the premiere in 1989. Some details that Hot Toys skimmed over which could have gone a long way in selling this as a highly-detailed collectible:

1. The deeper cuts of the lines in the black details along the side of the car, and their chamfered edges that catch the light and make it feel metallic.

2. The mesh ventilation inside the circle detail on the side of the car, and the rivets that surround it.

3. The small rivets along the panels that cover the machine guns.

4. That extra little lip where the glass meets the metal on the canopy.

5. The see-thru wire mesh in the headrests, as opposed to solid molded plastic.

6. Again, the cloudy variations in the body paint that give it a more gunmetal, metallic feel.

e8420fb3-d240-423a-a19e-1af2.jpg

9417903637_e6b8a8f9fb_h.jpg

I can't do it all at once, but I'm going to do what I can very carefully and slowly. I'll only mod what I am confident to attempt changing. In the end though, I hope to eventually do everything Spanbauer listed, plus craft a pull out cylinder engine, connect the steering wheel to the front steering arm (just because) and maybe even cram a real RC motor under the hood. Not that I'd ever run it (unless I buy a second one)...but just to know it's there. Then, top the whole thing off with a slightly more metallic dark gray, low-gloss, paint job.
 
Yeah, I ever since reading Spanbauer's ideas here, I've been thinking this thing could stand a lot more detailing.


I can't do it all at once, but I'm going to do what I can very carefully and slowly. I'll only mod what I am confident to attempt changing. In the end though, I hope to eventually do everything Spanbauer listed, plus craft a pull out cylinder engine, connect the steering wheel to the front steering arm (just because) and maybe even cram a real RC motor under the hood. Not that I'd ever run it (unless I buy a second one)...but just to know it's there. Then, top the whole thing off with a slightly more metallic dark gray, low-gloss, paint job.

One thing I am curious about is where the machine gun covers sit, on my 1:18 scale, the half circle design on the mattel has like something that kind of looks like mesh was supposed to be there, but on the 1:6 scale is just carved all black with no detail on it. Mind you could also replicate the pull out engine on the 1:18 and base it off that idea.

If I buy a second one of these, I might put an RC engine on it with working flames and add a soundboard on the vehicle for machine gun sounds and the 1989 engine sound, or the batman returns jet engine noise.

Haha, believe it or not, I was looking into that too. There are a few hard-core RC enthusiasts who made working afterburners, but they're mostly for RC jets, and way too powerful to even look right on the Batmobile for the 3 seconds after you turn it on before it turns it into a puddle of melted black plastic. :lol

[ame]https://www.youtube.com/watch?v=nEKQ6BEe2qI[/ame]

[ame]https://www.youtube.com/watch?v=gg98qIR9gSg[/ame]
 
In using polish to reduce the light scratches in mine I've found that the car takes on a slightly uneven finish that looks much more realistic and less like plastic. The downside is it becomes slightly blacker and shinier, losing the dull gray sheen these come with. I like the look although it is not entirely authentic to the actual car and I'm probably going to do this to the entire body of mine. If I wind up not liking it I can always repaint it. Not sure if I'd go back semi gloss or all out flat black.
 
Here's the video I made showing the Scratch X being used to reduce the scratch issue. While it didn't remove the scratches completely, it did at least lessen them to the point where they don't bother me quite so much. :)

[ame]https://www.youtube.com/watch?v=tYx-JT9aa4M[/ame]

Sallah
 
Back
Top