Building a Better Boba (3-3/4 inch scale)

Collector Freaks Forum

Help Support Collector Freaks Forum:

This site may earn a commission from merchant affiliate links, including eBay, Amazon, and others.
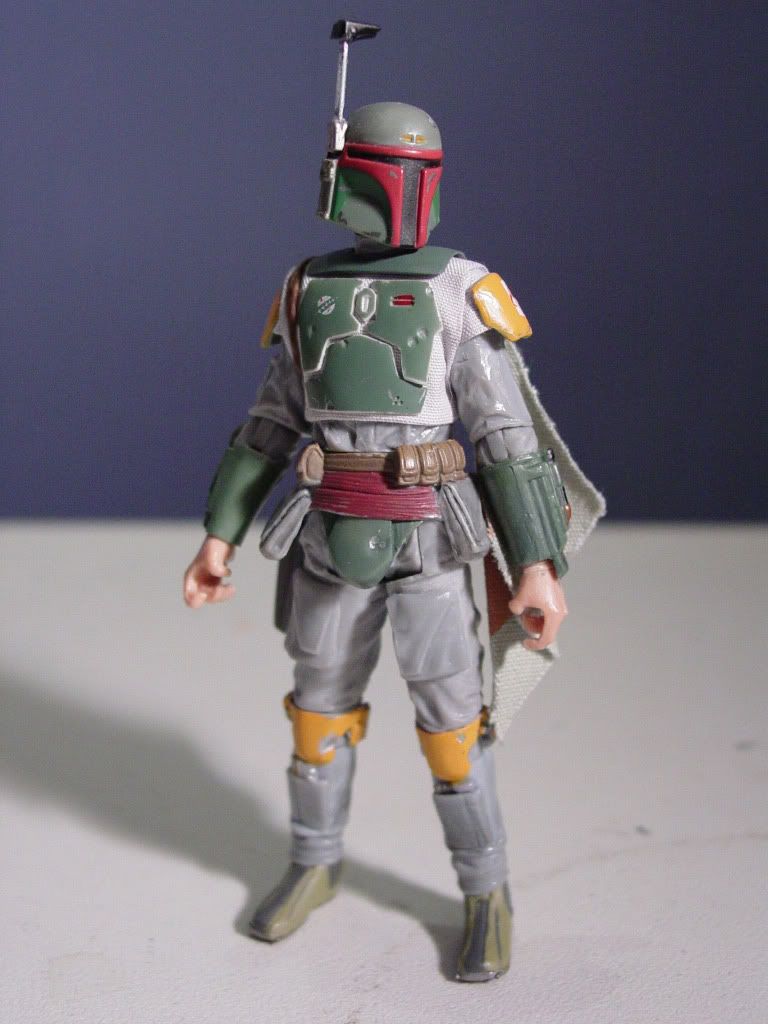
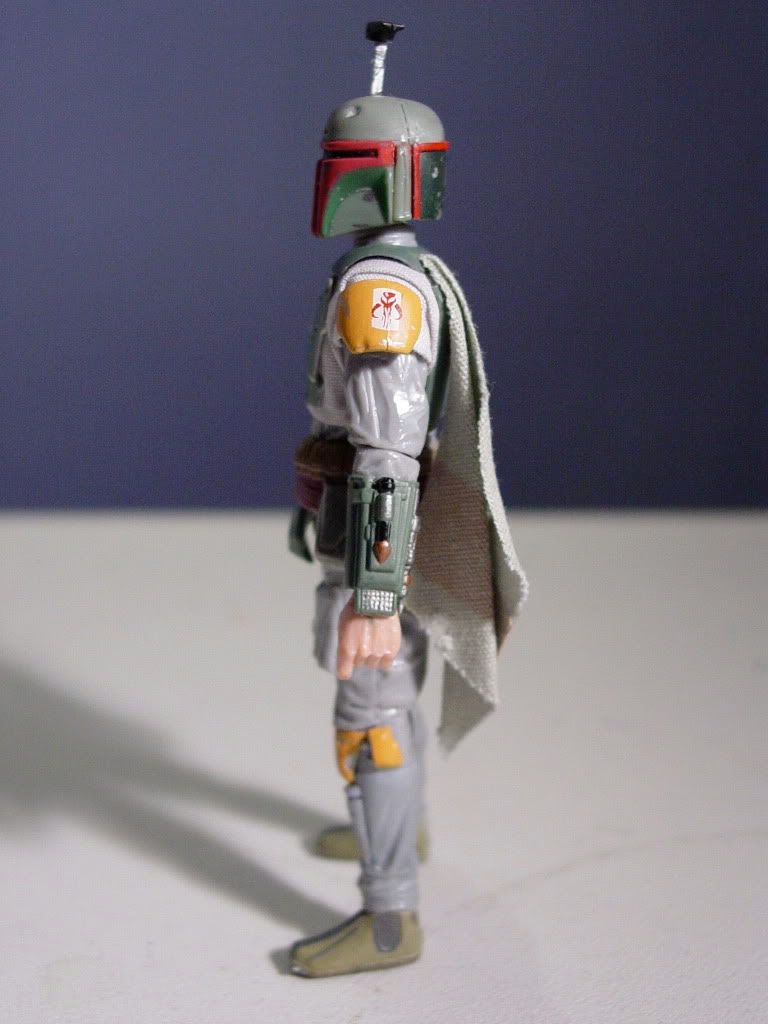
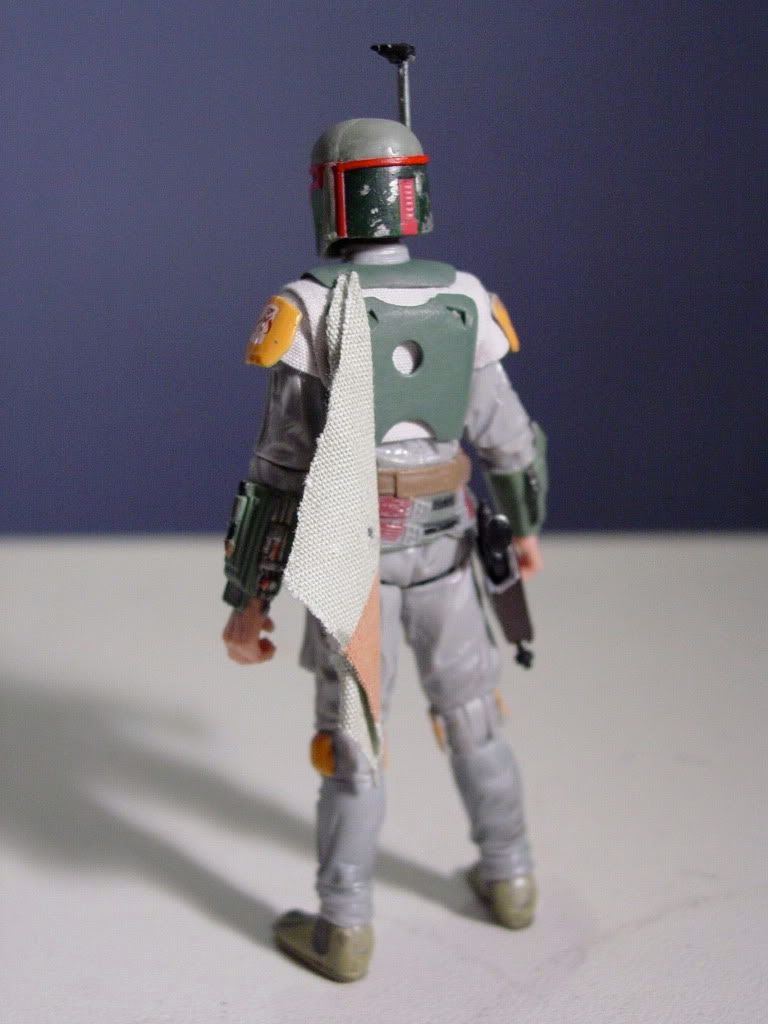
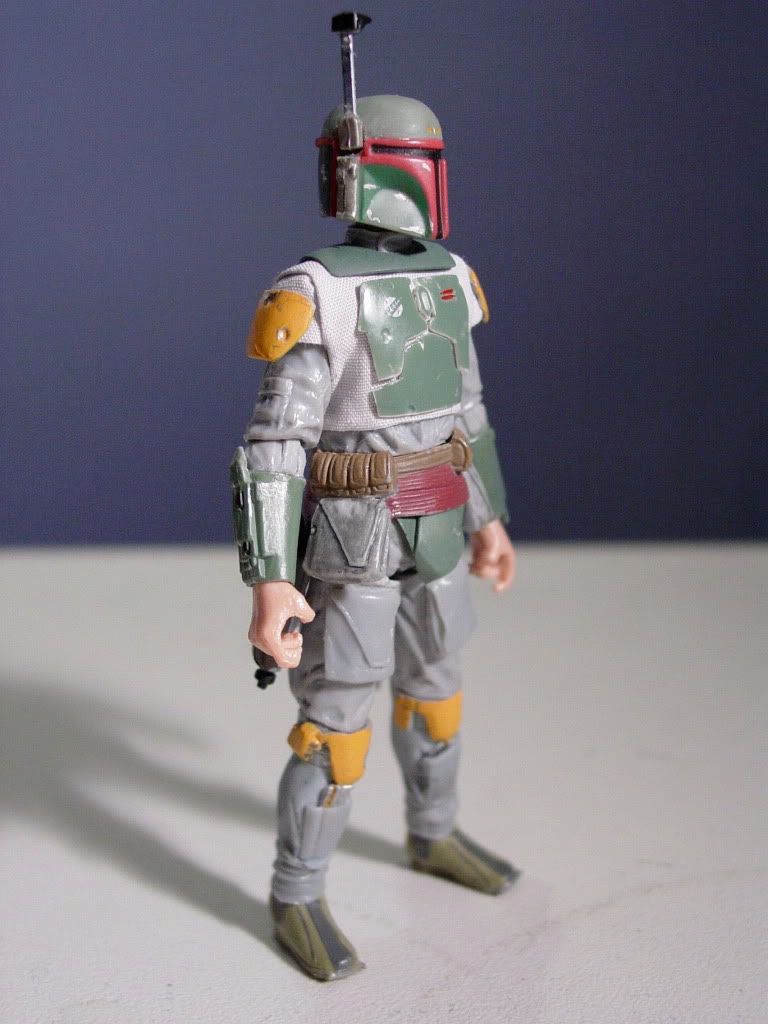
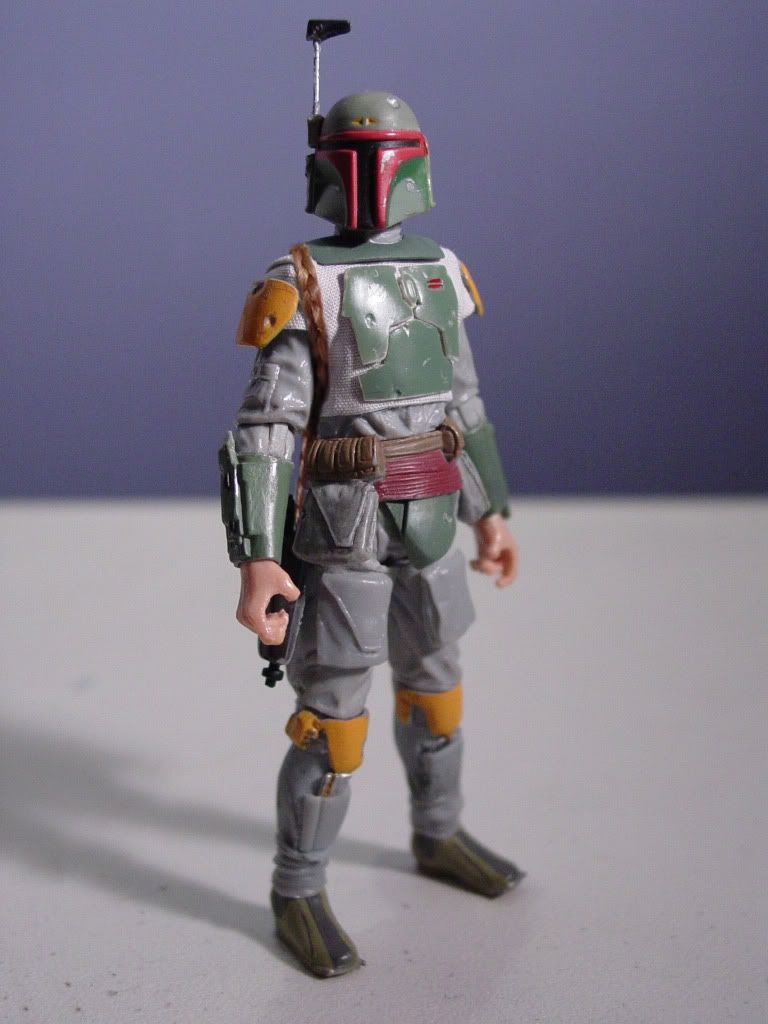
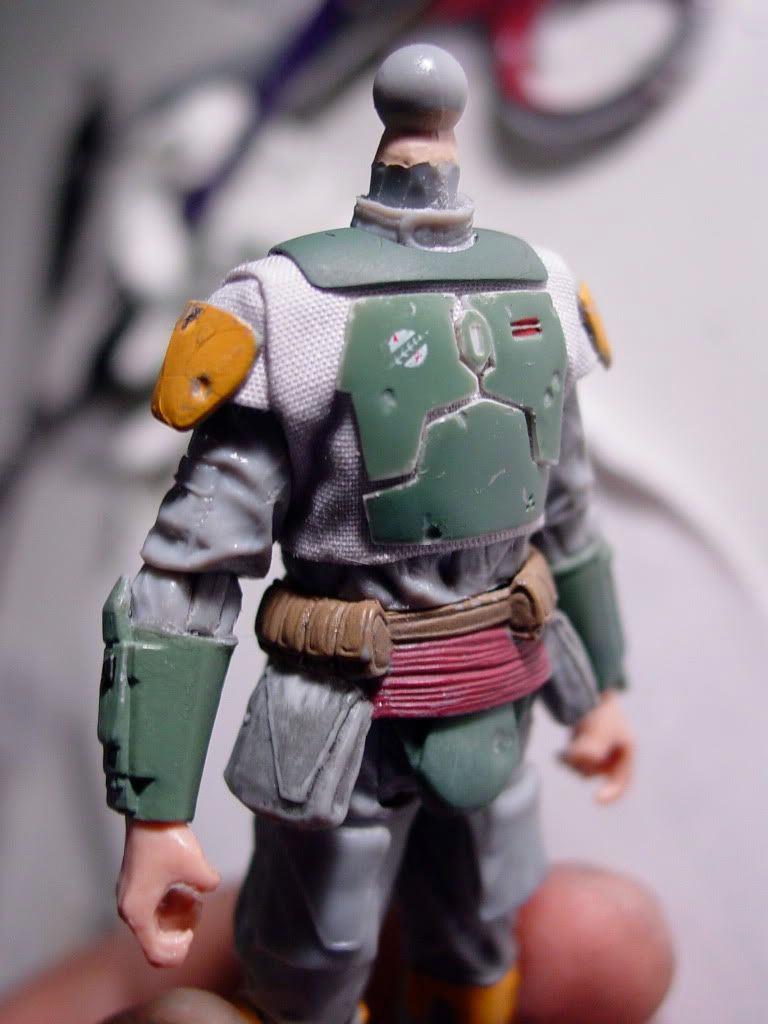
FINALIZING THE ARMOR

I needed to make all of Fett’s un-painted armor its final color. As usual, what I estimated to be a quick operation took me all night:

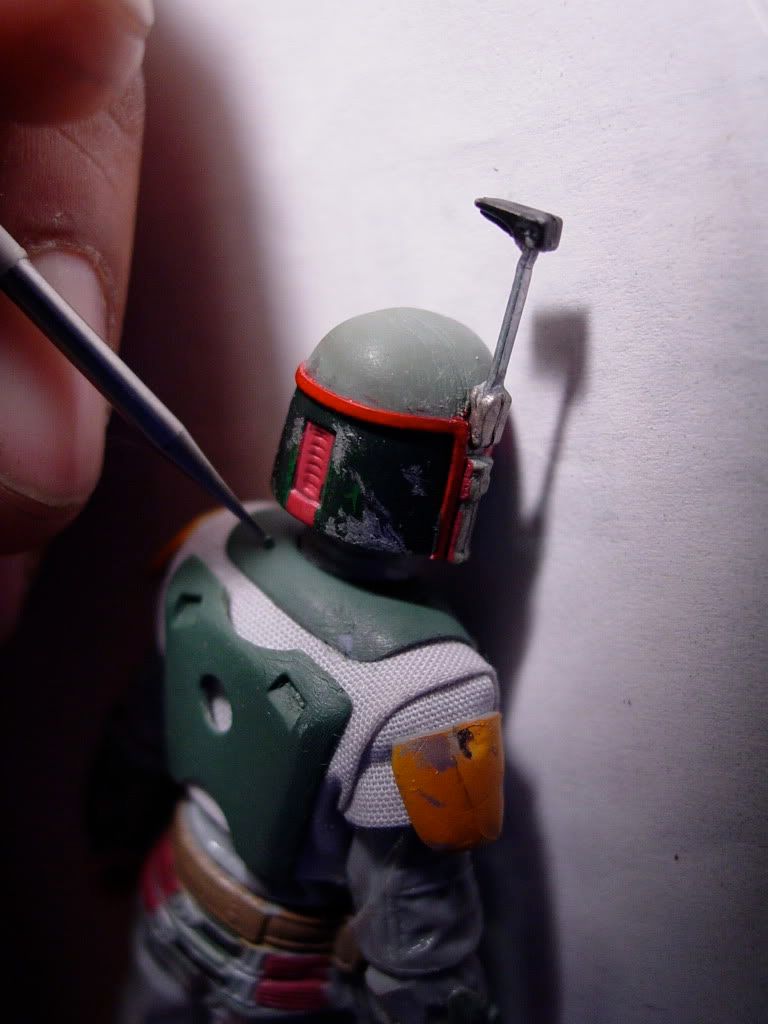
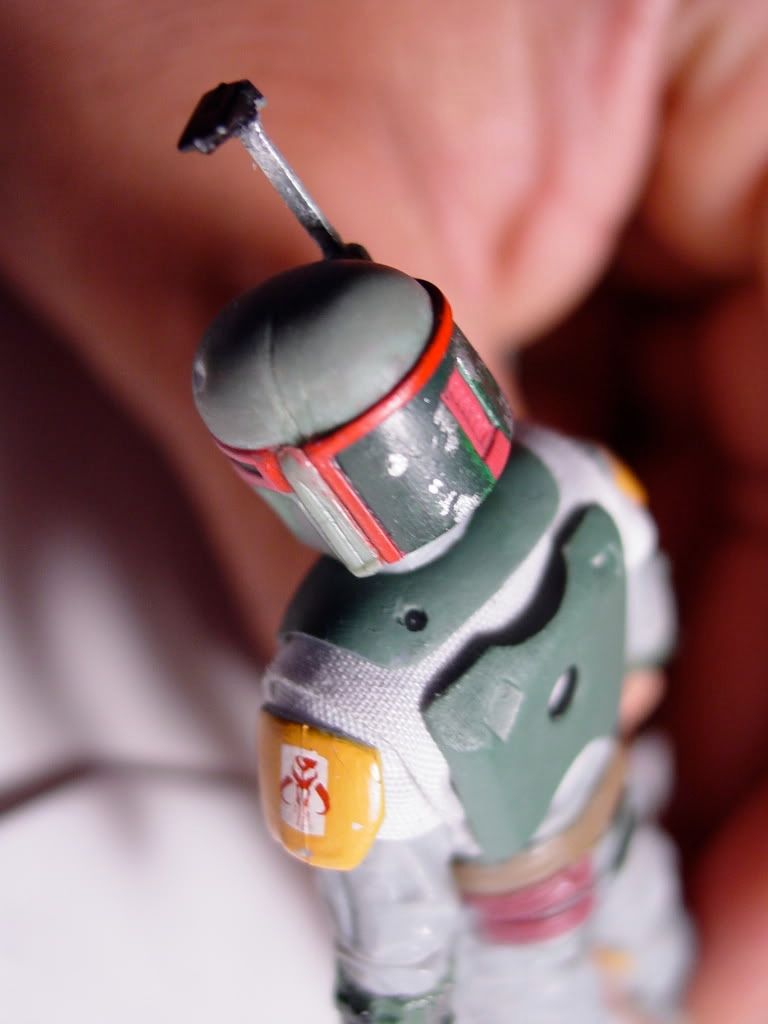
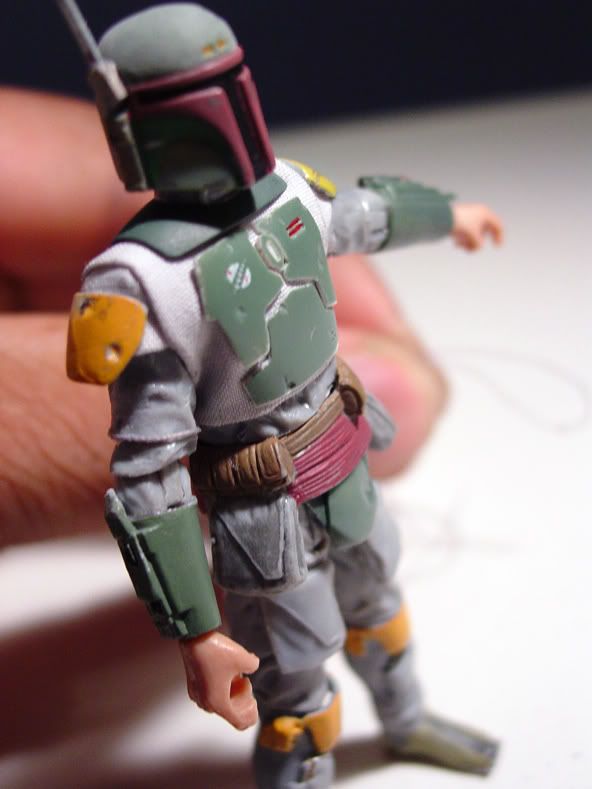
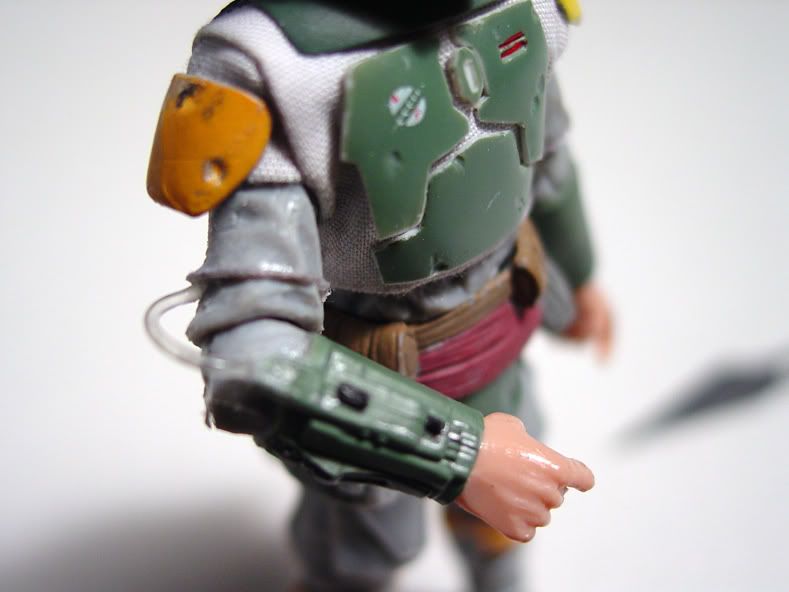
The collar armor, back armor plate (backpack mount), and crotch armor all needed their final paint job to match the torso armor plates (factory-painted at Hasbro).

DSC01305.jpg


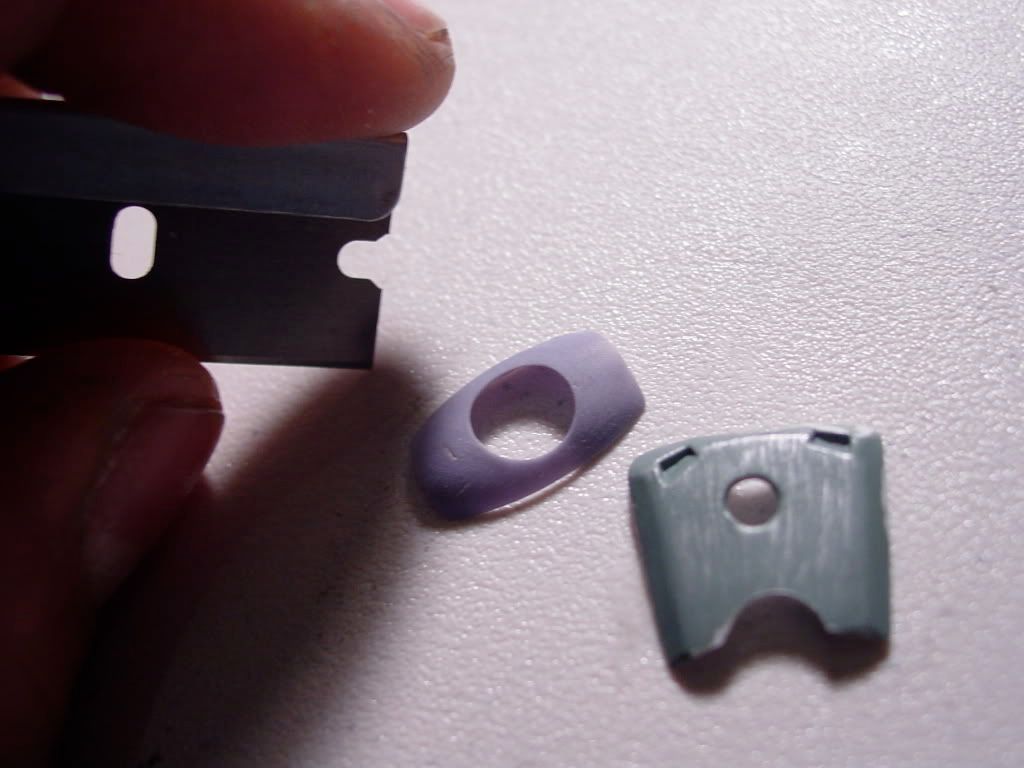
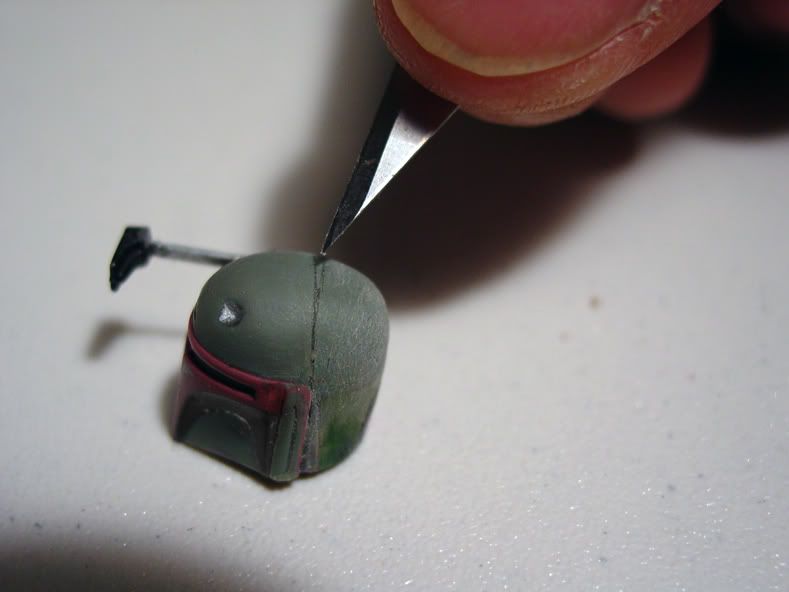
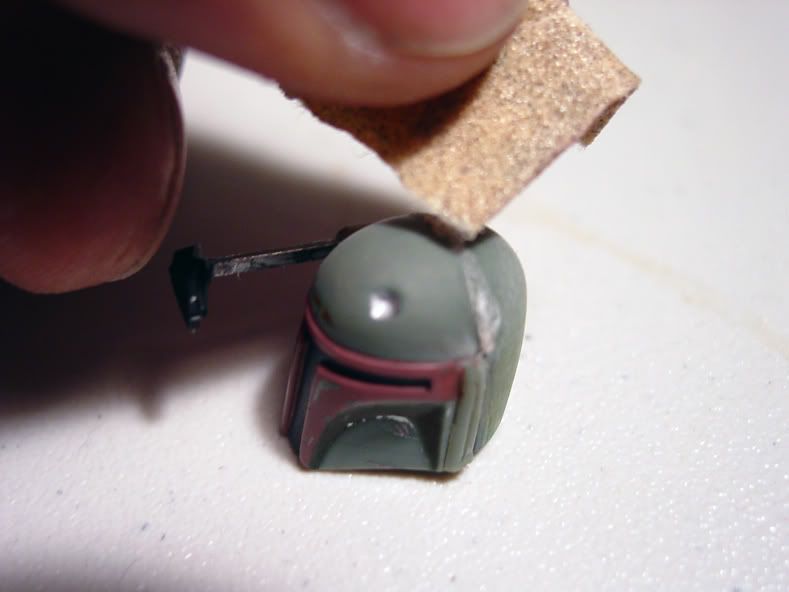
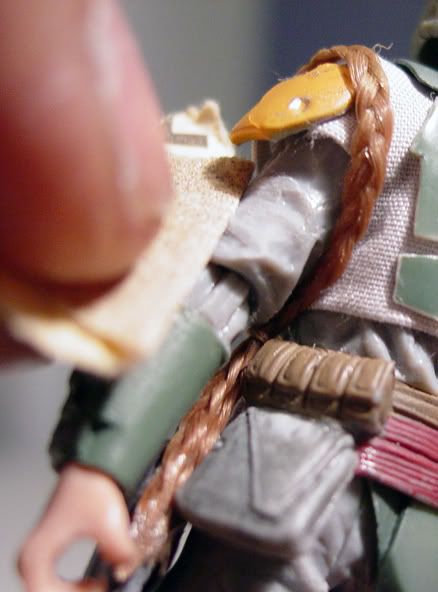
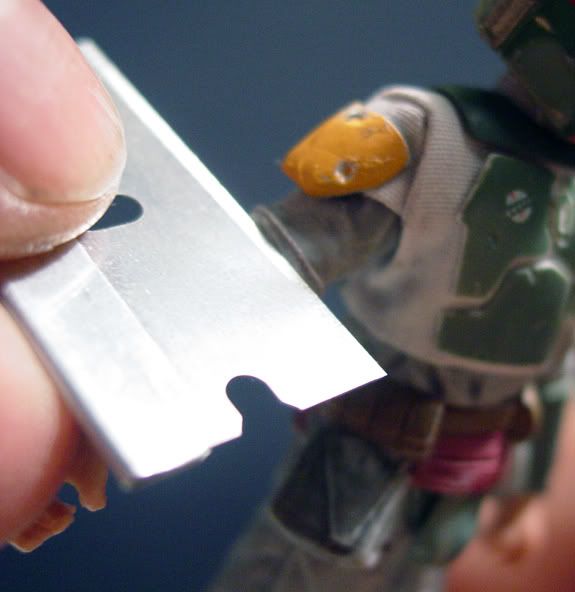
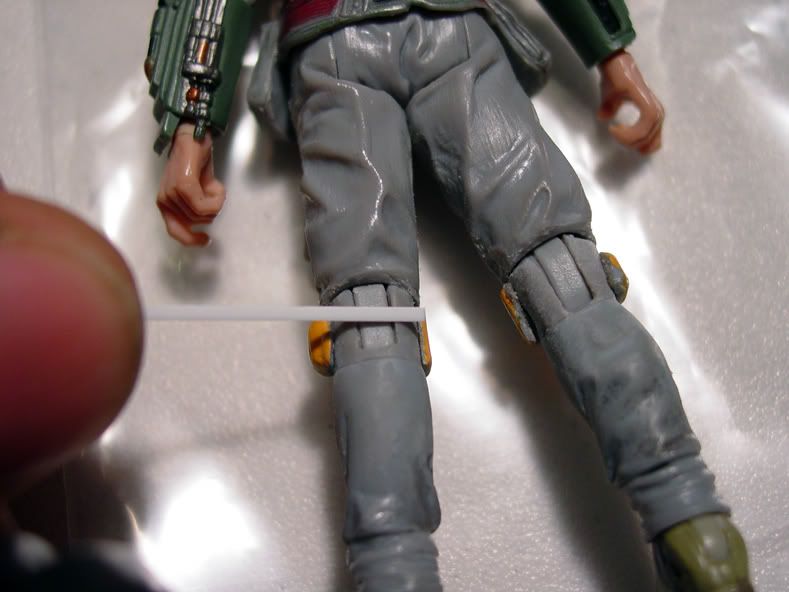
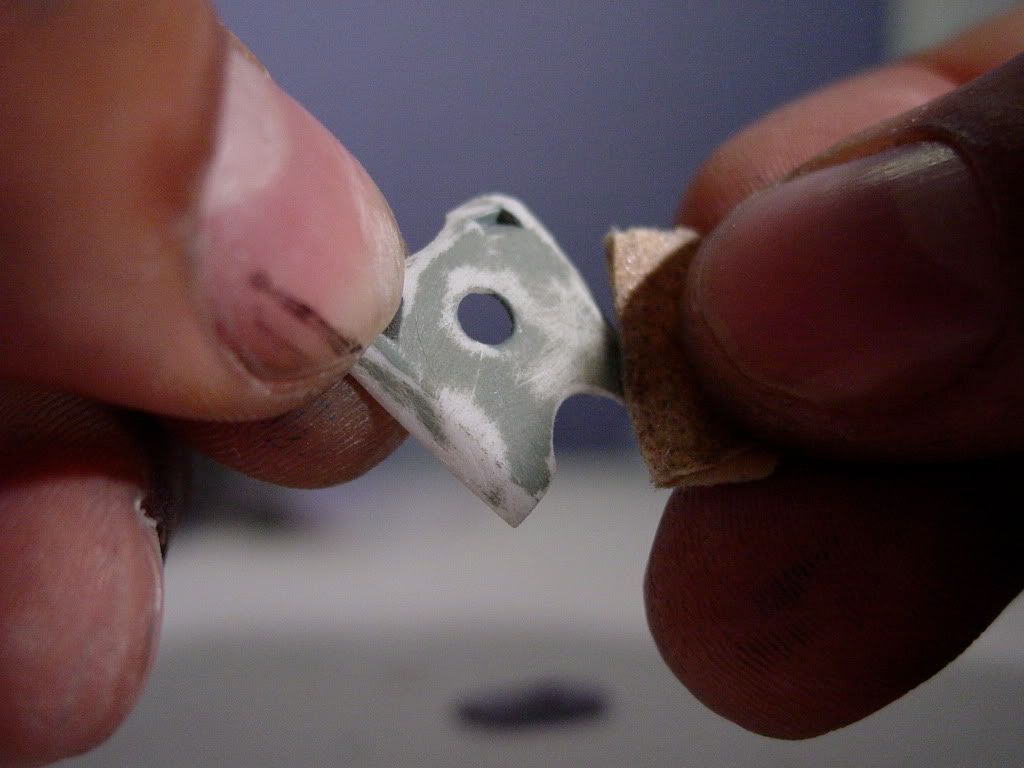
The collar and back armor pieces needed prep by having the original factory paint carefully sanded off by hand.

DSC01306.jpg


DSC01307.jpg


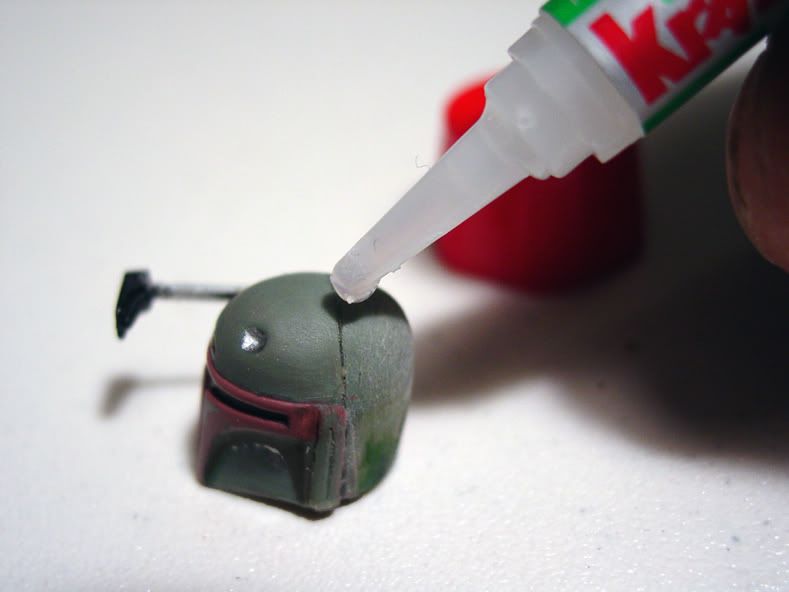
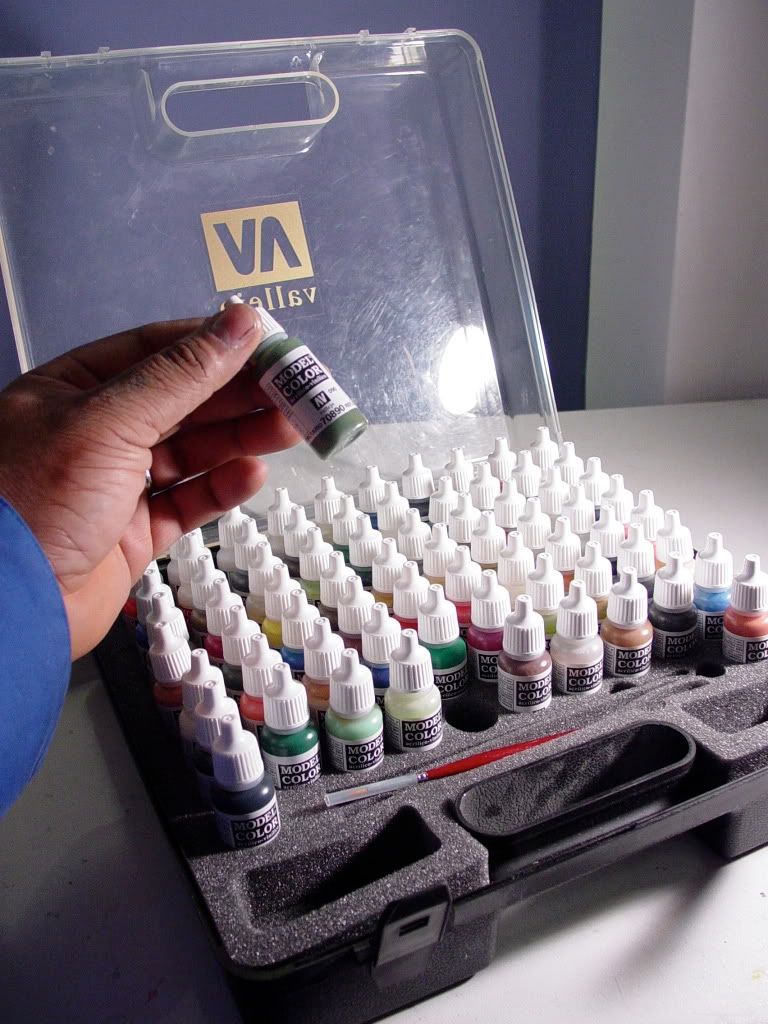
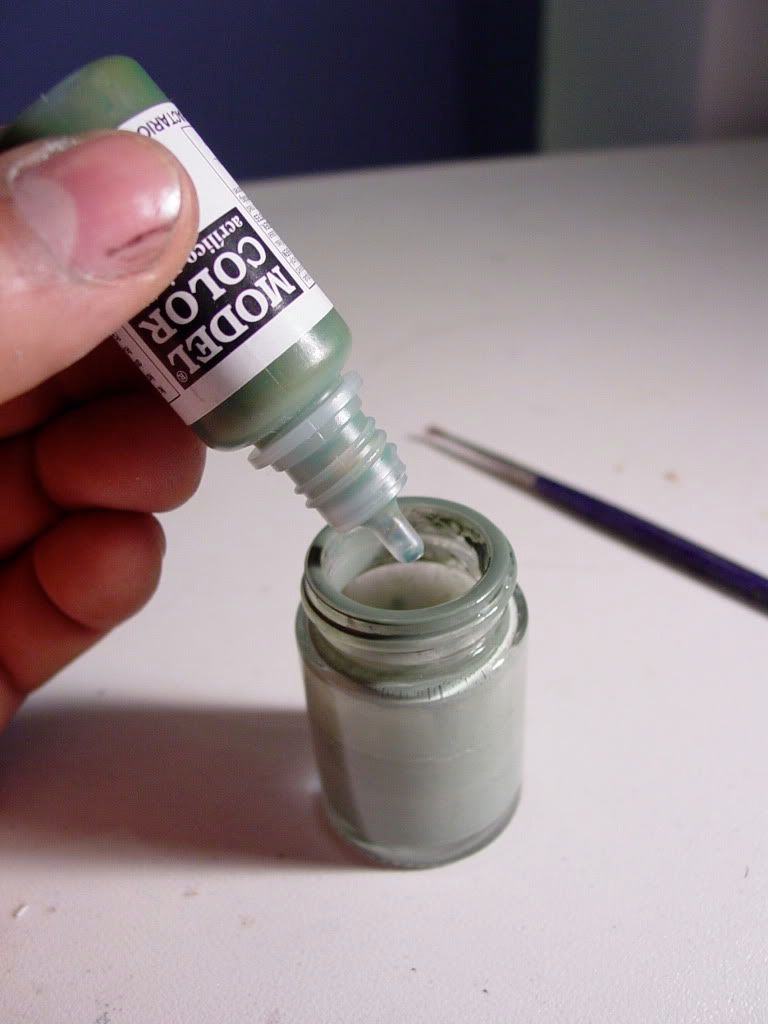
Next, I used the Hasbro painted torso armor pieces as color reference to mix the paint for the collar, back, and crotch armor.

Using my Valejo hobby paint set, I was able to mix up a VERY, VERY close duplication of the flat green for Boba’s armor.

DSC01308.jpg


DSC01309.jpg


DSC01310.jpg


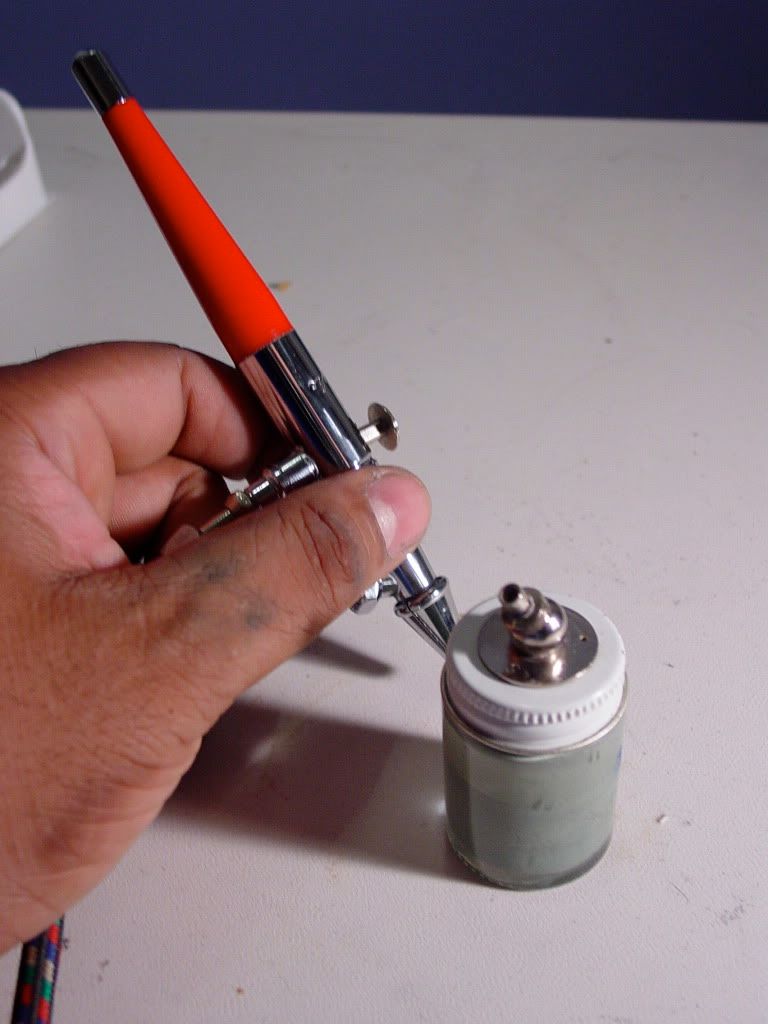
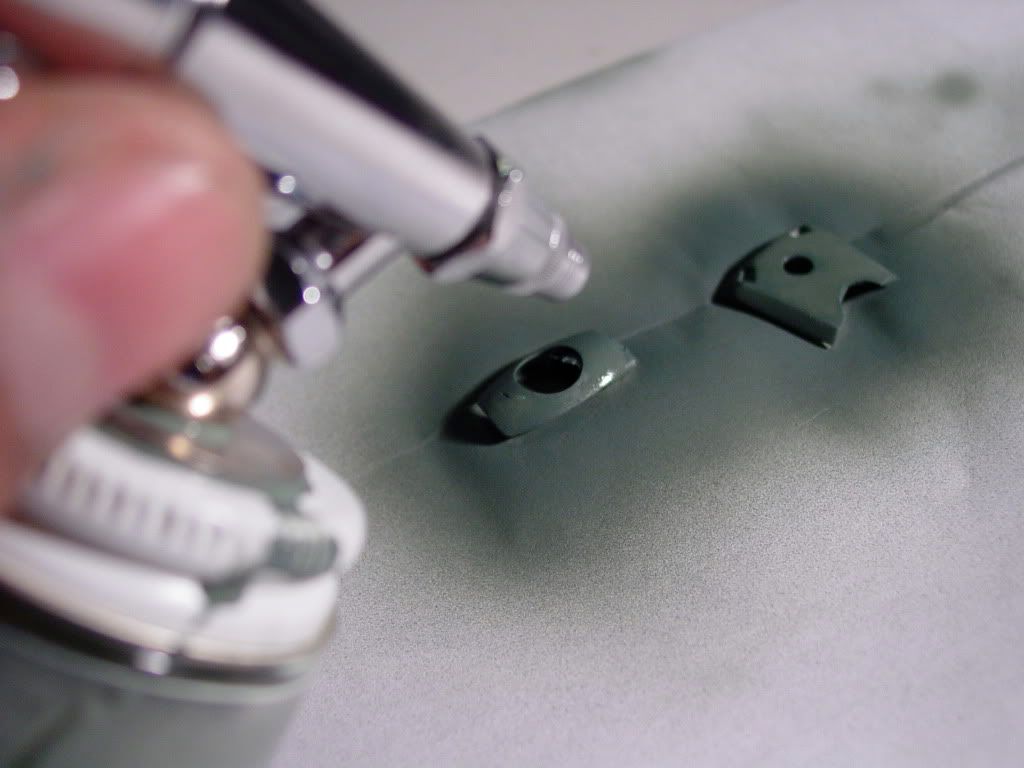
I loaded up my airbrush and went to work.

DSC01312.jpg


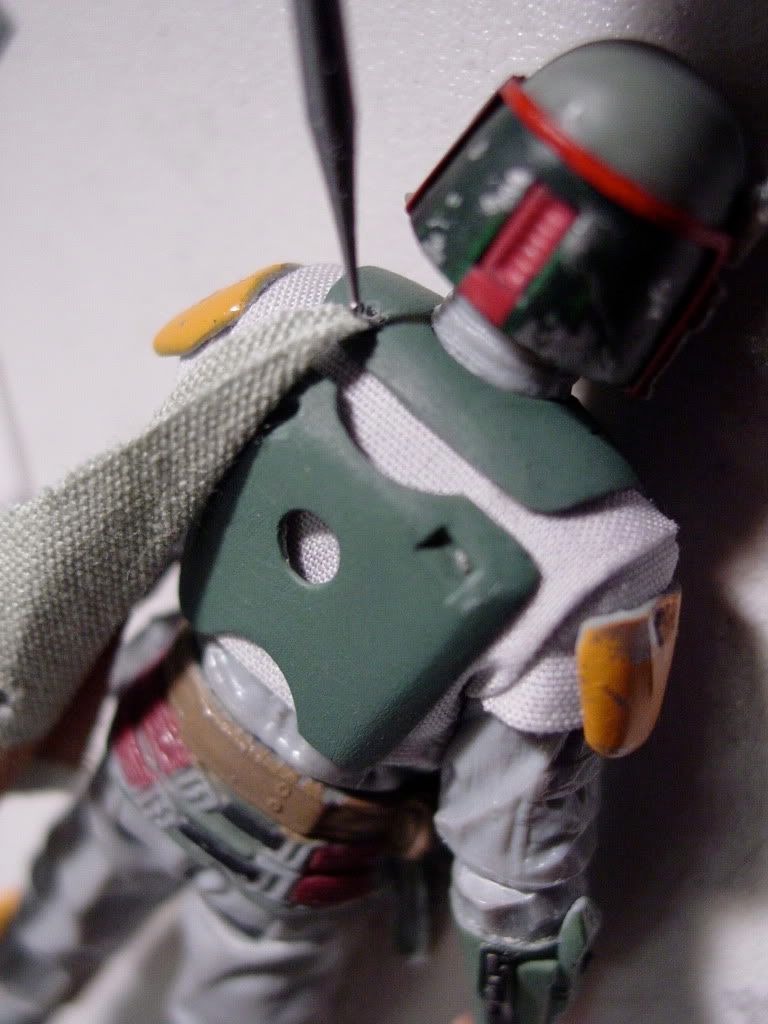
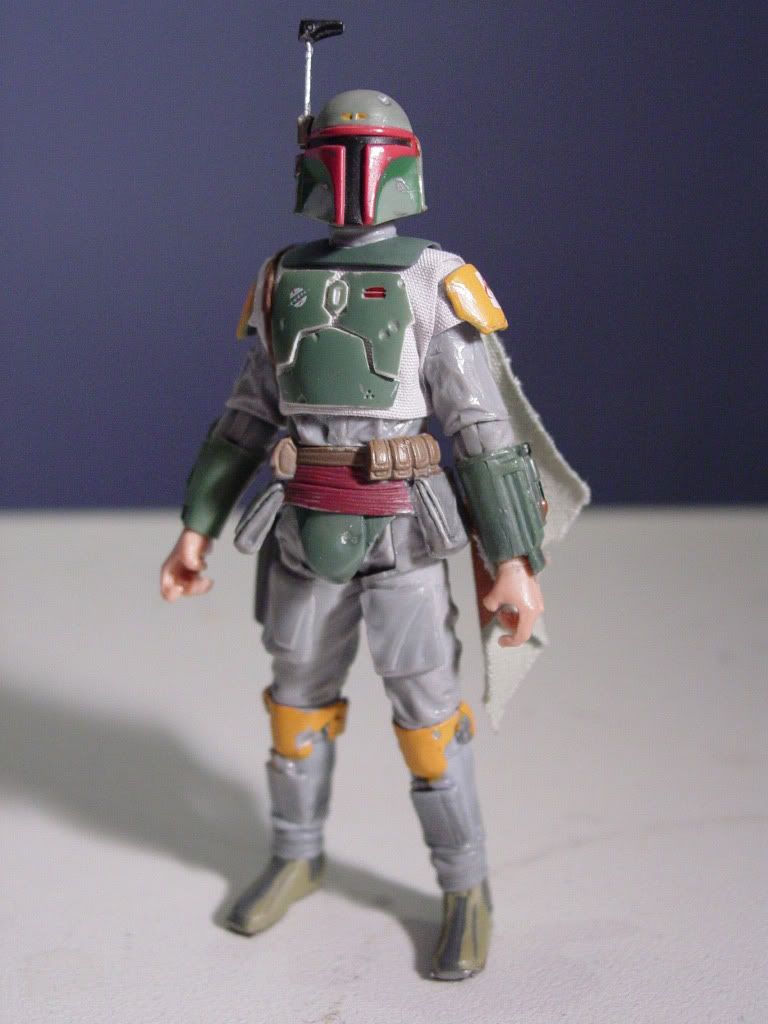
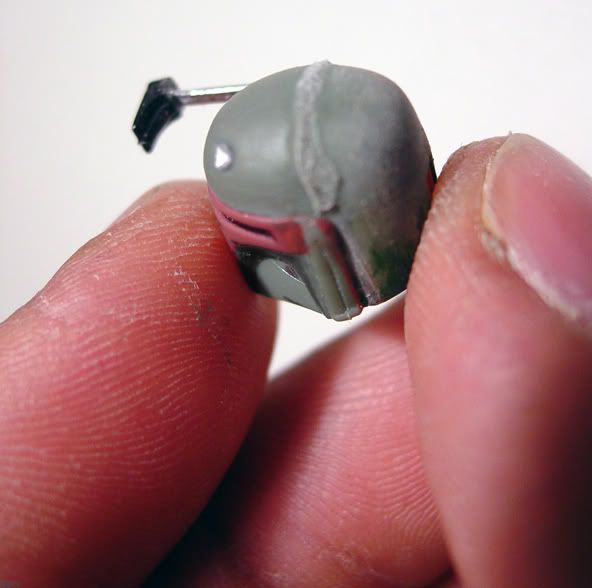
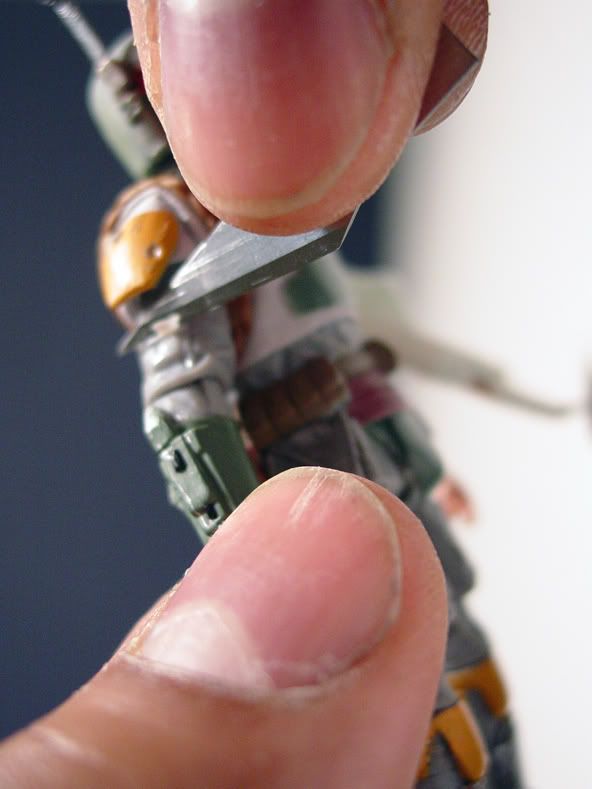
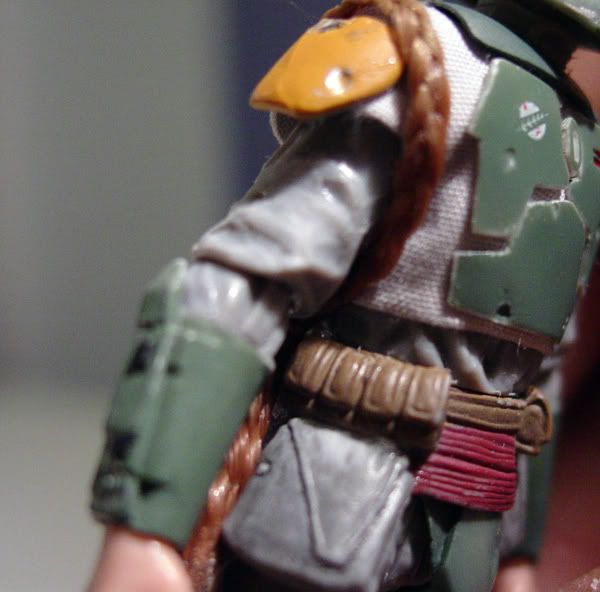
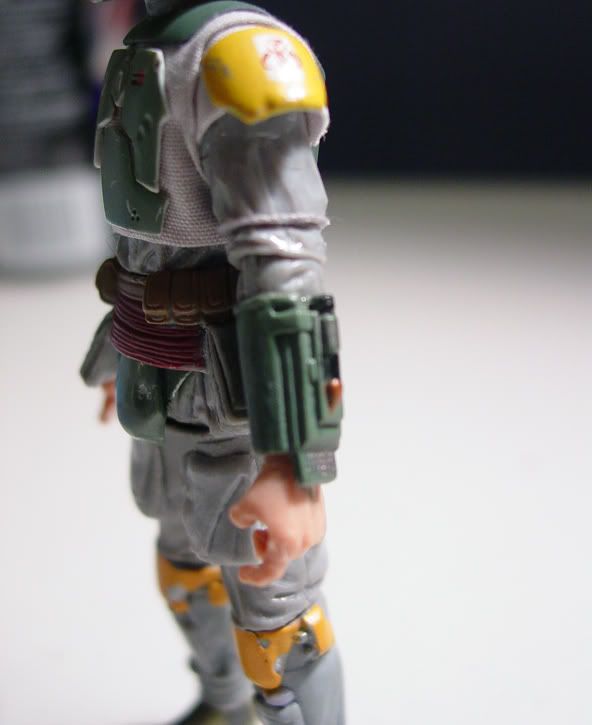
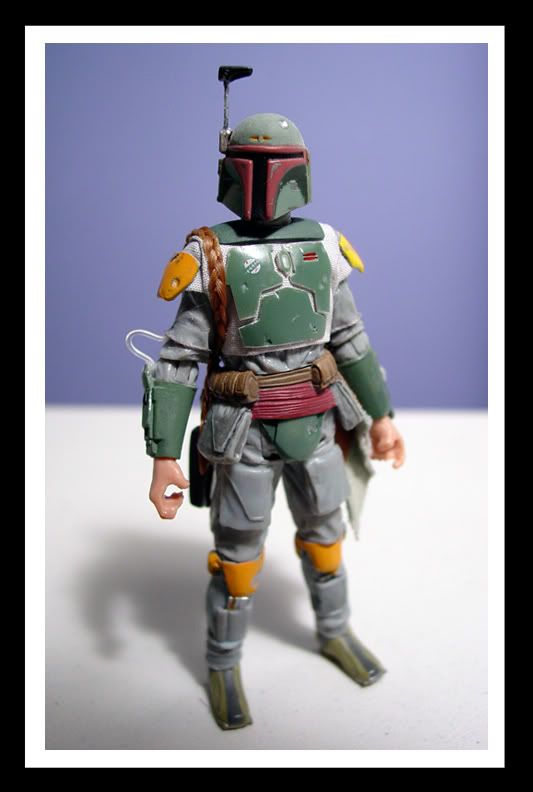
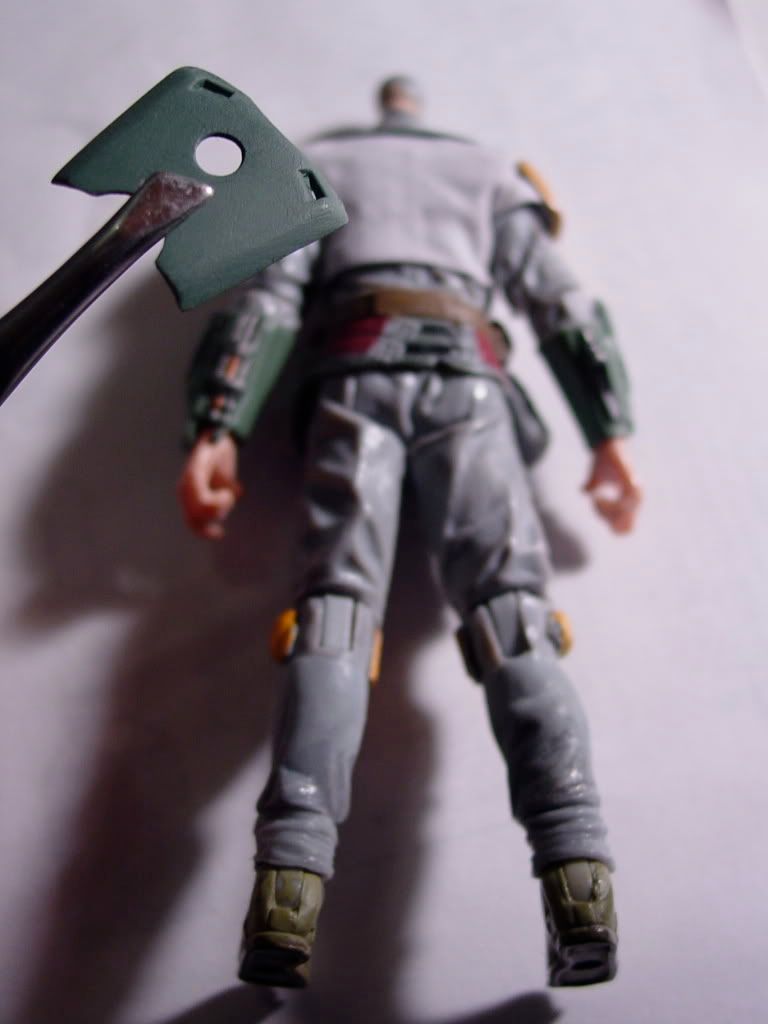
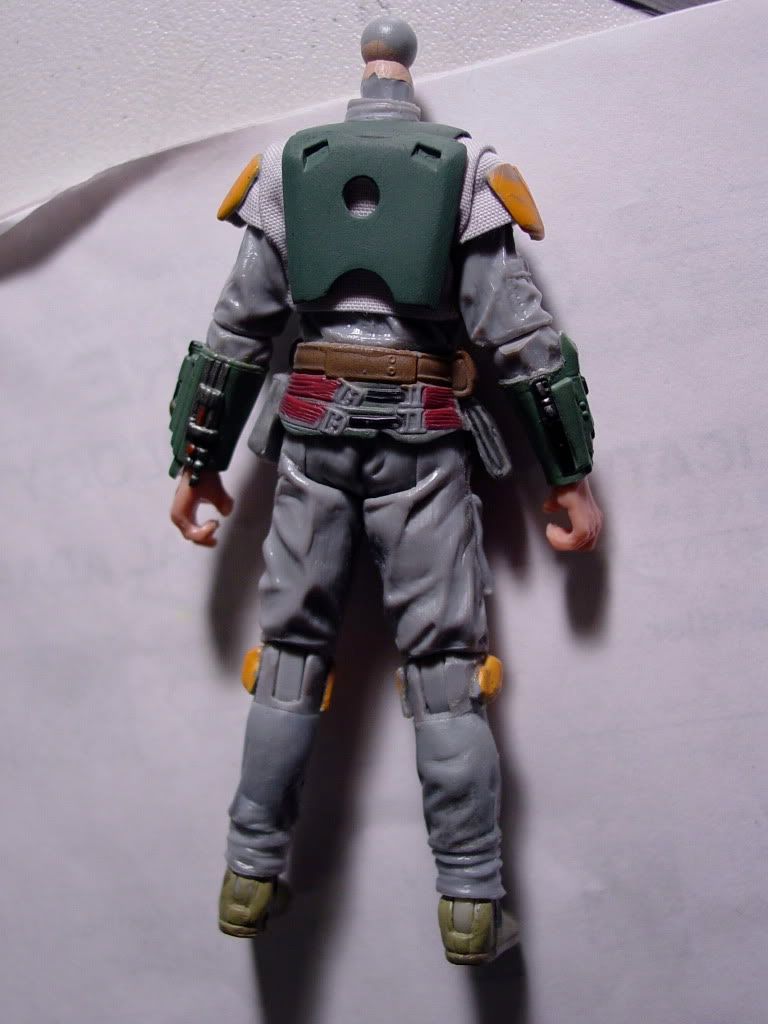
Once the newly painted armor pieces were dry, I placed them back onto the figure and checked their final color accuracy under a white light against the Hasbro factory painted torso armor pieces.

DSC01314.jpg


DSC01315.jpg


DSC01317.jpg
 
I drilled a tiny hole into the back of the collar armor to accommodate Boba’s side cape, and cut the fastening lead of the cape into a very fine point. I applied some glue, and then inserted the cape into the hole in the armor.

DSC01318.jpg


DSC01319.jpg


DSC01320.jpg
 
A quick series of photos to check the color accuracy and quality of Boba’s new armor paint-job before the gloved hands and final detailing complete this figure.

DSC0132605-39-41.jpg


DSC0132505-39-41.jpg


I love how this photo demonstrates the preservation of this figure’s slender build despite the addition of the soft-goods flak vest and the torso armor pieces.

DSC01327.jpg


DSC01328.jpg


Without wookie scalps…

DSC01330.jpg


DSC0133105-39-41.jpg
 
Impressive. Most impressive!

I'm not a huge fan of mixed media softgoods/plastic, but there was likely no other way around adding the armor pieces. The PotJ 300th Boba is by far my favorite. I too prefer the less colorful ESB version of the character. I never realized what an injustice even the best Hasbro version of this character is until you shared this project with us. Can't wait to see him with his backpack on!

It's a wonder you have fingers still!
 
what an awesome walkthrough! 3 3/4 SW figures were my original toy collection passion. and I TOO am not satisfed with any boba fetts hasbro has produced! BUT THIS , this is an awesome little fett u put together!! put me down for one haha! great work darklord!
 
Wow, wow, wow! :horror

Awesome work! It's hard enough doing one in 1:6 scale. That's some serious work and alot of focus!

my hats off!
 
Wow, what a ridiculous build! Looks really awesome, and the amount of work and dedication this took is staggering :google

Can't wait to see the finished figure :duff
 
I've been following your progress over at Rebelscum and MAN... this is the most awesome Boba custom I have seen to date! Outstanding work...
 
This thread is fantastic. Both the breakdown/analysis of the previous Fett offerings, then the step by step process of making the perfect 3 3/4 Fett.

Really amazing.
 
As most of you know, my camera was down for about a month, preventing me from documenting some of my work on this figure.

I was therefore unable to document some progress steps that occurred during the camera’s repair time.

Since those updates on the figure will be evident in the photos that I’m about to post anyway, I will list what those updates were.

1) The rangefinder on Boba’s helmet was shortened by about 2½ scale inches.
2) The cheek stripes on the helmet were re-painted in the correct flat black.
3) The T-visor on the helmet was re-painted in a darker shade of red. (Note: this T-visor re-paint was something that I was originally NOT planning to do . But admittedly I did change my mind about the desirability of the “toyetic” bright red after I saw it contrasted against the new flat black cheek stripes.
4 The minor paint rubs on the utility belt have all been touched up.
5 The armored shoulder bell for Boba’s left shoulder has been re-painted in the correct canary yellow. Knee pads and right armored shoulder bell have been left orange yellow.


Alright… onto to yesterday’s work…

A couple of months back when I performed the operation to change the profile of the figure’s helmet, I did a lot of filling work with plastic shavings to fill the gaps between the two helmet halves.

There was still a seam visible from the operation that I wanted to make disappear.

Helmetseam.jpg


I began by using a line of Krazy Glue. I laid down a sealant directly on the seam, and waited for the glue to dry and set.

Helmetglueseam.jpg


Helmetseamfilled.jpg


Once the glue dried and hardened, I sanded the seam smooth with 500 grit sandpaper, and then I did a fine wet-sanding with 1000 grit sandpaper to make the dome as smooth as possible.

Helmetseamsanded.jpg


I will air-brush the dome tomorrow, once and for all, effectively making the seam vanish.


Undoutedly, the most time-consuming operation I performed yesterday was converting the Imperial Scanning Trooper’s arm sleeves into Boba Fett’s correct double sleeve (sans arm mini pocket).

The first thing I did was to use an X-acto blade to carefully shave away the mini-pocket molded to the right arm. I gave the area a fine sanding to smooth it off, and then I got to work making the upper arm double sleeve.

shavearmpocket.jpg


sandarmpocket.jpg


smootharm.jpg
 
I used some sewing thread to layout the edge of the upper sleeves by carefully gluing it down around the circumfrence of both arms. Then, with my trusty razor (God, what would I do without that thing?) I re-sculpted the lower sleeve into a narrow taper that appears to emerge from underneath the upper sleeve.

thread.jpg


threadloop.jpg


threadaroundrtarm.jpg


rightarmthreaded.jpg


rightarmsculpt.jpg


finishedrightarm3.jpg


threadaroundlftarm.jpg


leftarmthreaded.jpg


leftarmsculpt.jpg


Finishedleftarm.jpg


The guide thread at the edge of each new upper sleeve is only TEMPORARY. They will be replaced by micro-thin ribbon to simulate the sleeve cuffs.
 
Boba’s right arm weapon gauntlet features a clear power tube that tucks underneath his right arm upper sleeve.

I used a big needle to make a hole underneath the upper sleeve ridge that I created. I then made a second hole in the coupling on the wrist weapon gauntlet. These would be the two connection points for the gauntlet’s power feed tube.

bigneedle.jpg


needletosleeve.jpg


I looked around the house for a suitable item to use as the tube. A tiny white / clear plastic binder on the bundle of new sox that I just bought was something that I thought might do the trick. In the end, I rejected it because it did not look like a tube to me, it seemed a bit small in its scale, and it did not have the flexibility I was hoping for. It kept popping out of the sleeve connection point every time I posed the figure’s elbow.


sox.jpg


soxtab.jpg


installwrongtube.jpg


I knew I was going to need a far more flexible material to resolve that issue.

A frantic search ensued in my wife’s closet, and as luck would have it, I located a brand new cashmere sweater that my wife bought for herself. The tag was still attached to the garment by a small clear rubber string! Yes!! Back in business.!!!

I cut a fragment of the string and installed it on the figure. The thicker size, the clarity, and the flexibility of the “tube” were all PERFECT!!


finaltube.jpg


finaltubecut.jpg


guantlettubeinstalled2.jpg
 
My next order of business was to add the straps for Boba’s armored knee pads. A reasonably straight-forward operation. I used some Plastruct strip styrene to create the straps and glued them into place behind the knees, making sure that the leg articulation was un-affected.


kneestrapmeasure.jpg


settingkneestraps.jpg


finishedkneestraps.jpg


So… a brief re-cap…

1) Helmet’s face colors have been corrected to correct shades
2) Helmet’s rangefinder has been shortened to correct height
3) Utility belt paint rubs have been repaired
4) Armored shoulder bell for left shoulder has been re-painted in correct yellow
5) Helmet seam has been filled and sanded (awaits air brushing)
6) Arm pocket has been shaved off / arm sanded smooth
7) Secondary upper sleeves have been layed-out and sculpted for both arms
8) Power tube for right weapon gauntlet has been installed
9) Rear fastening straps for armored knee pads have been installed

Custom Boba as of January 9th, 2011, 7:30 AM:

customBobaright.jpg


Coming up next: WOOKIE SCALPS

microbraids.jpg
 
This is absolutely one of the craziest things I have ever seen... but honestly it is looking really badass :rock
 
Back
Top