Devil_666
Super Freak
^^^Your sig is messed up man.


Yeah, the dissappearing headcover has been mentioned before; I just assumed that the facehugger somehow managed to get it's fingers under it. There's also one or two behind the scenes shots of John Hurt on set minus the helmet but with the headcover on, and the chinstrap is left undone. Maybe that's how it fell off and Ash & Dallas retrieved it when cutting off the rest of Kane's suit in the infirmary. Either that or it was just a plain error.
That reminds me of Batman. In either Burtons films or Nolans you never see him wiping off his black eye makeup when he takes off his cowl. Check out the scene in Batman Returns where he tries to persuade Catwoman from killing Max Shreck near the end. He's in full Batman garb, shrouded eyes 'n all - he rips off the cowl and by magic - no trace of eyeliner. Sorry to go off topic.
Well done, P@CK@R@CK!
But it sounds like a small nightmare for those of us without a soldering gun.
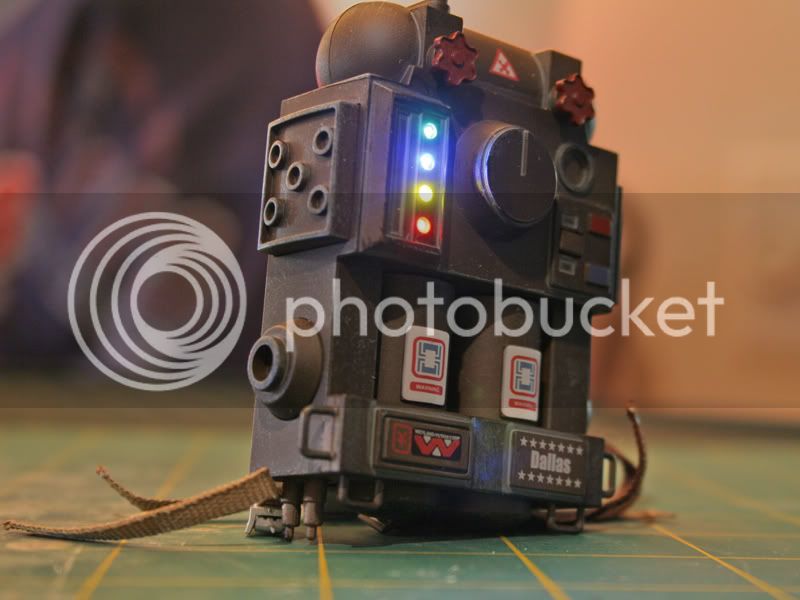
Are the LED's actually colored or are they all white with colored gel to make the colors? Sounds like they may be colored lights inside the pack.
As much as I crave accuracy, this might be one change I do not attempt. Considering how few times I will actually have the pack lights on once the figure is in the display case, I think I might have to let this inaccuracy remain (although it will always drive me nuts when I turn them on).
Take a look on the RPF, there's a thread following the building of a very accurate replica of the spacesuits... which also contains some fantastic reference pics of the original props e.g https://therpf.com/showthread.php?t=34659&page=15 and
https://www.flickr.com/photos/41111968@N00/sets/72157603574286453/
Tony

Enter your email address to join: