Hot Toys Bruce Wayne/Batman (2011 Toy Con Ex) review + pics

Collector Freaks Forum

Help Support Collector Freaks Forum:

This site may earn a commission from merchant affiliate links, including eBay, Amazon, and others.
HAVE you tried twisting the pegs in ? instead of pushing in ..they will just go just takes some tryin and patience or someone with good dexterity in fingers ...i have weak finger muscles and had friend atach them.....but go in easy after once applied if come out later on......

Thanks for the advise but Maglor is right, i'm not even going to bother anymore with the stock :nono

I mean seriously, how can a company known for accurate representations not get Batman's cape right in both material and attachments in the first place! :dunno

Batman figure after Batman figure they've dropped the ball on one of the main components that makes Batman...well.....Batman, his damn cape :dunno

It's not like they got it wrong only the first time, it's over and over.

Why doesn't HT just hire Lforigno for their cape designs :lol


Odd if you ask me.
 
sorry to hear dont like the cape ..I THINK im one of the only ones that is happy with it....I may get a custom cape later on for 2nd bale batman project later, but like to keep all original......and still gonna pick another one of these capes later on off evilbay.. the only thing about the custom i dont like is no liner with it ,but you get a more dramatic look with the longer cape... hot toys should gives us 2 capes with next release ...short and long
 
All I did was pull the new cape up around the hole for the neck, and then
just pressed the head into position. The cowl is the only thing keeping
the cape on. I don't miss the clips but I can see how not having them there would bug some people.

I can adjust how the cape sits on the shoulders just by decapitating Batman and futzing with how much of the cape is being held in place
with his head. (har har har)

I hope that helps! If you skip back a few pages you should see some pics I took just a few days ago.

thanks man Going to try that. I see most of the people putting the custom cape on without the clips. When i got mine i didnt know how so i made holes lol
 
I think the "proper" way IS to make yer own holes and use the clips that way. I just wanted to get the cape on him quick to see how it looked, and I was satisfied with how it looked, despite my "quickie" method.
 
How do you put the Custom cape on without the cape clips? Can someone help me. Pm me. would really appreciate that

All I did was pull the new cape up around the hole for the neck, and then
just pressed the head into position. The cowl is the only thing keeping
the cape on.
I don't miss the clips but I can see how not having them there would bug some people.

I can adjust how the cape sits on the shoulders just by decapitating Batman and futzing with how much of the cape is being held in place
with his head. (har har har)

I hope that helps! If you skip back a few pages you should see some pics I took just a few days ago.

That's exactly how the cape is designed to work. :exactly:
 
Thanks for the advise but Maglor is right, i'm not even going to bother anymore with the stock :nono

I mean seriously, how can a company known for accurate representations not get Batman's cape right in both material and attachments in the first place! :dunno

Batman figure after Batman figure they've dropped the ball on one of the main components that makes Batman...well.....Batman, his damn cape :dunno

It's not like they got it wrong only the first time, it's over and over.

Why doesn't HT just hire Lforigno for their cape designs :lol


Odd if you ask me.


Hear, hear.
 
Hot Toys Bruce Wayne/Batman neck mod

Hot Toys Bruce Wayne/Batman neck mod


There are two basic elements to this modification. 1) Shortening the internal neck itself and 2) shortening the cowl.

There is most likely more than one way to shorten the internal part, but I will share my convoluted way of doing it.

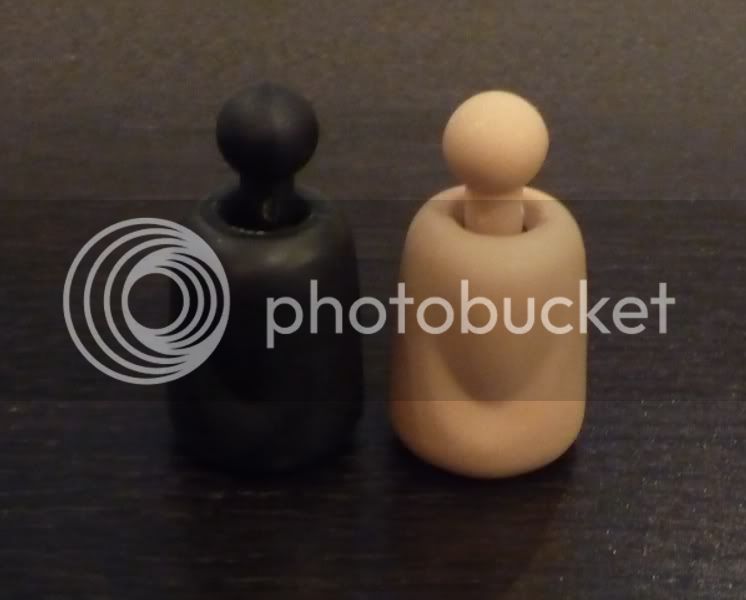
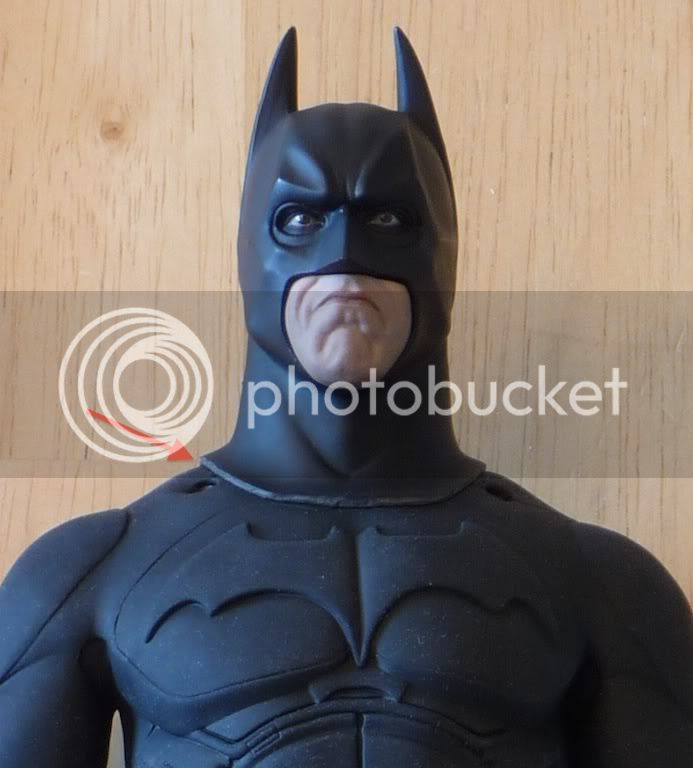
First of all, I did not use the black neck that comes with the figure, since I wasn’t sure how far I was going to take the mod and wanted the option of reversing it for as long as possible. I did the modification to a generic True Type neck:

01_P1160147.jpg

Figure 1.1


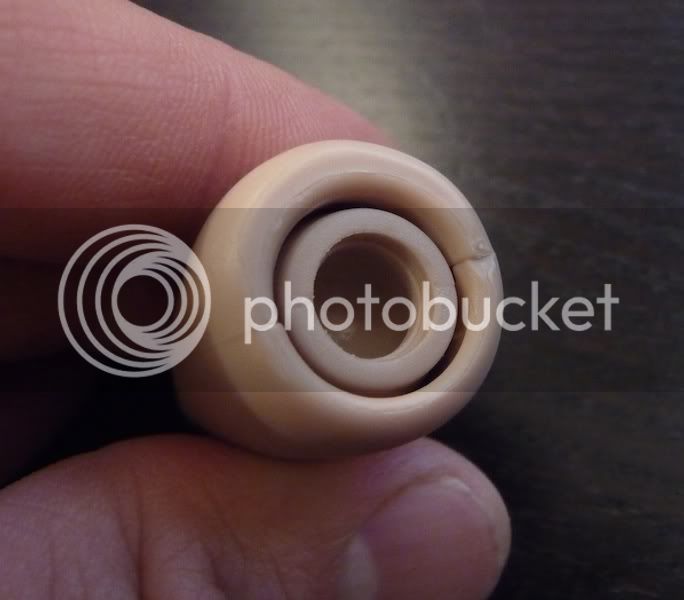
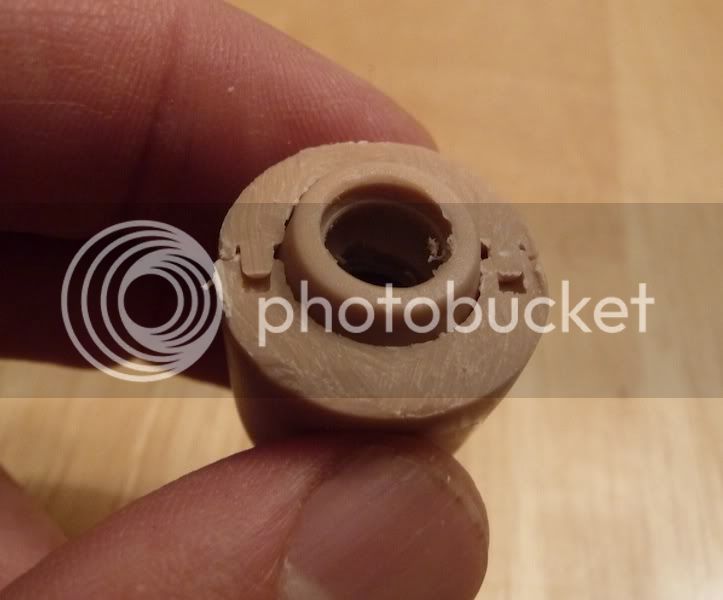
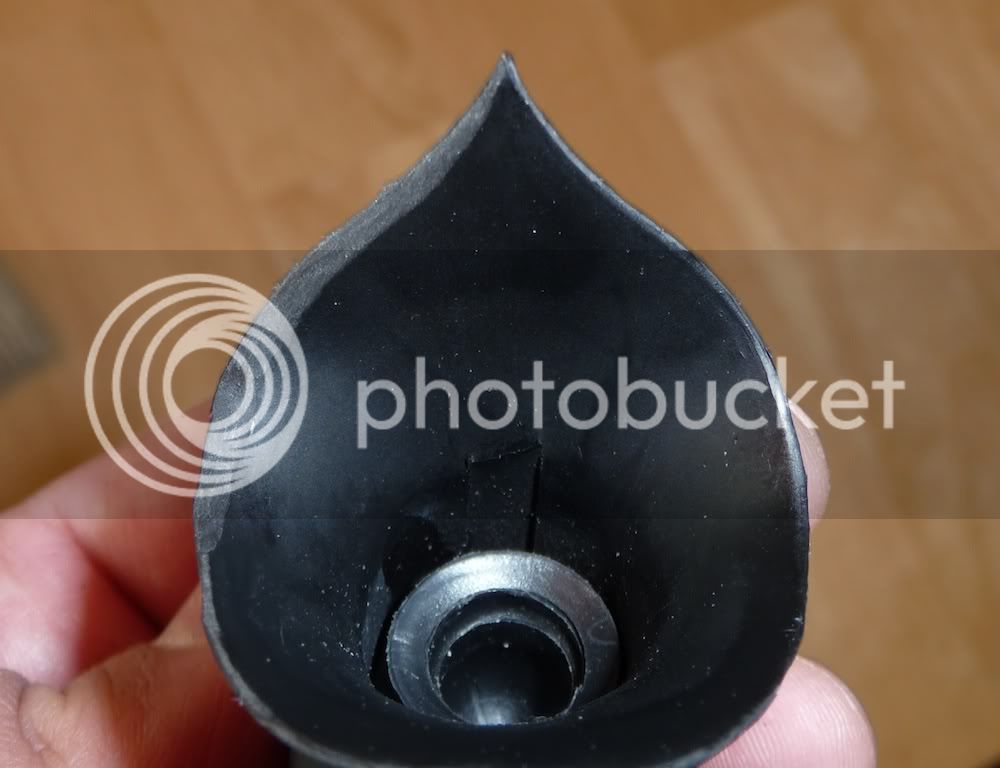
The underside of the neck looks like this:

02_P1160140.jpg

Figure 1.2


In the middle there you can see the little rubber piece that fits over the body/neck ball joint. There are two of these inside the neck, the other is for the head/neck ball joint.

Step 1) Split/pry the neck apart at the seam you can remove these two rubber pieces. You will only be modifying one of them and they are identical.

The basic goal of the internal portion of this neck mod is to get the rubber piece that is for the body/neck ball joint to sit lower. It normally sits here:

03_P1160163.jpg

Figure 1.3


You want it to sit here:

04_P1160200.jpg

Figure 1.4


Step 2) Use an exacto blade to cut the hole through the top of the rubber piece, but be careful to remove only just enough. You want the head to still fit relatively snug on the ball joint. You should have to work to get it off. Once I got the rubber piece pressed down to where it is in Figure 1.4 I had to use a needle nose pliers to get it off. That’s what you want. This is what keeps the head from having up and down play in it once the mod is done.

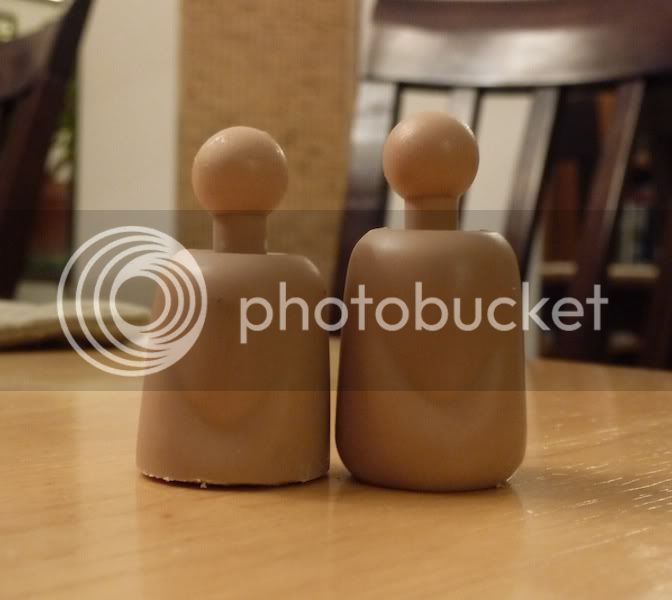
Step 3) The neck itself needs to be ground down on the bottom quite a bit. I forgot to take a comparison picture at the very end (I may have ground it a little shorter than this eventually), but this should give you an idea:

05_P1160157.jpg

Figure 1.5


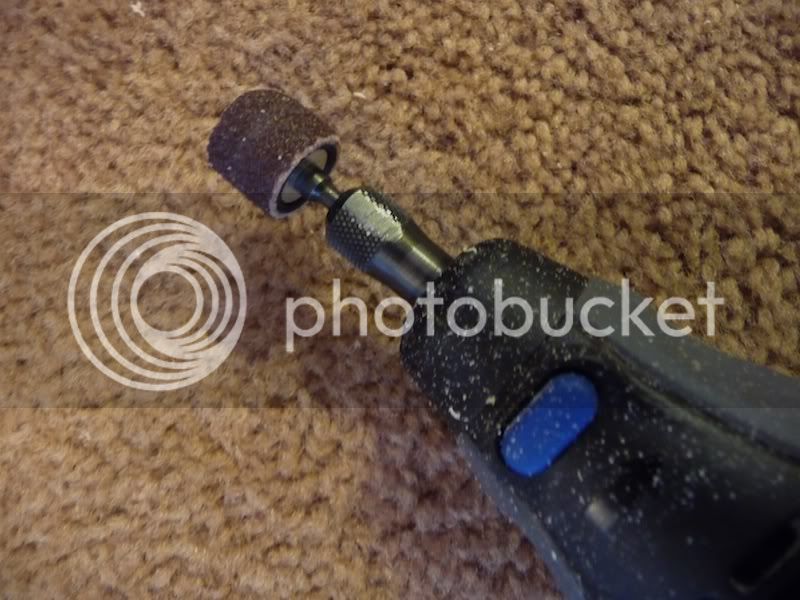
For this step I used the sandpaper tool on the dremel:

06_P1160151.jpg

Figure 1.6


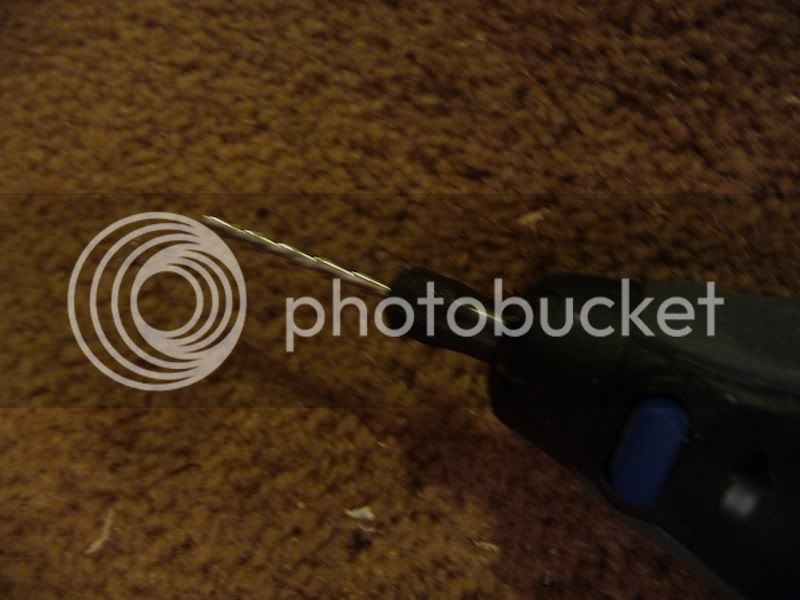
Step 4) You will also need to drill/dremel a hole inside of it to accommodate the body/neck ball joint.

07_P1160214.jpg

Figure 1.7


I used this cutting tool to create that hole:

08_P1160160.jpg

Figure 1.8


Step 5) When you put the rubber piece back in you will see the need to grind that shorter as well (I used the same sanding tool), as it will be sticking out like this:

09_P1160196.jpg

Figure 1.9


Again, be careful to not grind too much off this part, as this is what articulates with the body/neck ball joint. It tappers in towards the bottom; the goal is to grind off enough for the head to sit as low as was indicated in Figure 1.4 while still letting it taper in enough to hold in place. I should say here that I strongly 
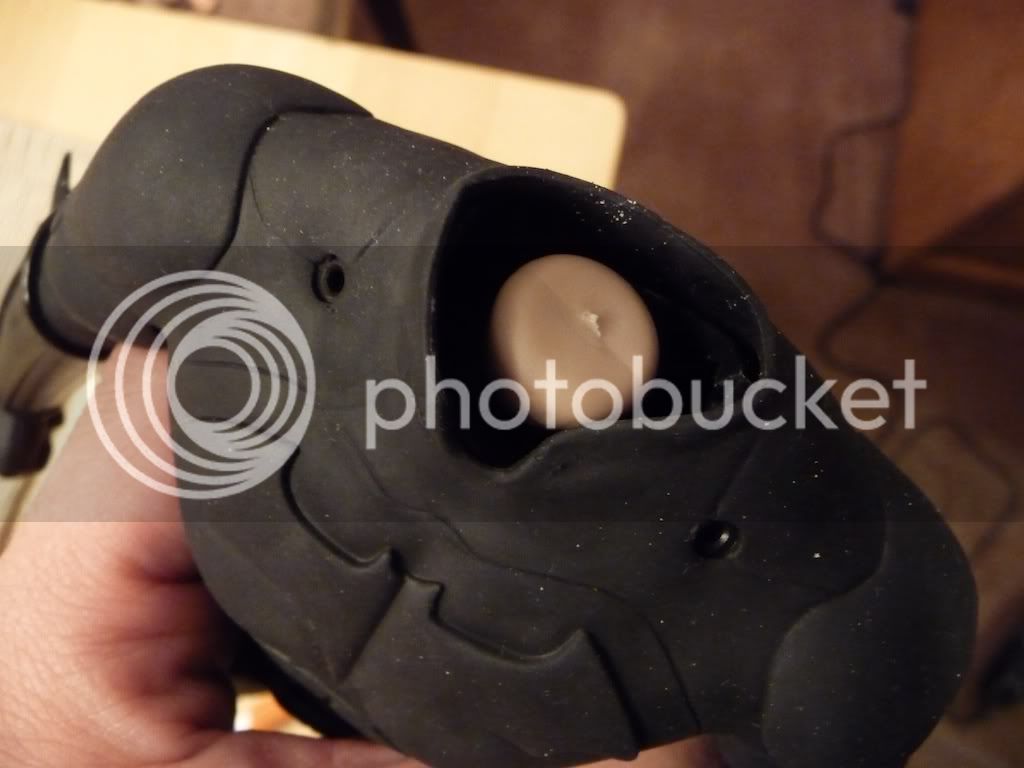
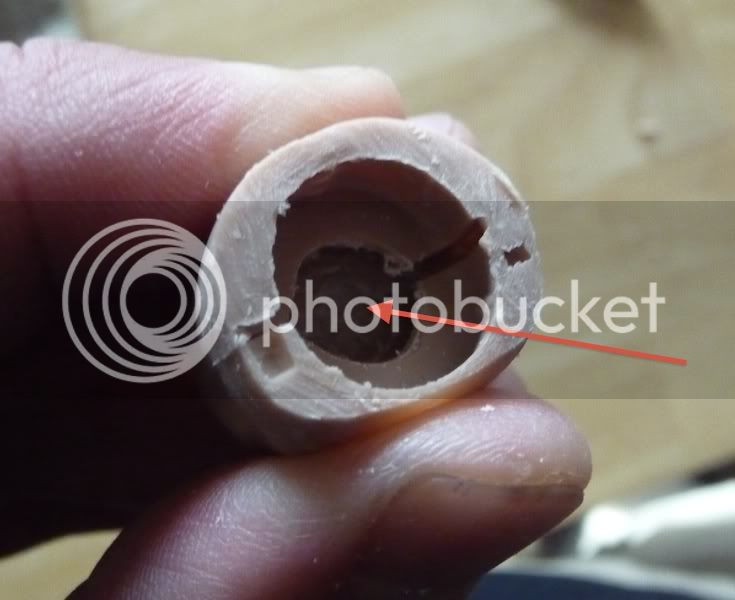
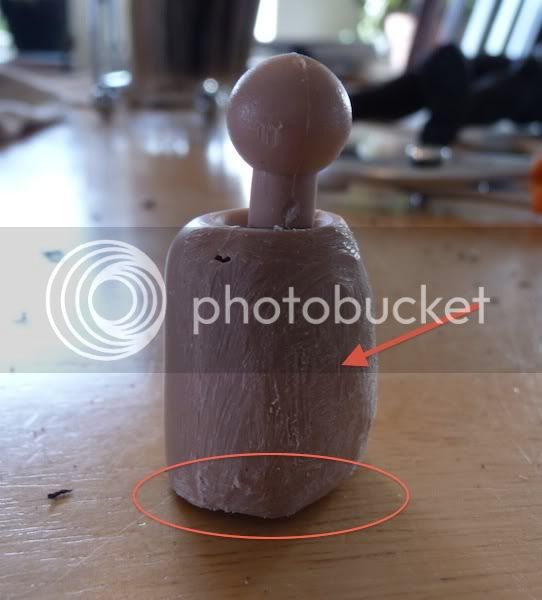
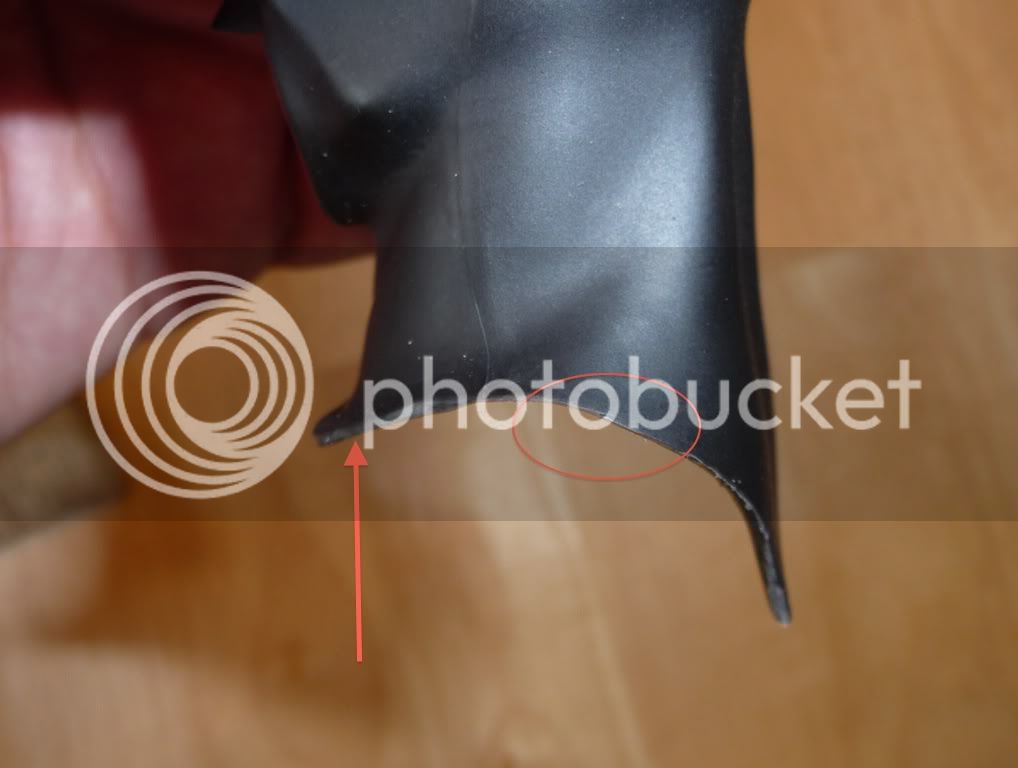
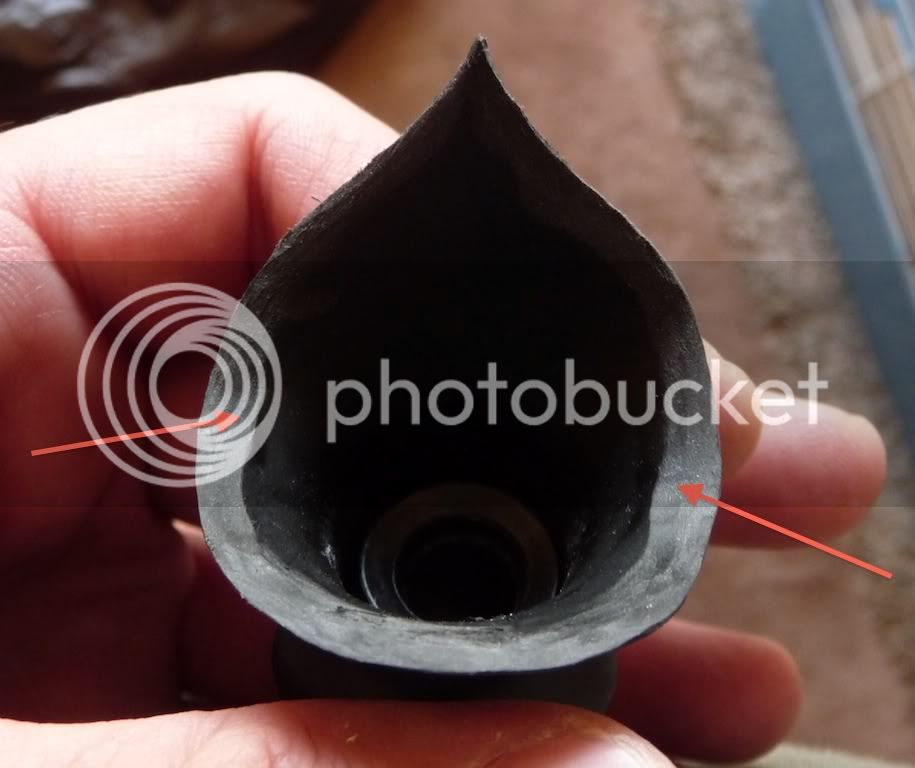
suspect you could grind it totally flat here since I think it’s the top part of the rubber piece that holds it in place – again, see Figure 1.4. Anyway, I left a little bit of the rubber piece still sticking out so when I stand the neck up the plastic body of the neck is a little raised off the table (circled below):

10_P1160301edit.jpg

Figure 1.10


Step 6) In Figure 1.10 above, the arrow indicates the front (adam’s-apple part) of the neck. You can see that I have ground this down significantly with a dremel tool (Sanding attachment - Figure 1.6). The reason I did this was to allow for greater forward tilt at the head/neck ball joint (otherwise the inside of the cowl is bumping up against the adam’s-apple). Some forward tilt at the body/neck ball joint is lost from shortening it, and this step makes up for that a bit.

Step 7) After all this grinding it is unlikely that the two halves of the neck will ever click back in place so superglue them together along the seams. Make sure that the two rubber pieces and the head/neck ball joint is back in place as in Figure 1.10 before gluing it back together.
 
Hot Toys Bruce Wayne/Batman neck mod

Okay, at this point the mod is 100% reversible, as you have done nothing to the original black neck (Figire 1.1). This internal mod alone will have made a slight difference in the overall appearance.

Before:

11_P1160188.jpg

Figure 2.1


After:

12_P1160205.jpg

Figure 2.2


The head can be forced a little bit further down as you can see, but it’s a very subtle difference. For me, it couldn’t end there. I wanted a more dramatic change. This is where is get’s scary as it’s time to cut the cowl!

Step 8) Cut a thin strip off all the way around the cowl starting at the back where the cowl comes to a point.

13_P1160278.jpg

Figure 2.3


For this I used a small precision scissors:

14_P1170002.jpg

Figure 2.4


After cutting that thin strip off, the cowl doesn’t look pretty. It leaves a big squared-off edge:

15_P1160286edit.jpg

Figure 2.5


Step 9) This is the fun part, where you get to be a bit of an artist. Break out the dremel again; using the same sanding tool (Figure 1.6) start smoothing out the edge like so:

16_P1160299.jpg

Figure 2.6


This will make that unsightly squared off edge (indicated by the arrow below) disappear (finished part circled):

17_P1160294edit.jpg

Figure 2.7


I should mention that there was a little trial and error here. After the initial scissors trim and dremel grind, I actually trimmed off another skinny strip (much easier since the plastic was now thinned out) and ground at it some more, basically repeating steps 8 and 9. Anyway, here’s how the underside of my cowl looked when I was done:

18_P1160306edit.jpg

Figure 2.8


Both the cutting and the grinding are necessary for this to look its best. It’s actually grinding off so much of the plastic that lets the cowl sit lower. Especially is this so where I have indicated with arrows in Figure 2.8. This is where his traps stick way up. A little extra grinding here lets that cowl really conform to the shape of his shoulders. Just be careful not to grind right though, or to leave it paper thin at the edges!


Anyway, here is the finished product:

19_P1160302.jpg

Figure 2.9
 
Finally, here is the fairest before and after comparison I can do. In both pictures, the figure has been futzed and posed with great care to look as good as I could get them to look. And they are taken from the same angle.


Before:

20_P1150149crop.jpg


After:

21_P1160321crop.jpg


Note that in the before picture I have the head bowed as far forward as possible without the head popping off. This created an illusion that the neck was shorter than it really was but from any angle other than straight on he looked like he was craning his neck forward unnaturally. Now after the neck mod, I can tilt the head slightly forward and it looks fantastic from all angles.


I somewhat doubt that anyone else is gonna try this mod, but if you do, I hope my tutorial helps. :peace
 
That's a GREAT writeup/instructional photo essay! I am a lazy pansy and won't be doing the mod, but you've definitely done a great job of showing exactly how it's done.
Thumbs up man!
 
I like before better :lol

I don't know whether to laugh or cry...


The after didn't hurt the look but I prefer the before look.

Seriously guys, from any other angle than the one pictured he looked like a giraffe craning his neck forward.


Note that in the before picture I have the head bowed as far forward as possible without the head popping off. This created an illusion that the neck was shorter than it really was but from any angle other than straight on he looked like he was craning his neck forward unnaturally. Now after the neck mod, I can tilt the head slightly forward and it looks fantastic from all angles.

:lecture


I could post a slew of pictures showing how long the neck can look un-moded, but I was trying to be fair.
 
Awesome tutorial Mags! I won't be doing it. But for those who are here's a side comparison so you can see how tall the neck is from the side. (If under rare occasion you pose him from the side)
IMAG0414.jpg


And here's one, that if posed/futzed right looks good if in a frontward position. (not as good as moded but pretty good looking)
IMAG0417.jpg
 
Back
Top