"Medicom" Pre-pro/Mythos Boba Fett

Collector Freaks Forum

Help Support Collector Freaks Forum:

This site may earn a commission from merchant affiliate links, including eBay, Amazon, and others.
Little more work done on the gloves. It takes quite a bit of time to paint them all when I have so many. I have the full set that came with Zartan (12), plus a couple of Marmit hands, and I'm modifying some replicate a few of the hands that the HT Fett came with. The detail on the Marmit hands are kind of soft compared to the Sideshow hands, so I have to sculpt a bit of detail so they match a bit better. All in all, he'll have about 16+ hands for plenty of posing options.

d995b9d9-09b7-493c-842f-0c0ac9cb94b6_zpskdf7ax9r.jpg


b2765b81-4b97-4157-ac08-61b7243ea5b3_zpsfpgrasgh.jpg


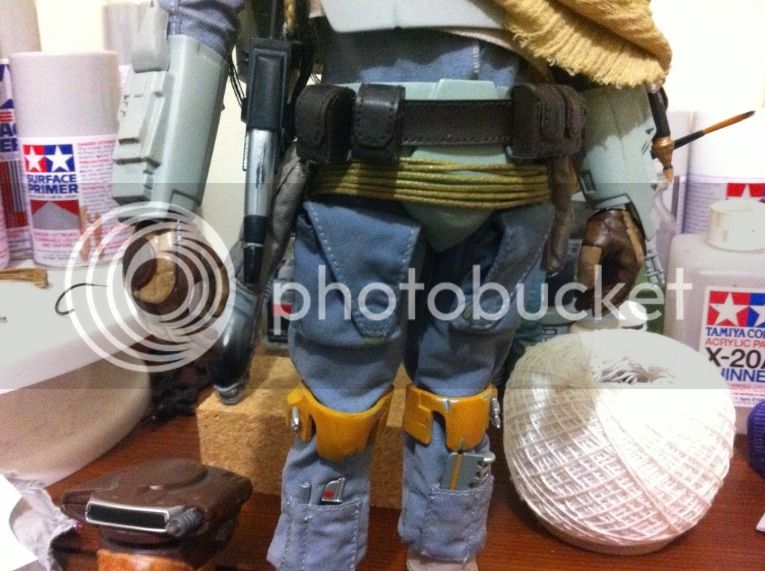
Detail shot. Once he's all done I'll get some real shots with a DSLR. It's too easy to just snap a picture with the phone at this point.

6881d3d5-5169-44a1-9e67-b90db666c467_zpsqekiuoez.jpg


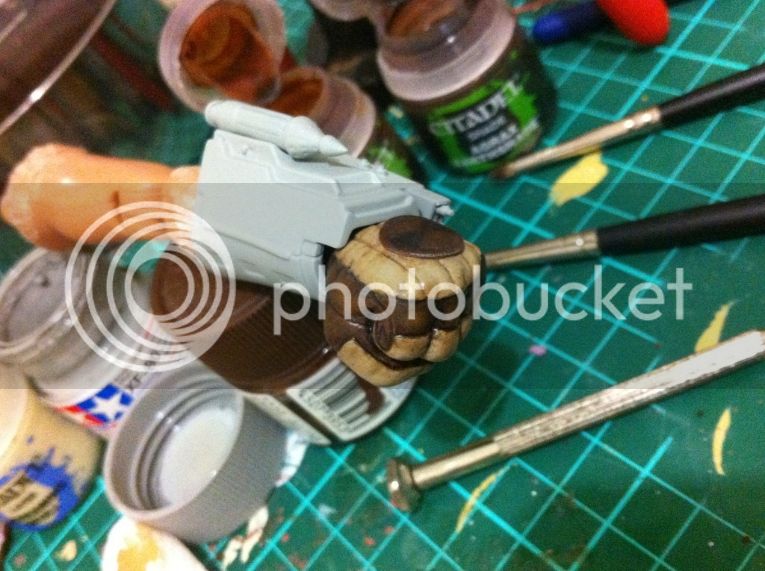
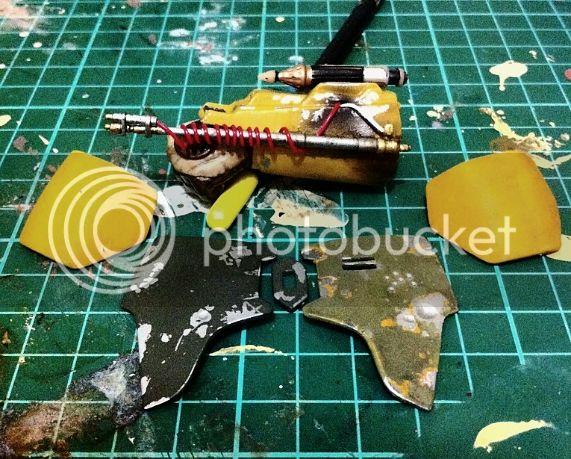
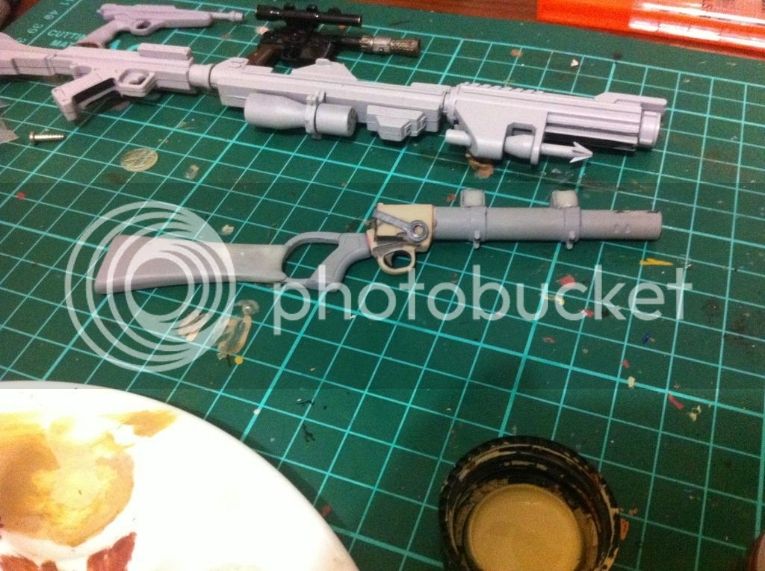
Also, started work on the ESB blaster. Sure, I could just buy the Sideshow one, but where's the fun in that? Besides, the SS blaster isn't 100% accurate either, so I would just end up altering it anyway. This one is an amalgam of the Medicom and Marmit blasters, and will have bespoke parts as well.

b5a64b80-e0f5-4f40-b52e-a5bfef02501c_zpscmic99nj.jpg
 
Enjoying this build, look forward to seeing the helmet painted. Great work.
 
Started painting some of the key armour pieces. Lighting washed out the pic a bit. I tried to correct it in the photobucket editor to very little success. Astute observers may notice a little Man With No Name homage I threw in there as well.

e1a54445-6853-4b22-a0ef-5295610bfab7_zpsrm4xql2g.jpg
 
Shoulder bells close to finished. Went with the pre-pro bird on the right shoulder, and the ESB mythosaur on the left. Was originally thinking I would get decals for the emblems, but decided that I didn't want to spend unnecessary money and I didn't want to wait on someone to print them up and ship them. In the end, I just free-handed them as best I could.

375d7ec7-e60a-4103-ab0c-bec3a366230c_zpsiqh7qxcz.jpg


d9aea4b4-22b7-4039-b97b-62d209006023_zpscaygoejq.jpg
 
So, here are the gauntlets. The yellow pre-pro is pretty much complete.

There are still a few things to do on the right gauntlet. It needs the hose connectors (which I will probably scratch build), the darts (again, scratch build) and the silver tube thing (not sure exactly what it is). Also, instead of just making the right gauntlet straight ROTJ, I gave it the more colourful grappling line launcher as seen on some of the pre-pro suits (that was later carried over to the ESB gauntlet). Also, instead of the boring, simple tube used on the ROTJ gauntlet for the flame unit I wanted something a bit more interesting to look at. For that I used the entirely inaccurate, left gauntlet flame unit from the Hasbro OTC 12" Boba. Just creatively trimmed it and flipped it around backwards.

For the alternate left gauntlet, I thought I would add a little variety instead of using the standard ROTJ gauntlet with the keypad, since the pre-pro gauntlet already has that. I decided, since Boba has been shown to be at least a little sentimental, that I would give him Jango's old gauntlet. Over time he's painted it yellow, and, eventually, painted red over the yellow as his fashion sense changed. I've always liked the idea that Boba has several pieces of armour that become repurposed as time passes. His chest pieces in ESB looked as if they were once yellow before they were painted green, and I always thought maybe they were originally yellow as they were in the Holiday Special. I've also made the rocket launcher "unloaded", since this gauntlet will essentially be a spare packed in with the rest of his kit, and wouldn't need to be loaded.

Once I get the hose connectors made I plan to track down some clear hoses. Not sure if they'll all be clear or if I'll leave a couple black to fit the non-uniformity of the rest of the build.
 
Last edited:
Thanks for the comments, guys. People on this forum are pretty much the only people that are gonna see this thing, aside from the wife, since we don't have many visitors. The feedback is appreciated.

Did some work on the codpiece. Little finicky things like making studs can be one of the most annoying parts of doing things like this, but once it's done the feeling of accomplishment is great. This is a pic of the raw stud. Made another for the other side, and gave them a silver coat after the picture was taken. Pretty annoying to make two exactly the same. I'll probably make a mold of one and cast a few copies when I get to the collar. I'm basically scaling down the 1:1 here piece for piece though, so the groin armour is pretty much held together exactly as it would be on the full scale. It's two pieces, and there's a pin that holds them together, and the studs cap onto the pins.

Now, onto the buckles for the sash.

9c92ee8a-5e8d-4796-9cd2-191e6133de4a_zpse73vxldi.jpg
 
I don't have an SST helmet. Not particularly fond of it. The ones I'm working with are a set of Marmits (one reshaped to be more pre-pro 1 shaped, and the second reshaped to be more ESB), a couple of Medicoms (one of which is being reworked into a McQuarrie concept helmet), a Hasbro OTC (which I probably won't end up using) and a Black Series die-cast helmet.

Personally, I prefer the Marmits, as they're more accurately shaped, and easier to work with. Only problem is the lack if finer detail, but all of the helmets will get some tweaks and upgrades. In the end, I plan to have a few helmets for him to wear, because there are so many different Boba helmets that all have their own unique and interesting looks.

Here's my sash. Completely made from scratch. Buckles still need some weathering and detail. Also, I'll have to cast up another buckle, because the weather has been up and down here as of late, and one of the buckles didn't set properly. I'll also replace the black webbing straps with leather ones when I can find some leather I like. I also added a basis for what I plan to use as a sidearm holster or other detail to hang on so the sash isn't 100% decoration and actually serves a purpose.

sash_zpsxm5qusy0.jpg
 
Back
Top