EndoT800
Freaked Out
- Joined
- Apr 14, 2011
- Messages
- 140
- Reaction score
- 2
UPDATE: Completed project is here:https://www.sideshowcollectors.com/forums/showthread.php?t=94191
Hi guys,
I've been working on creating a new custom Neca 18in Endoskeleton for the past few weeks. I have two more Endo projects that I have planned so I had to postpone the primary project and got this one underway.
I originally was going in another direction with his one, but I changed plans and decided to do a bit more of an overhaul project to compensate.
This Endo has some great potential for customizing. It has size & its relatively cheap plus there’s plenty of them out there to be had.
First up was to take it apart and change and improve some of the Endo’s parts where needed rather than just doing a simple repaint. I wanted to incorporate more metal parts to give it a better overall finished look. I ended up doing a lot more fabricating work to many of the Endo’s parts which is making a nice improvement overall.
This is a work in progress so most of base work is progressing. I'll then go back and finalize each part.
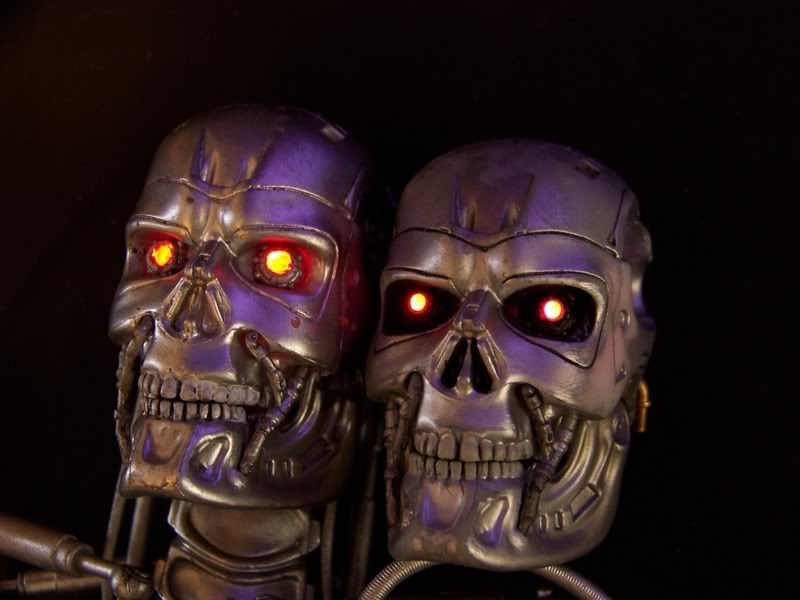
I started with the head. The first change was the eyes. They are too oversized, bright and have poor circular shapes. I removed the existing eye lenses and used some brass tubing to make a housing for the new lenses. They are now smaller & more circular.
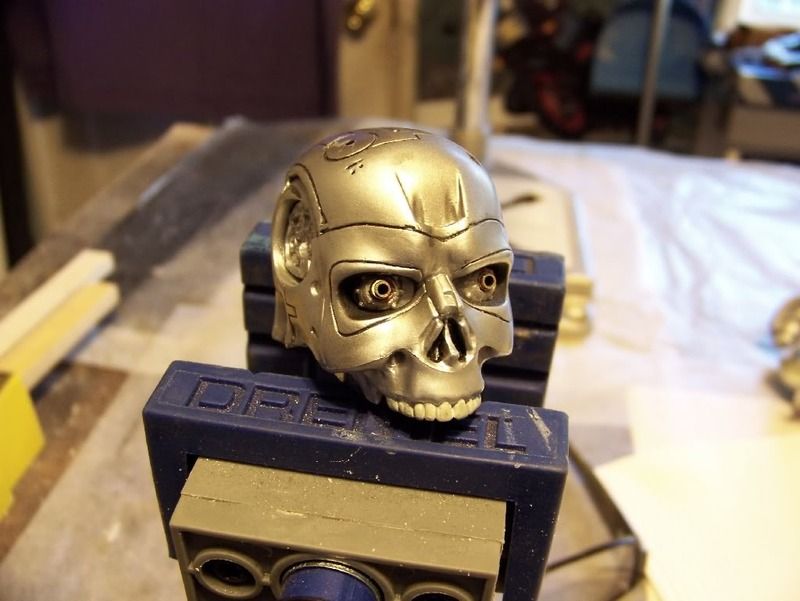
Now you can see compared to the originals that they are much better shaped & sized. They now have the right amount of red glow now although the camera does not show it well.
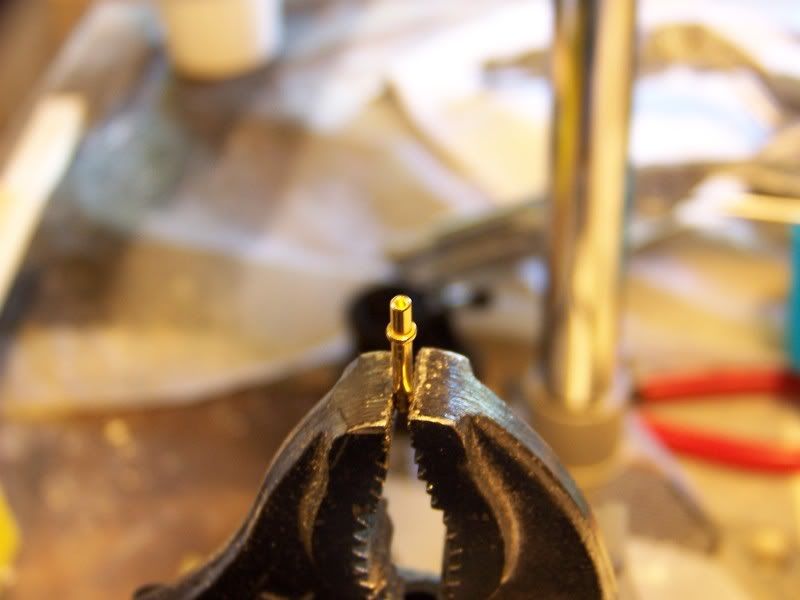
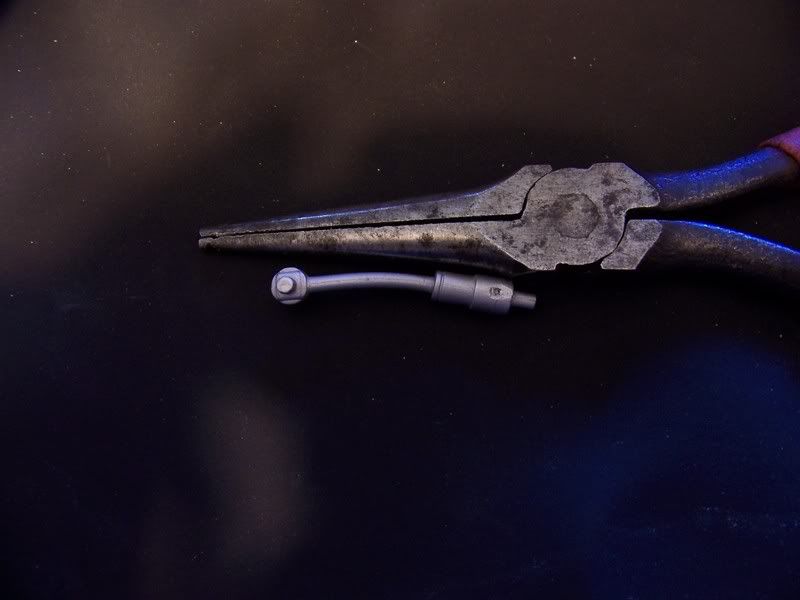
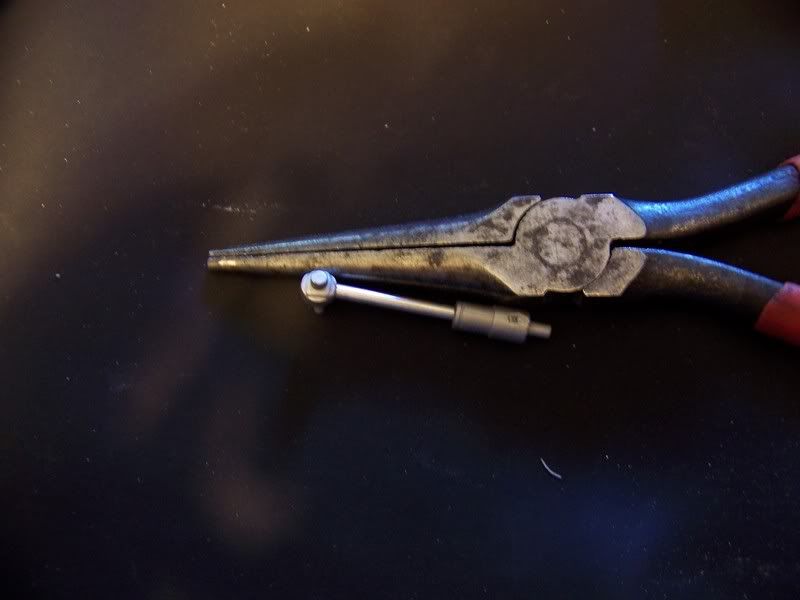
Next was to add two metal fittings for the neck cables. This is the earlier version of Neca Endo so they are missing, not a big deal. I started with a piece of solid brass. In order for the cables to attach to it, I needed to drill a very small hole at the bottom of each one. Drilling a hole this small is not easy task.
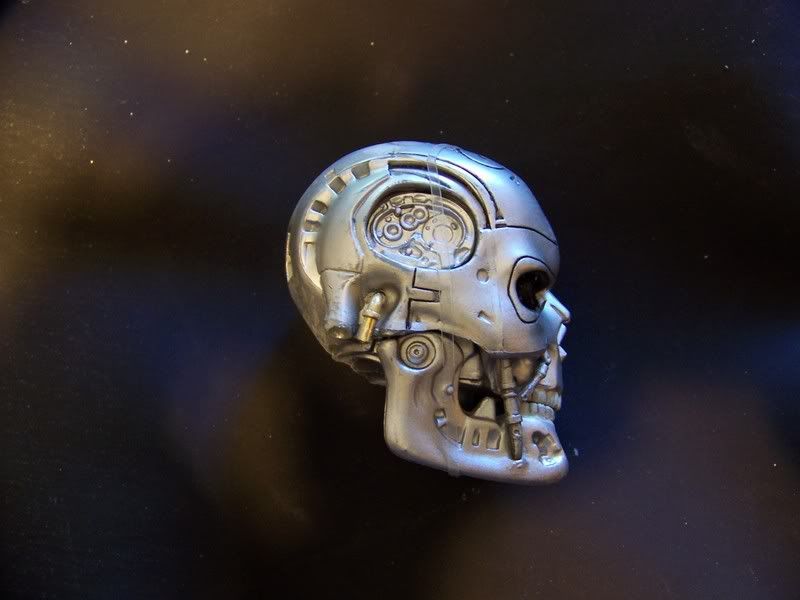
Next was to give it a 90 degree bend and were done. I also reshaped the teeth, modified the battery cover & covered up the battery screw hole. I then cut and replaced the plastic neck stems with an aluminum and brass rod combo.
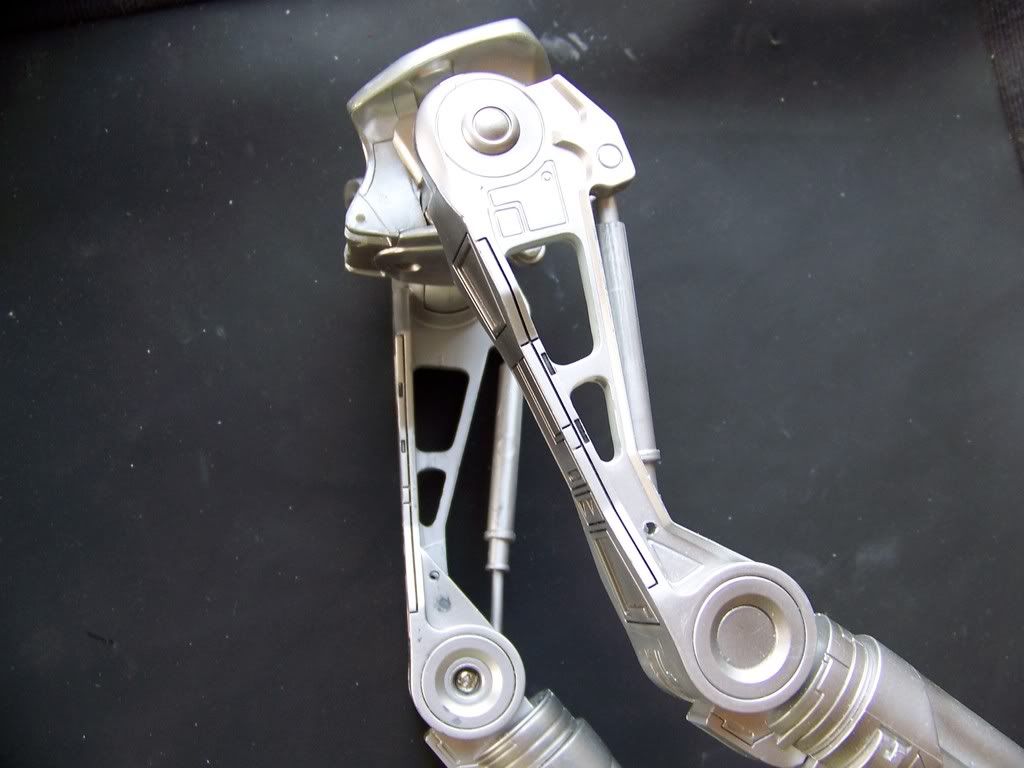
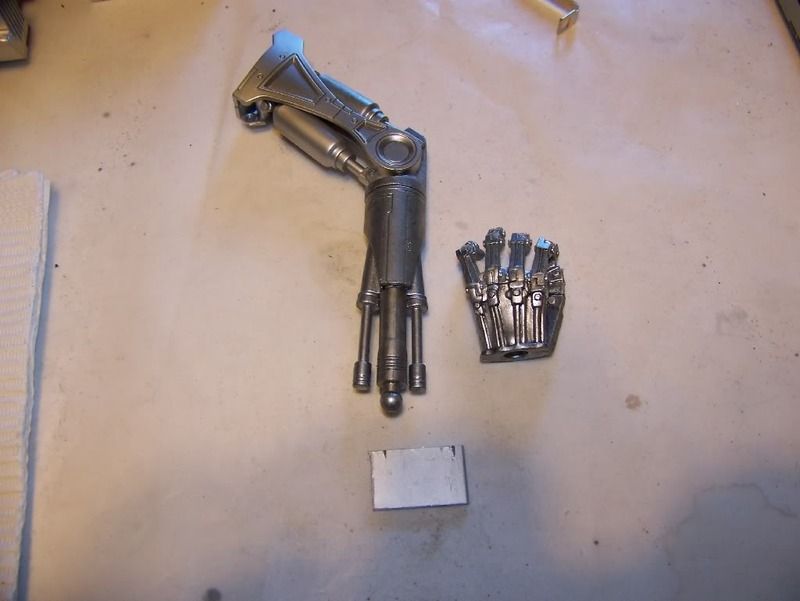
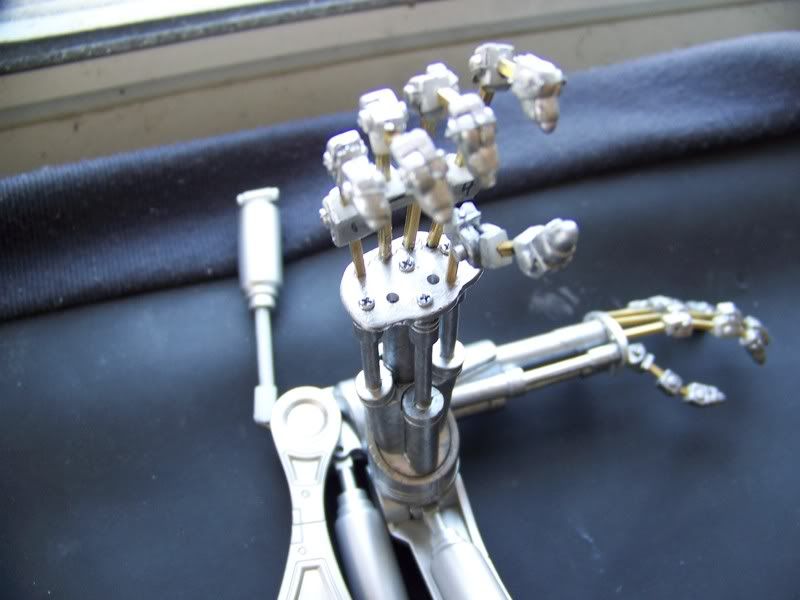
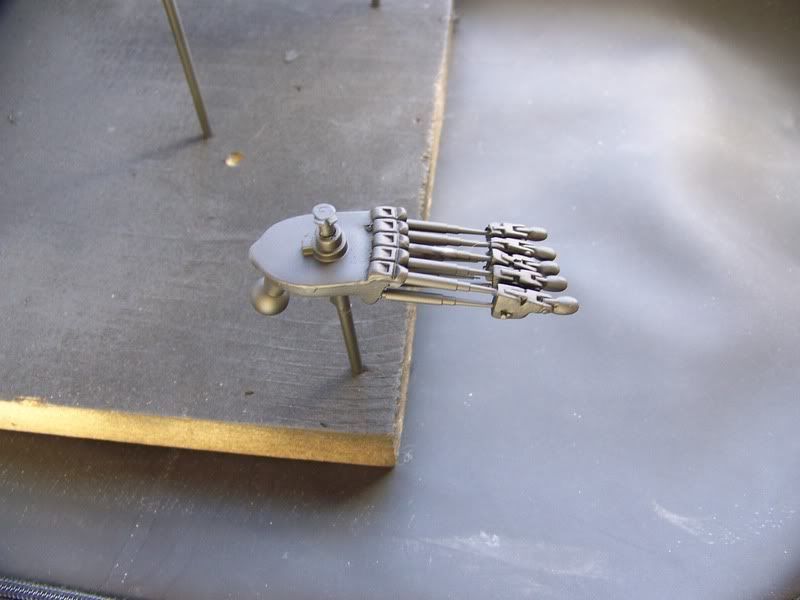
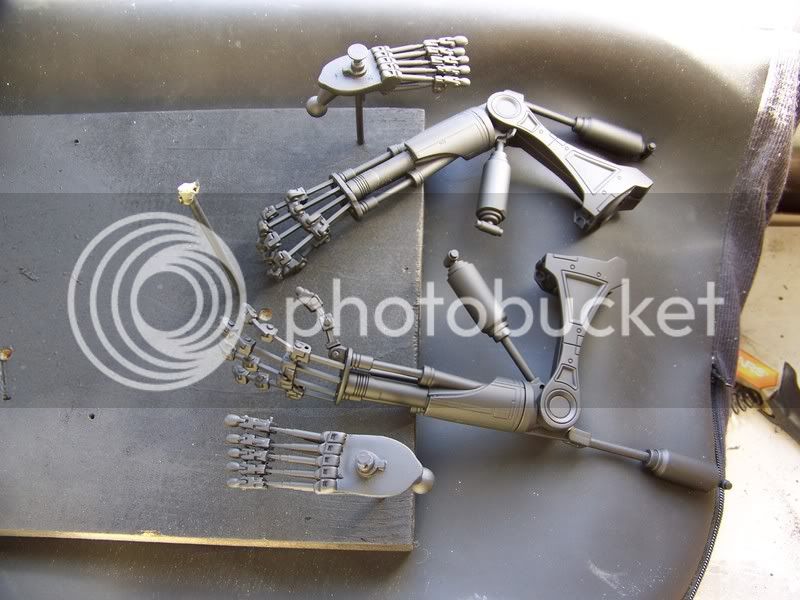
Next was up was to reshape the hands and feet. As you can see, the hands are need of reshaping. For each hand, I started with scratch piece of aluminum for the base. I cut and reshaped the wrist base, then polished and drill the necessary holes for the fingers, rods and screws. I ended up cutting the original fingers at each joint and creating new a new set of fingers using the same joints and using brass & stainless steel rods. I then used tiny screws to attach each hand to the arm. Once I paint the arms and reattach them, I’ll then finish up each hand by adding the additional finishing stainless steel metal parts.
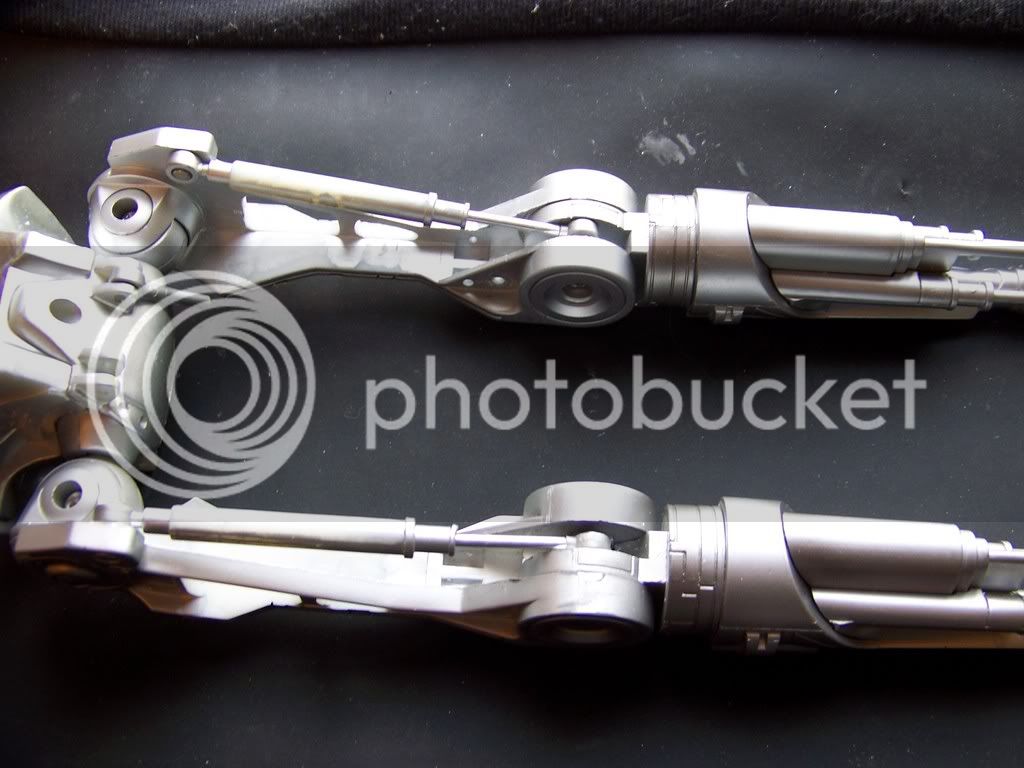
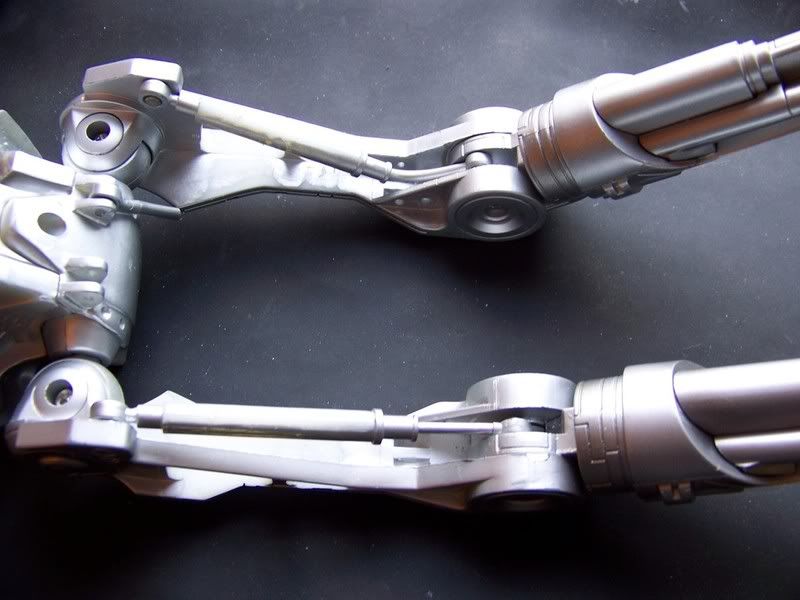
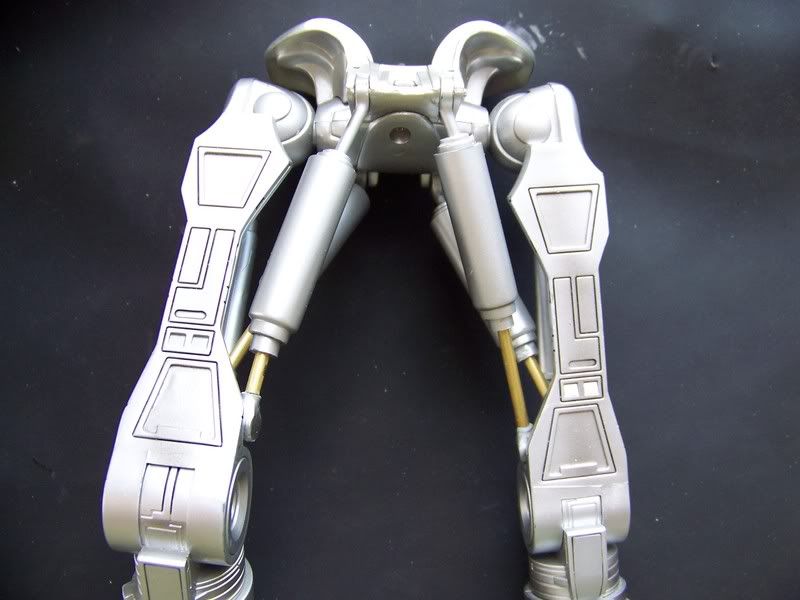
For the feet, I essentially did the same as with the hands. I took them completely apart and added metal shaped piston rods and reinforced them with stainless steel rods. Here they are primed up.
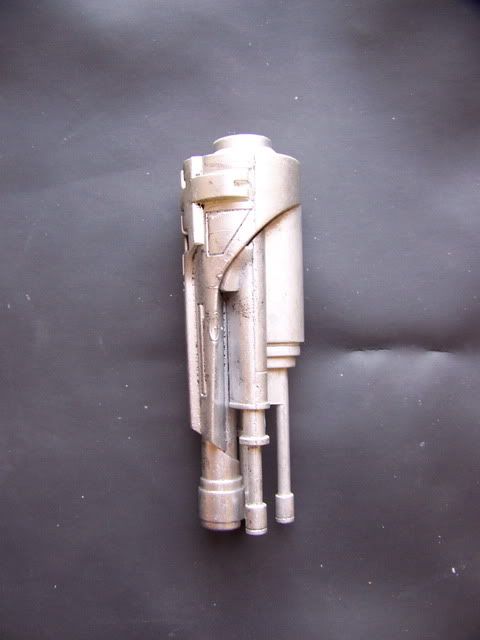
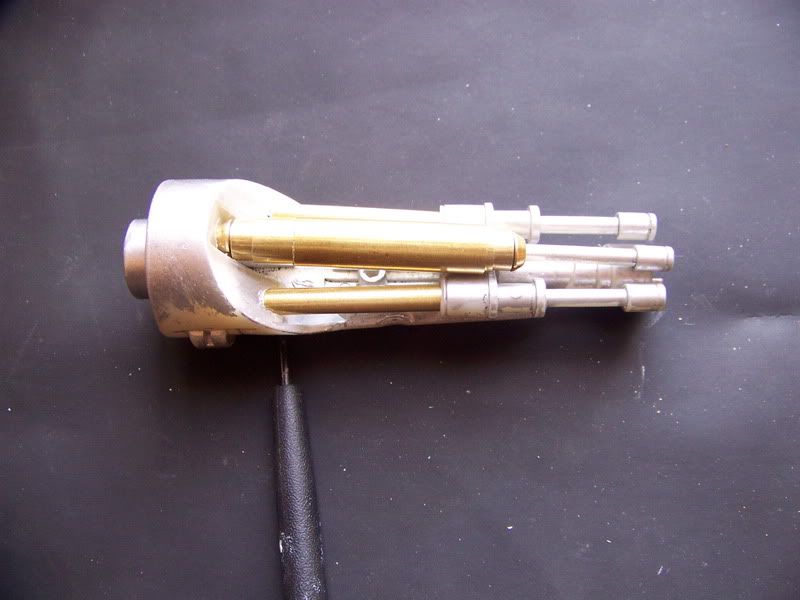
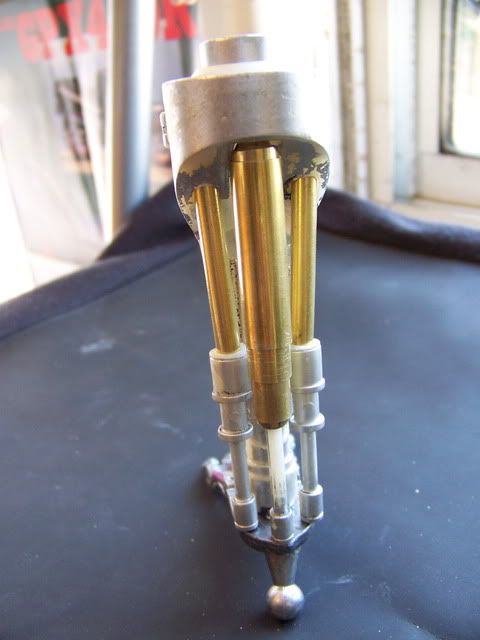
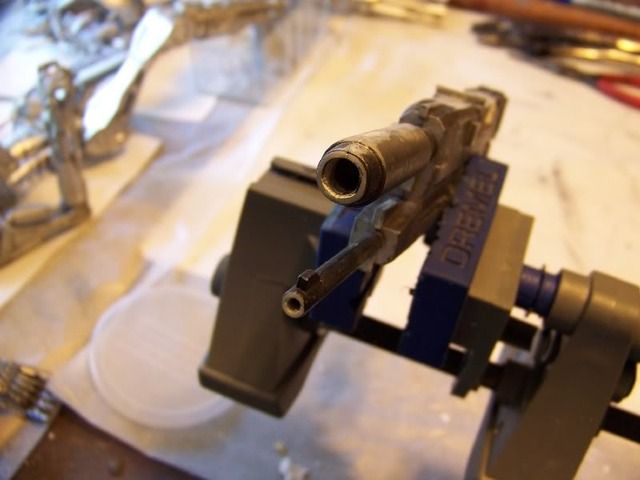
Next was to refinish the Phased plasma gun in-the-40 watt range. I covered the seam that runs in the middle of the gun so it looks like one piece rather than two. I then drilled out each barrel and then apply primer for painting.

Hi guys,
I've been working on creating a new custom Neca 18in Endoskeleton for the past few weeks. I have two more Endo projects that I have planned so I had to postpone the primary project and got this one underway.
I originally was going in another direction with his one, but I changed plans and decided to do a bit more of an overhaul project to compensate.
This Endo has some great potential for customizing. It has size & its relatively cheap plus there’s plenty of them out there to be had.
First up was to take it apart and change and improve some of the Endo’s parts where needed rather than just doing a simple repaint. I wanted to incorporate more metal parts to give it a better overall finished look. I ended up doing a lot more fabricating work to many of the Endo’s parts which is making a nice improvement overall.
This is a work in progress so most of base work is progressing. I'll then go back and finalize each part.
I started with the head. The first change was the eyes. They are too oversized, bright and have poor circular shapes. I removed the existing eye lenses and used some brass tubing to make a housing for the new lenses. They are now smaller & more circular.
Now you can see compared to the originals that they are much better shaped & sized. They now have the right amount of red glow now although the camera does not show it well.
Next was to add two metal fittings for the neck cables. This is the earlier version of Neca Endo so they are missing, not a big deal. I started with a piece of solid brass. In order for the cables to attach to it, I needed to drill a very small hole at the bottom of each one. Drilling a hole this small is not easy task.
Next was to give it a 90 degree bend and were done. I also reshaped the teeth, modified the battery cover & covered up the battery screw hole. I then cut and replaced the plastic neck stems with an aluminum and brass rod combo.
Next was up was to reshape the hands and feet. As you can see, the hands are need of reshaping. For each hand, I started with scratch piece of aluminum for the base. I cut and reshaped the wrist base, then polished and drill the necessary holes for the fingers, rods and screws. I ended up cutting the original fingers at each joint and creating new a new set of fingers using the same joints and using brass & stainless steel rods. I then used tiny screws to attach each hand to the arm. Once I paint the arms and reattach them, I’ll then finish up each hand by adding the additional finishing stainless steel metal parts.
For the feet, I essentially did the same as with the hands. I took them completely apart and added metal shaped piston rods and reinforced them with stainless steel rods. Here they are primed up.
Next was to refinish the Phased plasma gun in-the-40 watt range. I covered the seam that runs in the middle of the gun so it looks like one piece rather than two. I then drilled out each barrel and then apply primer for painting.
Last edited:
")