You are using an out of date browser. It may not display this or other websites correctly.
You should upgrade or use an alternative browser.
You should upgrade or use an alternative browser.
ANH Buckets
- Thread starter Solo_bones
- Start date


Help Support Collector Freaks Forum:
This site may earn a commission from merchant affiliate
links, including eBay, Amazon, and others.
Those buckets looks so good.
I’m doing so much work on my Sandtroopers, and they are looking really nice, but it kills me that the stock helmets are off the mark by so much. I really hope some more accurate helmets become available again soon.
Sent from my iPhone using Tapatalk
I’m doing so much work on my Sandtroopers, and they are looking really nice, but it kills me that the stock helmets are off the mark by so much. I really hope some more accurate helmets become available again soon.
Sent from my iPhone using Tapatalk
Adam1138
Super Freak
- Joined
- Mar 24, 2016
- Messages
- 1,262
- Reaction score
- 134
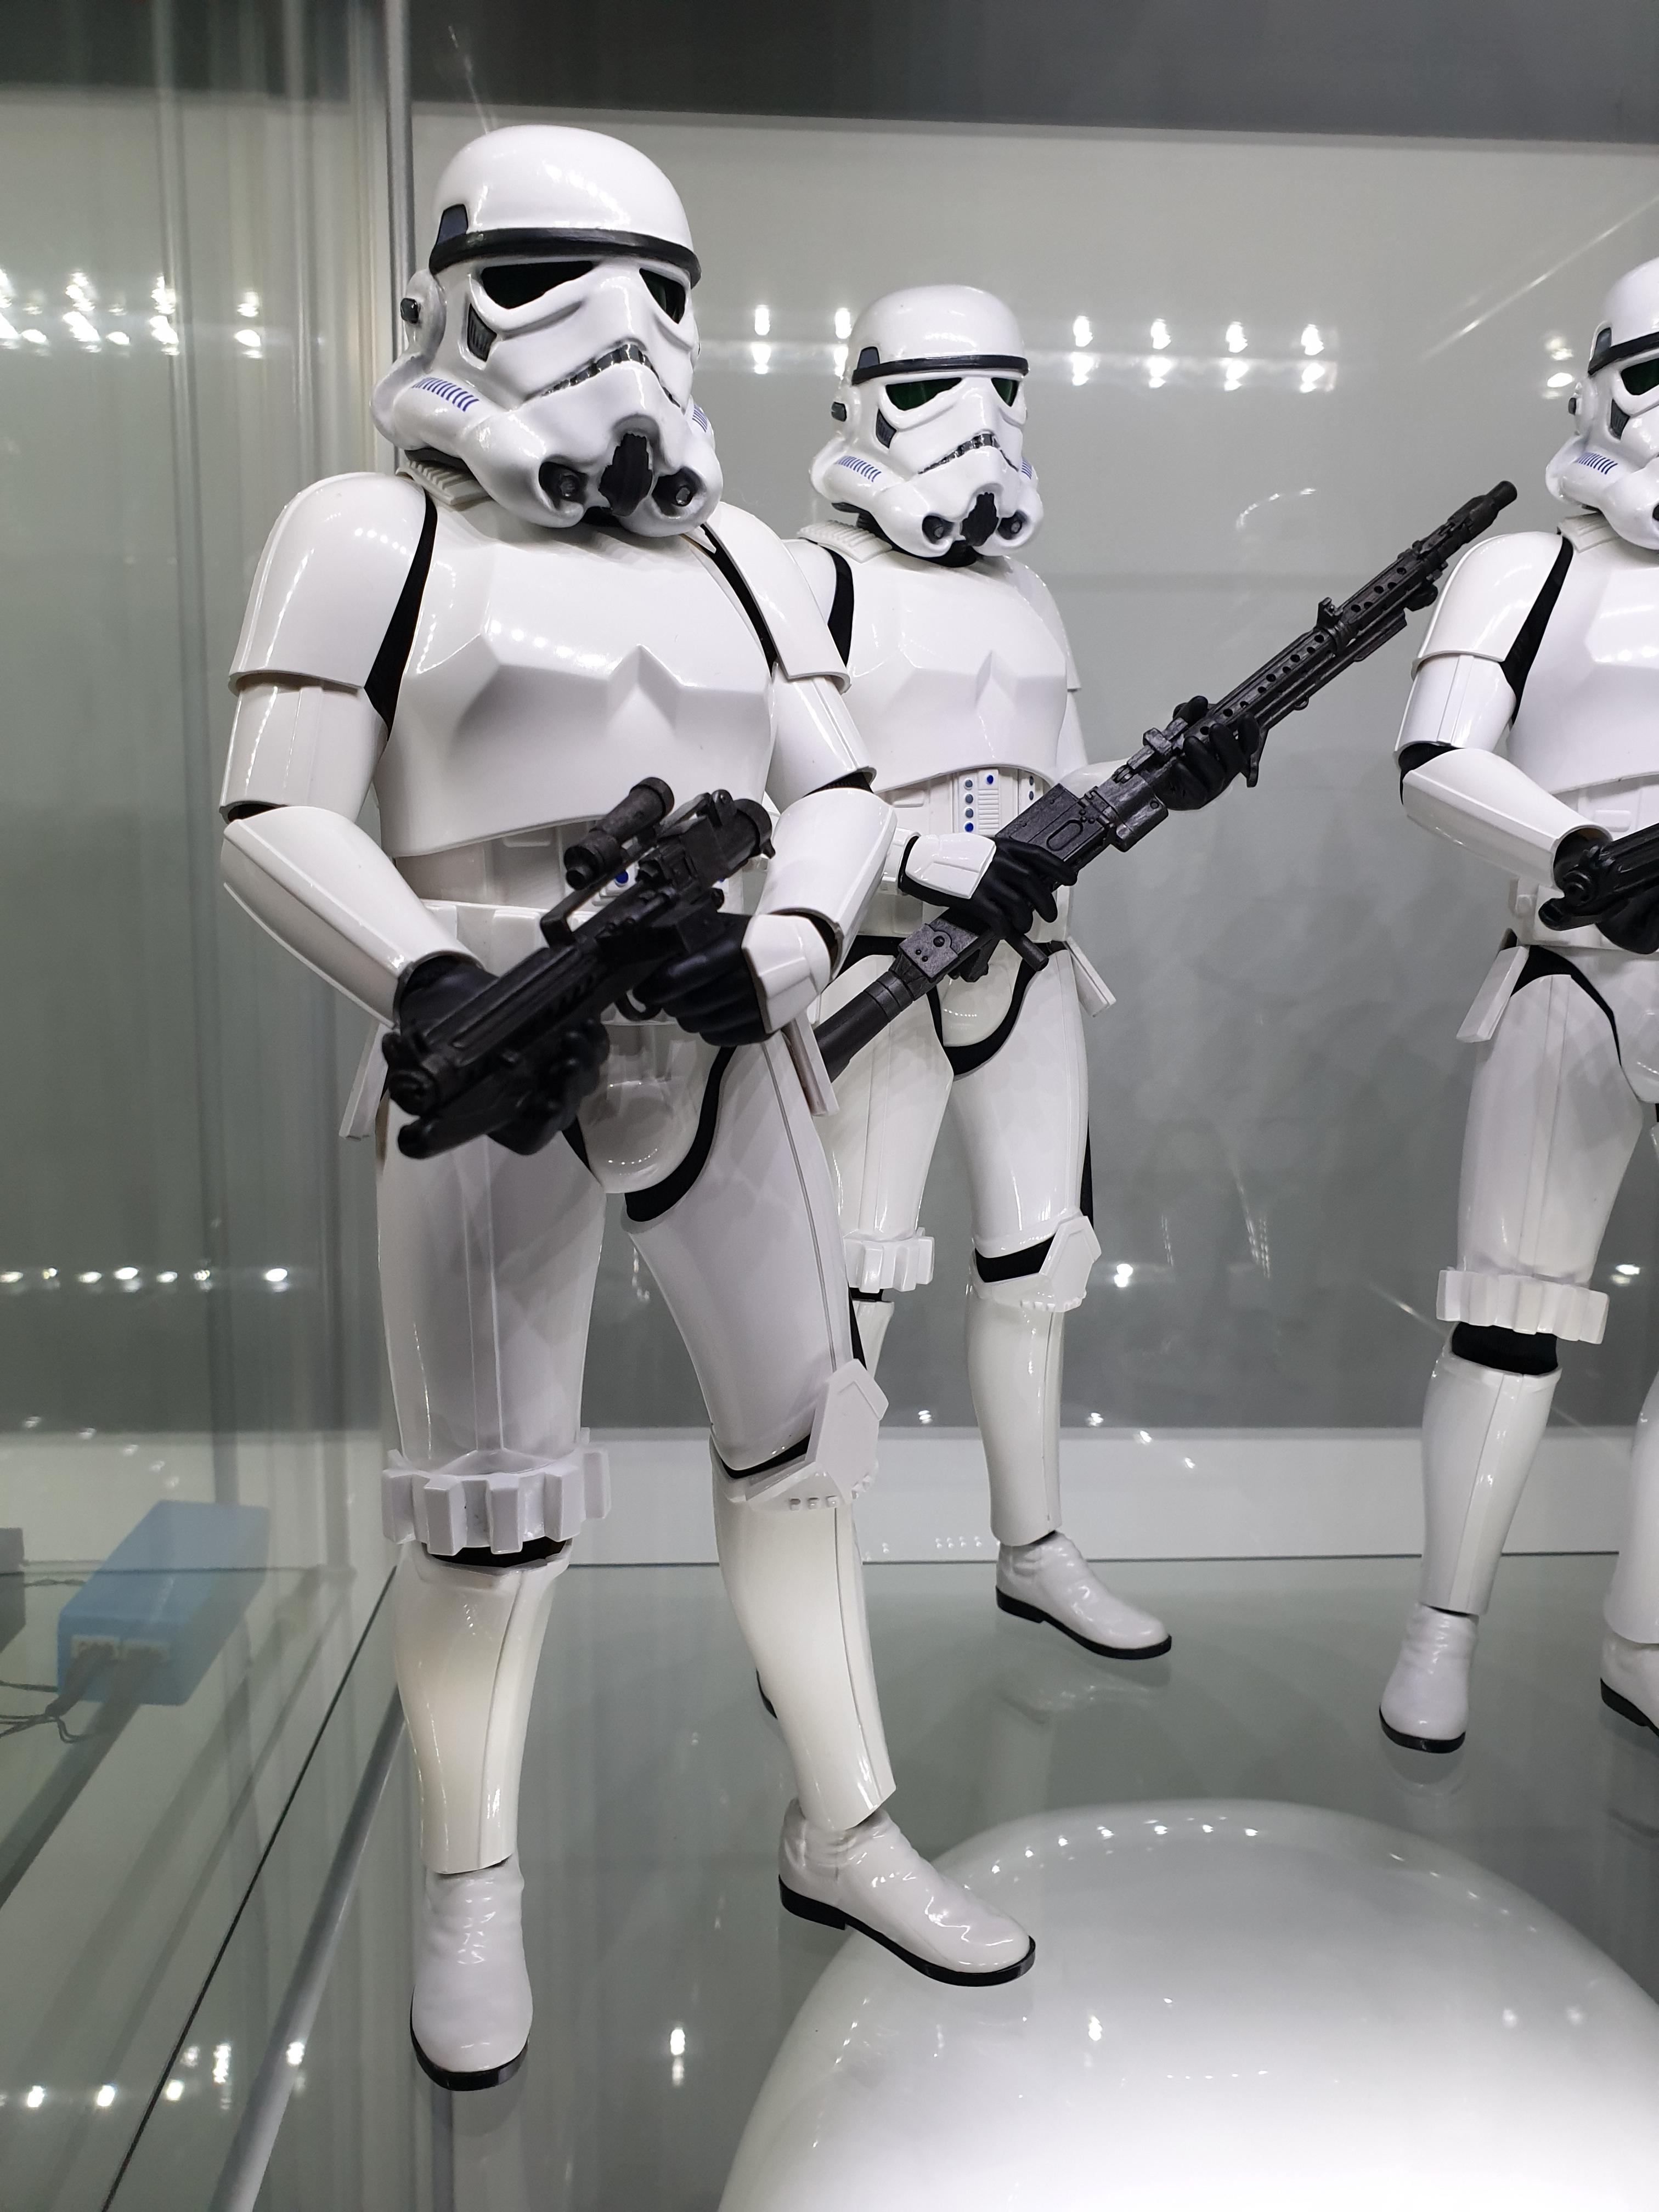
Thanks guys for the kind comments. Still have 2 more helmets to do but will give it a break for a while. The amount of time and concentration to do each one is quite consuming and I can tell you. Will leave it here for now with my small garrison of Stormtroopers.


Great stuff Mancutd!
 Can I ask what paints you are using for these please? You really seem to have got the colour match pretty spot on there.
mancutd
Freakzoid
Thanks for comments guys. ") Adam the paint I used was the same as Solo Bones. Tamiya ts-26 gloss white spray can. I used Tamiya fine grey primer to start with and then done several light coats of the white. To get the shine I put Pledge floor wax varnish to seal the paint. I then added the decals after and painted the frown , vocoder and brow. Hope this helps.
Adam the paint I used was the same as Solo Bones. Tamiya ts-26 gloss white spray can. I used Tamiya fine grey primer to start with and then done several light coats of the white. To get the shine I put Pledge floor wax varnish to seal the paint. I then added the decals after and painted the frown , vocoder and brow. Hope this helps.
Adam the paint I used was the same as Solo Bones. Tamiya ts-26 gloss white spray can. I used Tamiya fine grey primer to start with and then done several light coats of the white. To get the shine I put Pledge floor wax varnish to seal the paint. I then added the decals after and painted the frown , vocoder and brow. Hope this helps.Thanks for comments guys.
I’m impressed with the smooth finish. Did you sand down the printer texture, or was it the paint and primer that filled it in?
Sent from my iPhone using Tapatalk
mancutd
Freakzoid
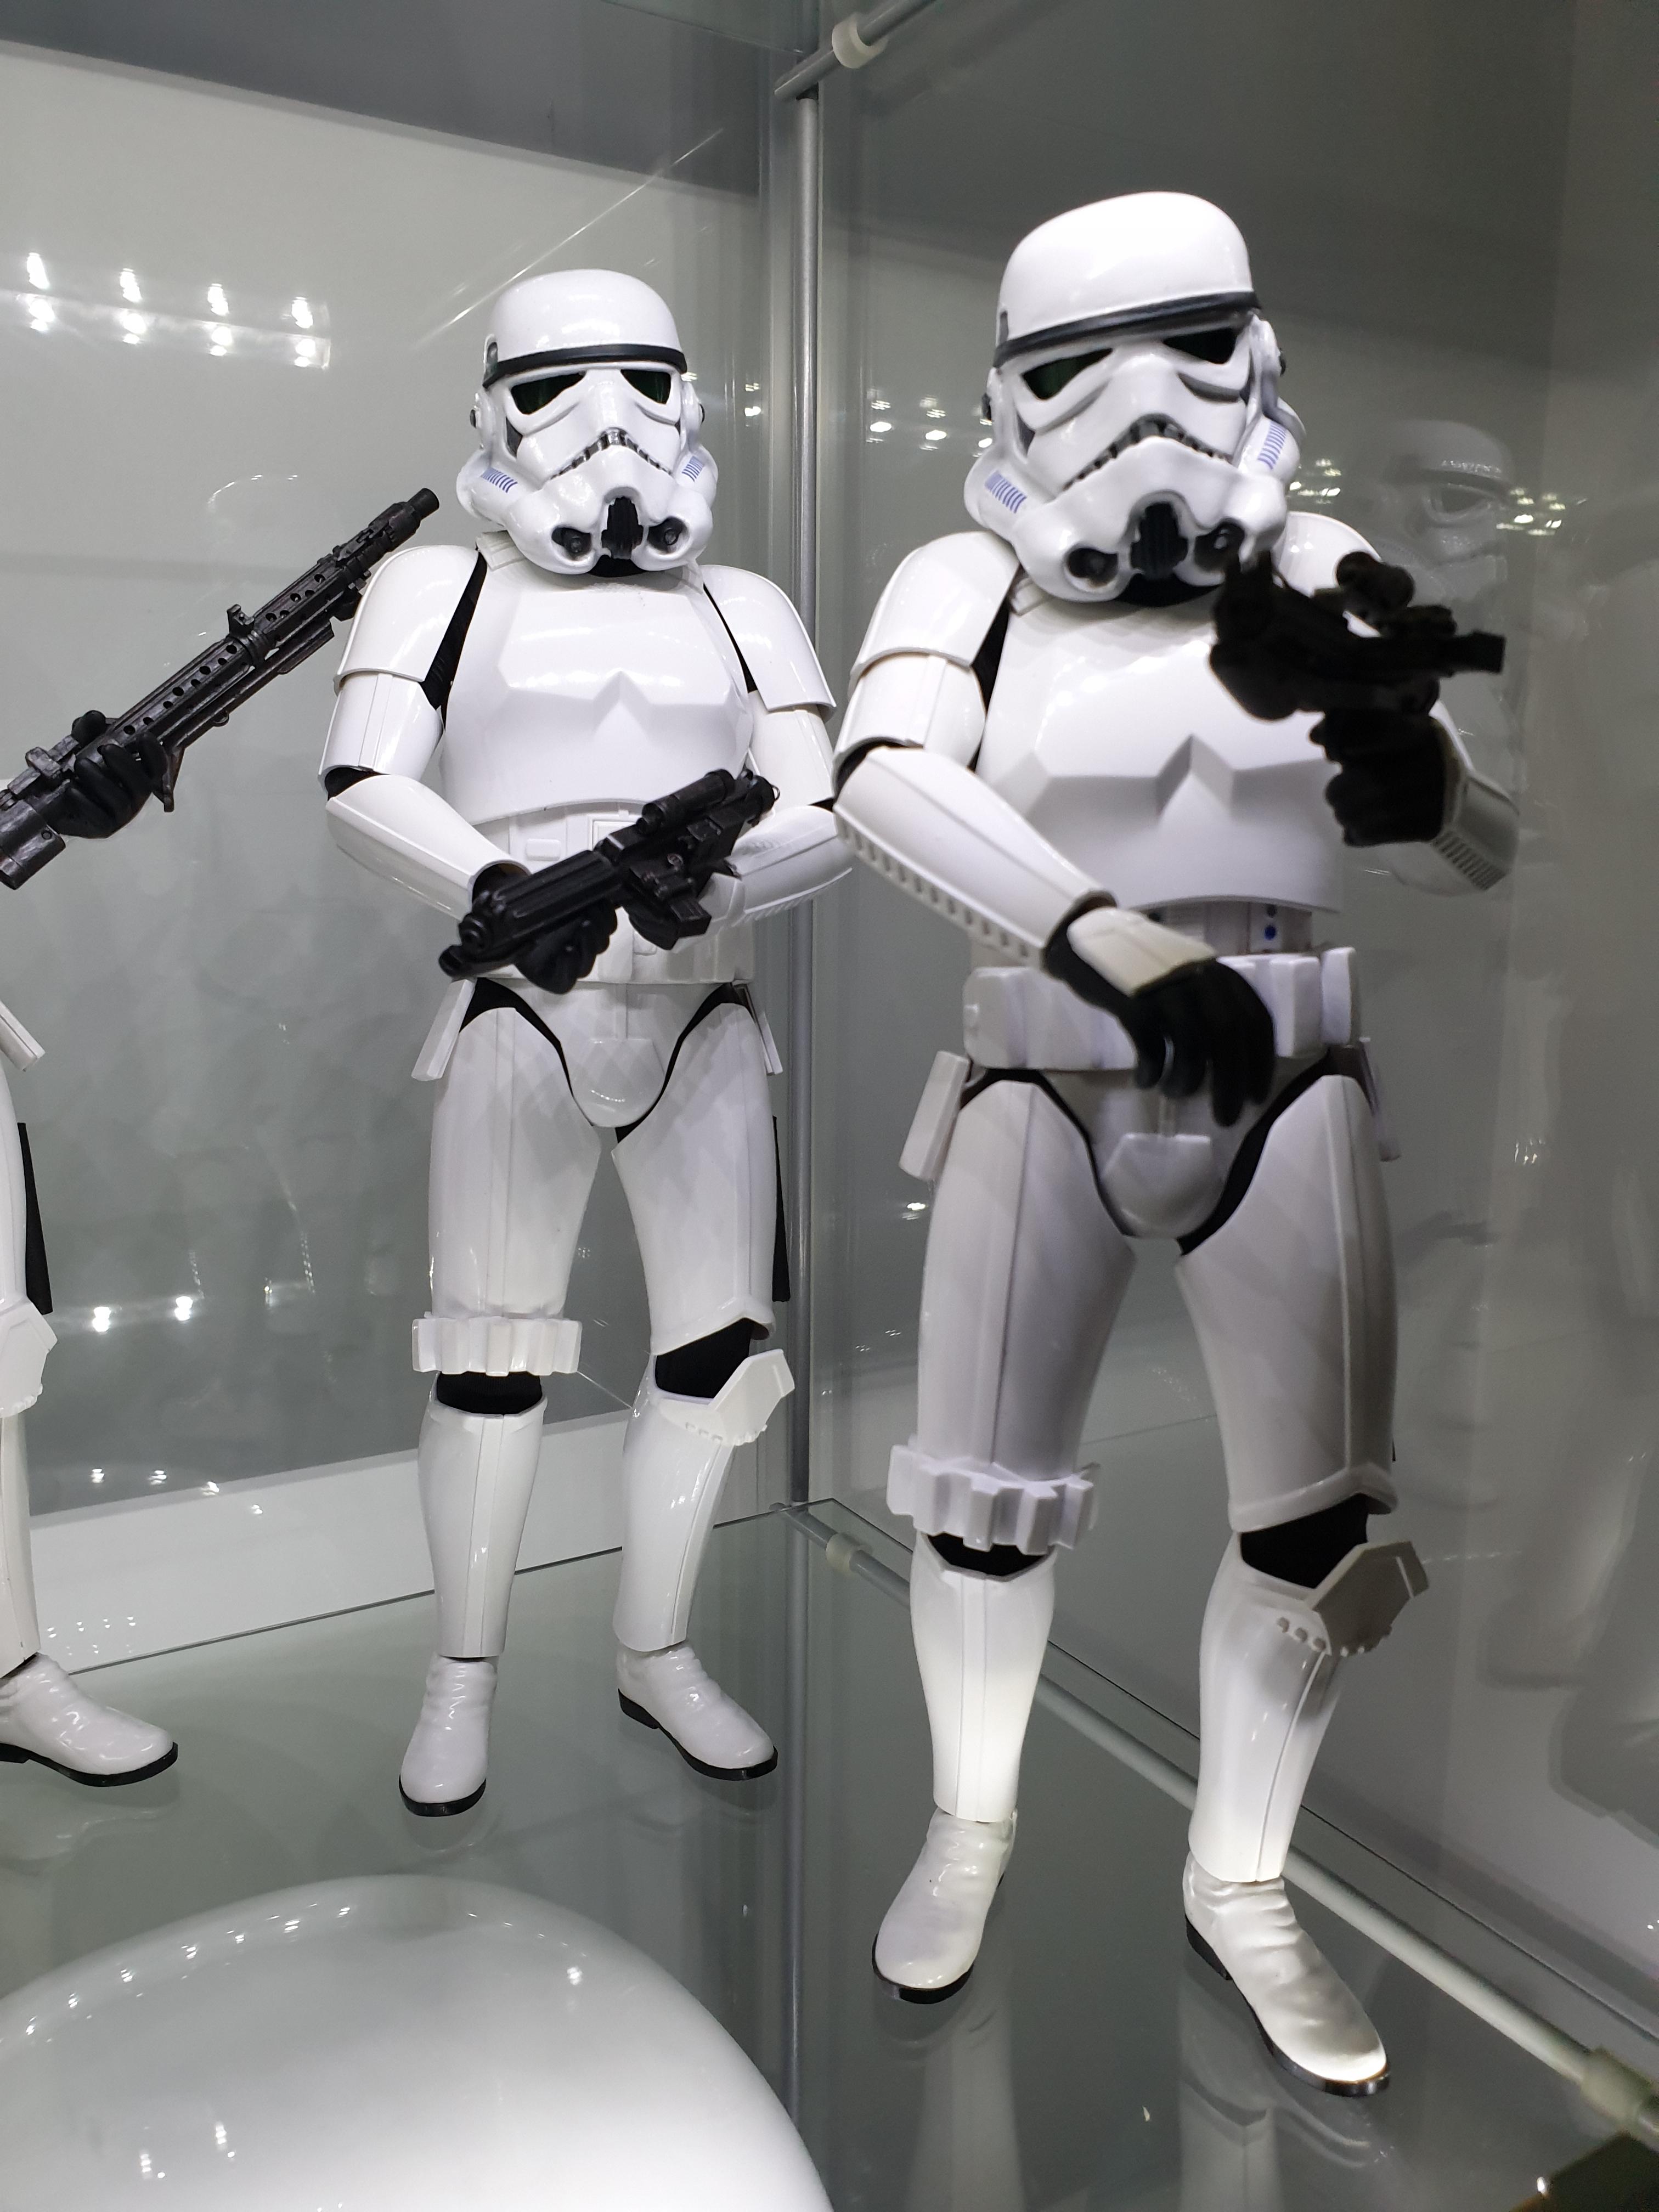
Thank you WTC. The heads were not 3d printed. They were cast in resin from a mold that Solo Bones crafted and spent many weeks perfecting. But yes the heads do come in rough format with seam lines and air bubbles in them. I first used needle files to erase the seam lines and then sanded with various grit paper. I then primed them with Fine grey primer. This showed up any defects. Carefully I then smeared Bondo spot putty into any pin holes and in some cases I used some milliput white fine putty. Then wet sanded with 1000 grit to achieve the smooth surface. With couple of coats of primer too the surface was almost blemish free. Perfect for building up the coats of gloss white. The helmets are not perfect and do have some marks but I find this adds to the realism as the 1-1 helmets had many chips and dents too.
Adam1138
Super Freak
- Joined
- Mar 24, 2016
- Messages
- 1,262
- Reaction score
- 134
Thanks for comments guys.
Thanks for all the info mancutd. The finish on these is superb. I also agree that a few “imperfections” actually make these helmets all the more screen accurate. The original helmet 3D model that these helmets originate from was supposedly a direct scan of the screen used “set for stun” helmet. It used to be available on Shapeways but has long since been deleted from their inventory for some reason. Back probably about 3 or so years ago I ordered one which I still have to this day. I posted a pic of it on this thread which re ignited Wills passion to continue with the project. After a few different scale proto’s he settled on which we all thought was the correct size. Which brings us to where we are today with these beautiful little things. I really need to pull my finger out and get finishing the ones that I have. Your pictures have made me green with envy!
Chakaman
Super Freak
Those buckets look fantastic mancutd!!
mancutd
Freakzoid
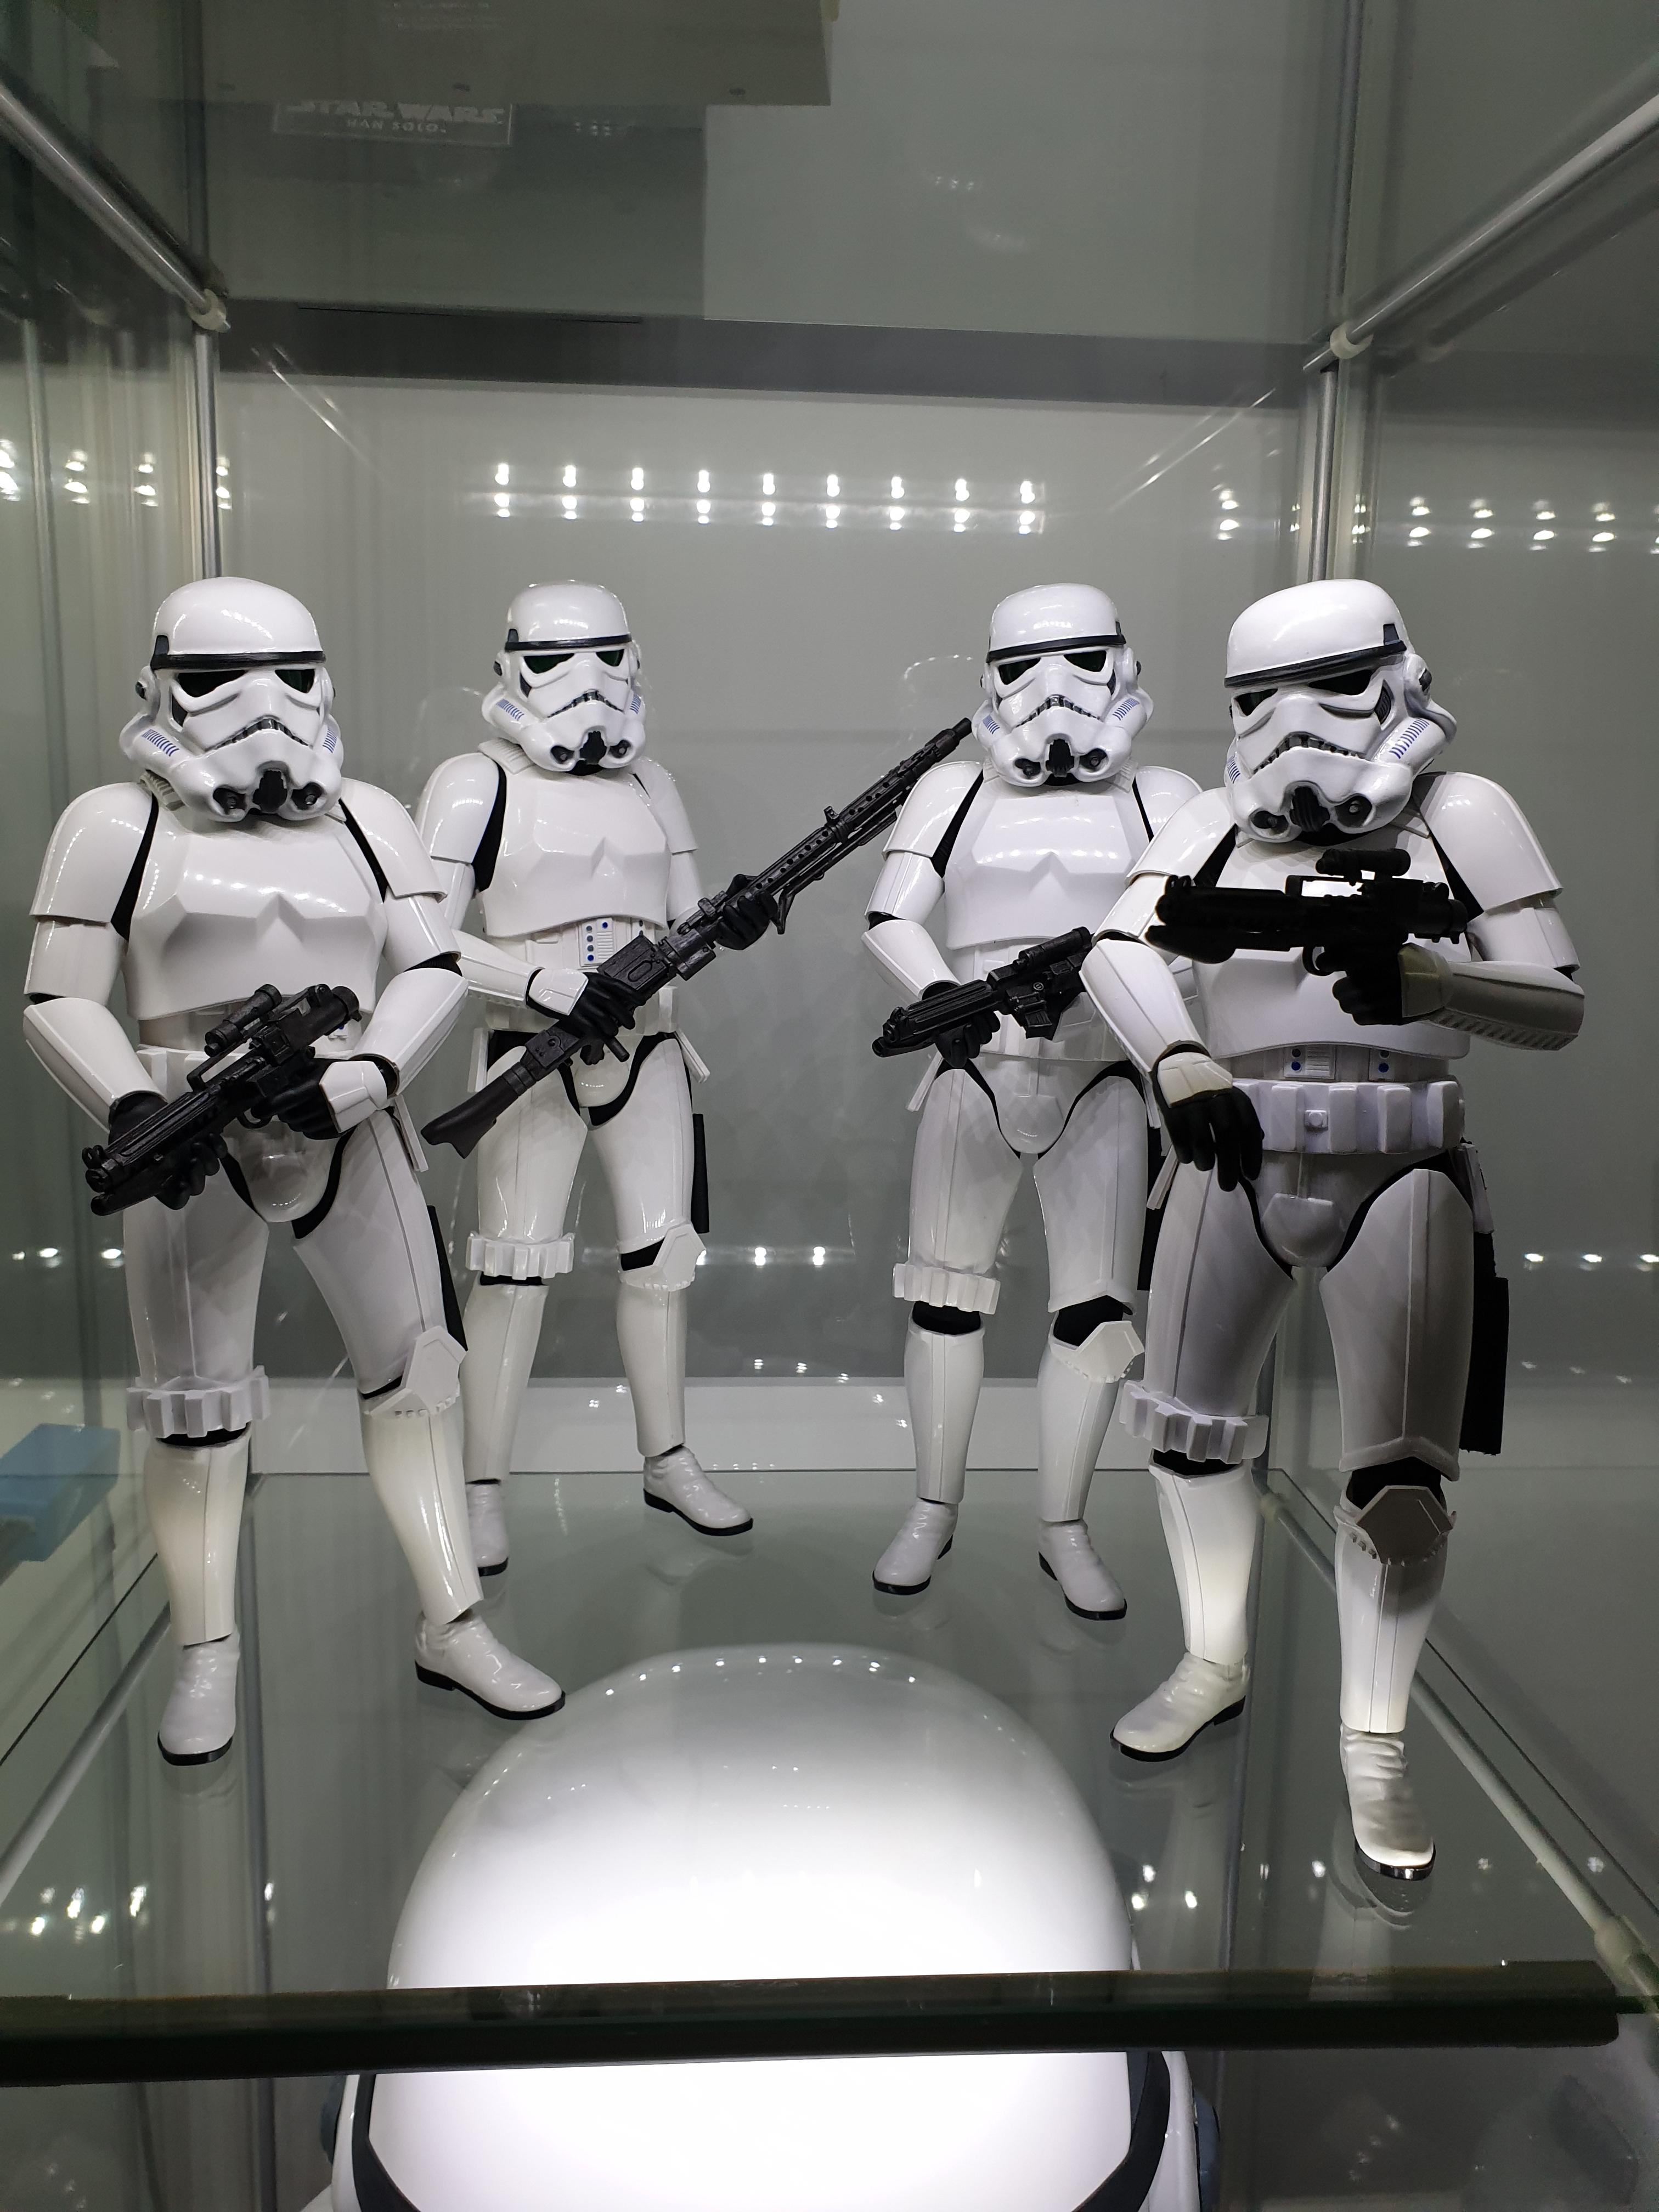
Cheers Adam and Chakaman. Means a lot to have such nice comments on the Buckets. First time I ever tried doing anything like this before. I amazed myself how good they turned out to be honest. I was putting it off for months attempting to do these for fear of making a right hash job of them. I still have another 4 to do but will take a breather for a while. Adam I remember seeing the 3D printed version on Shapeways years ago too and then it just vanished. It was your post that I found in google search looking for them that led me to this project of Will's. I would like to say a big thank you to yourself and Will especially for seeing this through. I do hope Will is alright as I have not heard from him for quite a few months. Finally we have a bucket that can do justice to a great figure.
Means a lot to have such nice comments on the Buckets. First time I ever tried doing anything like this before. I amazed myself how good they turned out to be honest. I was putting it off for months attempting to do these for fear of making a right hash job of them. I still have another 4 to do but will take a breather for a while. Adam I remember seeing the 3D printed version on Shapeways years ago too and then it just vanished. It was your post that I found in google search looking for them that led me to this project of Will's. I would like to say a big thank you to yourself and Will especially for seeing this through. I do hope Will is alright as I have not heard from him for quite a few months. Finally we have a bucket that can do justice to a great figure. D.R.37
Super Freak
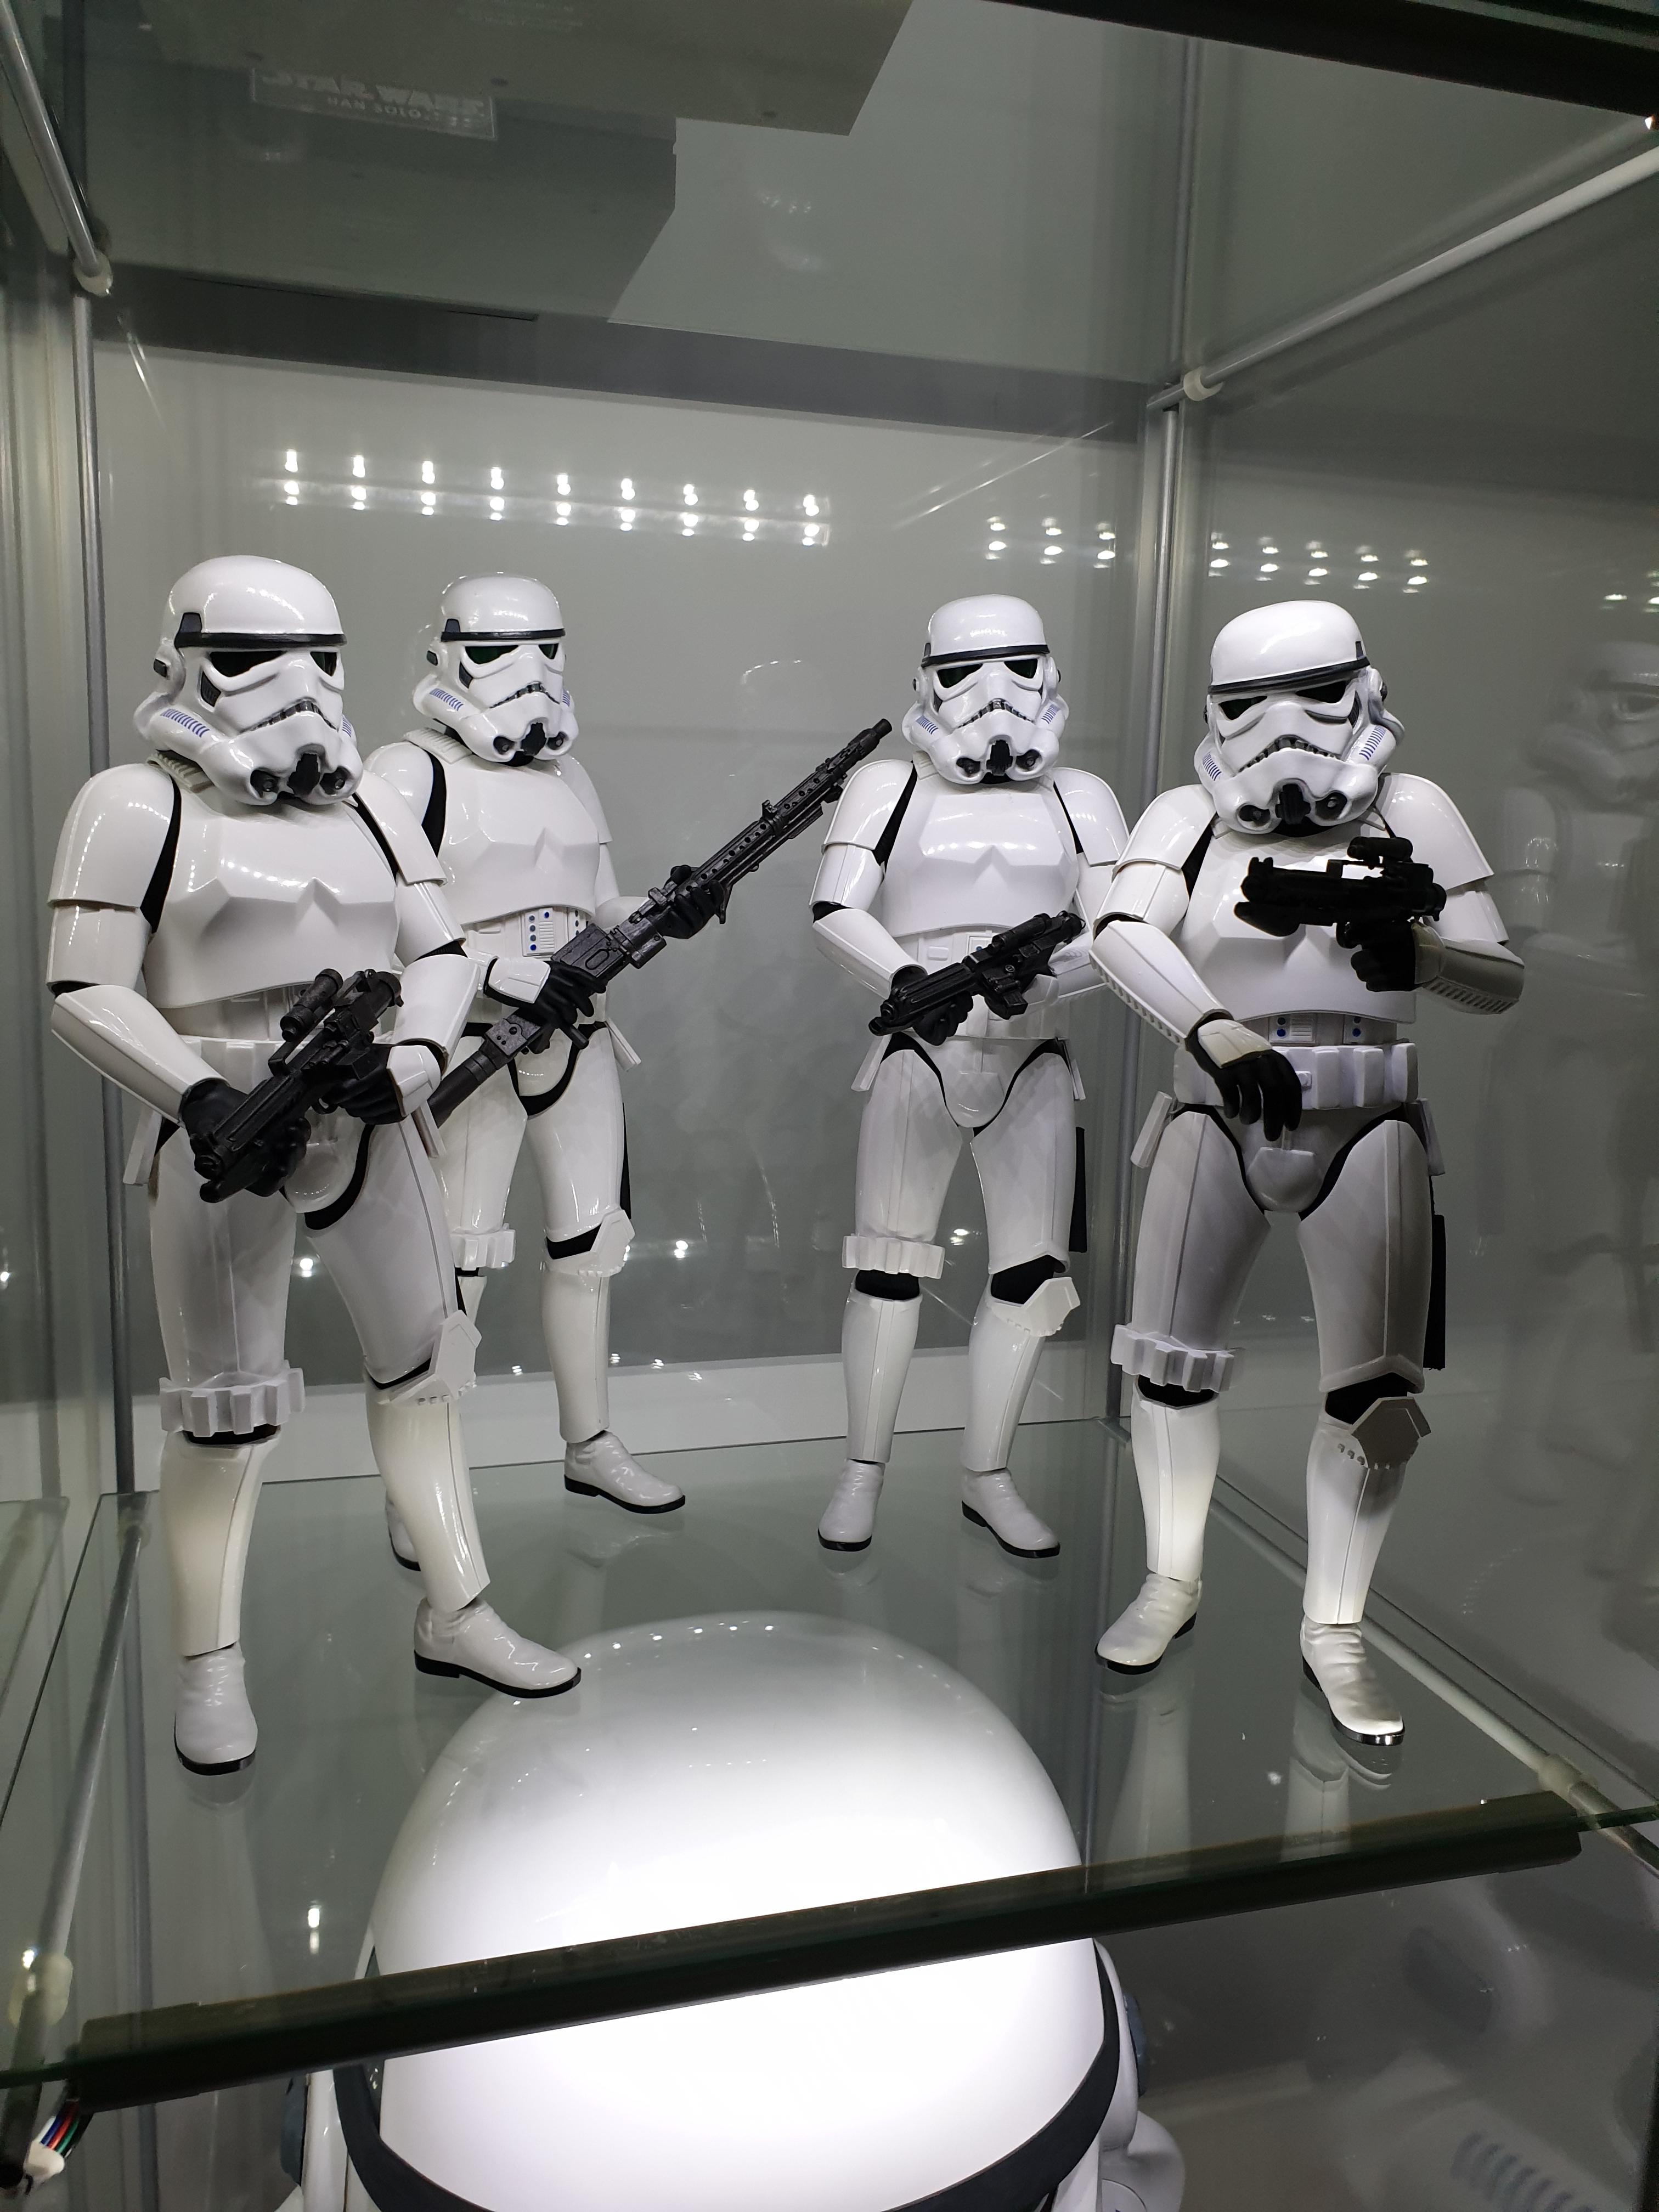
Over the past couple weeks I finally made some time to finish off the first 2 buckets ("Move Along" still needing to be weathered-up). These were a bit more work than i anticipated, but well worth it. Also from some of the mistakes along the way i've figured out ways to improve on the next few.


Chakaman
Super Freak
Nice work Paul. Good stuff.
- Joined
- Apr 19, 2013
- Messages
- 10,668
- Reaction score
- 4,311
Ya know, I haven't even had a chance to start on mine yet. Looking good, guys! The "move-along" helmet in particular is great.
D.R.37
Super Freak
Nice work Paul. Good stuff.
Ya know, I haven't even had a chance to start on mine yet. Looking good, guys! The "move-along" helmet in particular is great.
Thanks guys

I’m thinking the Sandtrooper’s armor is looking a bit too weathered. I may tone that down. Need to look at more refs.
- Joined
- Apr 19, 2013
- Messages
- 10,668
- Reaction score
- 4,311
Thanks guys ����
I’m thinking the Sandtrooper’s armor is looking a bit too weathered. I may tone that down. Need to look at more refs.
It is. There's a little bit of variation between individual batches, but not much. It's pretty easy to remove some of the weathering but be careful not to be too heavy-handed or use anything too strong, or you'll wind up removing the undercoat of paint, which will creat a LOT more work for you.
Adam1138
Super Freak
- Joined
- Mar 24, 2016
- Messages
- 1,262
- Reaction score
- 134
Over the past couple weeks I finally made some time to finish off the first 2 buckets ("Move Along" still needing to be weathered-up). These were a bit more work than i anticipated, but well worth it. Also from some of the mistakes along the way i've figured out ways to improve on the next few.
View attachment 446895
Nice work and excellent pose on the Stormtrooper. Very natural
- Joined
- Apr 19, 2013
- Messages
- 10,668
- Reaction score
- 4,311
Over the past couple weeks I finally made some time to finish off the first 2 buckets [...]
What did you use to cut/trim the resin? I don't think I have a good tool for that on the bench, wondering what I should use.
D.R.37
Super Freak
It is. There's a little bit of variation between individual batches, but not much. It's pretty easy to remove some of the weathering but be careful not to be too heavy-handed or use anything too strong, or you'll wind up removing the undercoat of paint, which will creat a LOT more work for you.
Yeah I plan on working up from 50/50 alcohol and water mix until I get the result I like. Although any damage to the armors finish would just be authentic
Nice work and excellent pose on the Stormtrooper. Very natural
Thank you.
What did you use to cut/trim the resin? I don't think I have a good tool for that on the bench, wondering what I should use.
I used a dremel for all the inside trimming and just an exacto for the eye-holes for the lenses. I ended up getting the 1:1 Stormtrooper green replacement lenses and cut the lenses out of that.
- Joined
- Apr 19, 2013
- Messages
- 10,668
- Reaction score
- 4,311
I used a dremel for all the inside trimming and just an exacto for the eye-holes for the lenses. I ended up getting the 1:1 Stormtrooper green replacement lenses and cut the lenses out of that.
Yeah, I'm gonna have to resort to tiny drill bits and grinders on my jeweller's Foredom (it's like a powerful Dremel). I tested an X-acto blade on virgin resin and it hardly scratches it. I'll need pilot holes at least, I think.
D.R.37
Super Freak
Yeah, I'm gonna have to resort to tiny drill bits and grinders on my jeweller's Foredom (it's like a powerful Dremel). I tested an X-acto blade on virgin resin and it hardly scratches it. I'll need pilot holes at least, I think.
Oh yeah I definitely did pilot holes to break up the unwanted resin in the helmet before grinding out the last bits.
Yeah, I haven't really started on mine yet - it looks like a lot more clean-up/work than I was expecting, but overall it looks very cool and accurate. He did a great job on it. I'm hoping I'll have mine done by mid-year maybe.
Similar threads
- Replies
- 1
- Views
- 703
- Replies
- 20
- Views
- 3K
- Replies
- 7
- Views
- 2K
- Replies
- 5
- Views
- 2K