You are using an out of date browser. It may not display this or other websites correctly.
You should upgrade or use an alternative browser.
You should upgrade or use an alternative browser.
1/6 Indy Customizations: Image Thread
- Thread starter IrishJedi
- Start date


Help Support Collector Freaks Forum:
This site may earn a commission from merchant affiliate
links, including eBay, Amazon, and others.
- Joined
- Dec 31, 2009
- Messages
- 15,215
- Reaction score
- 157
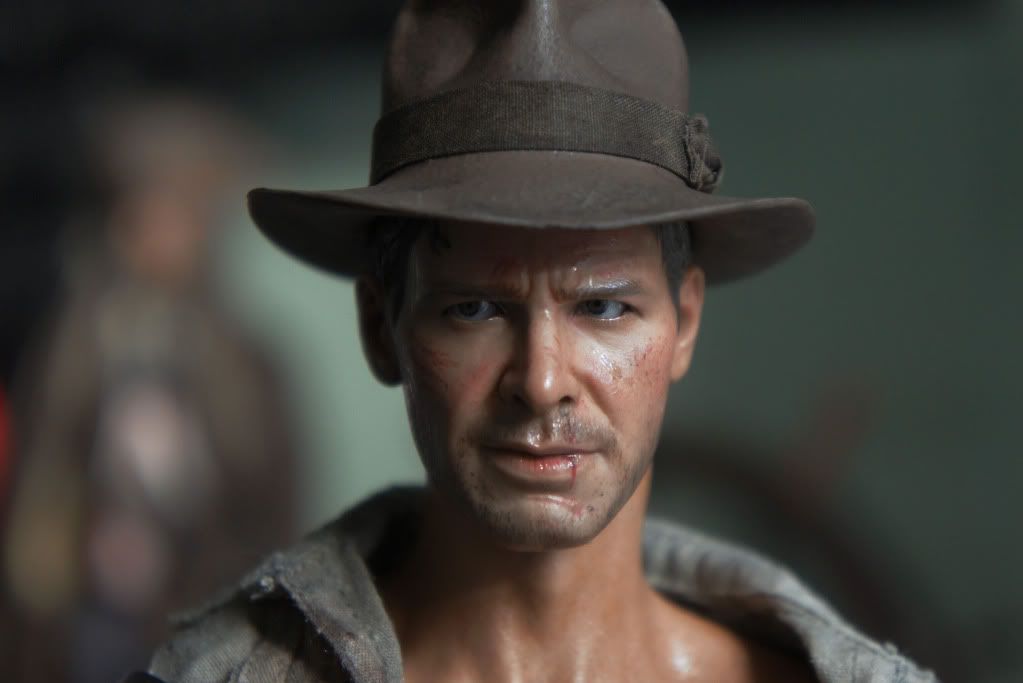
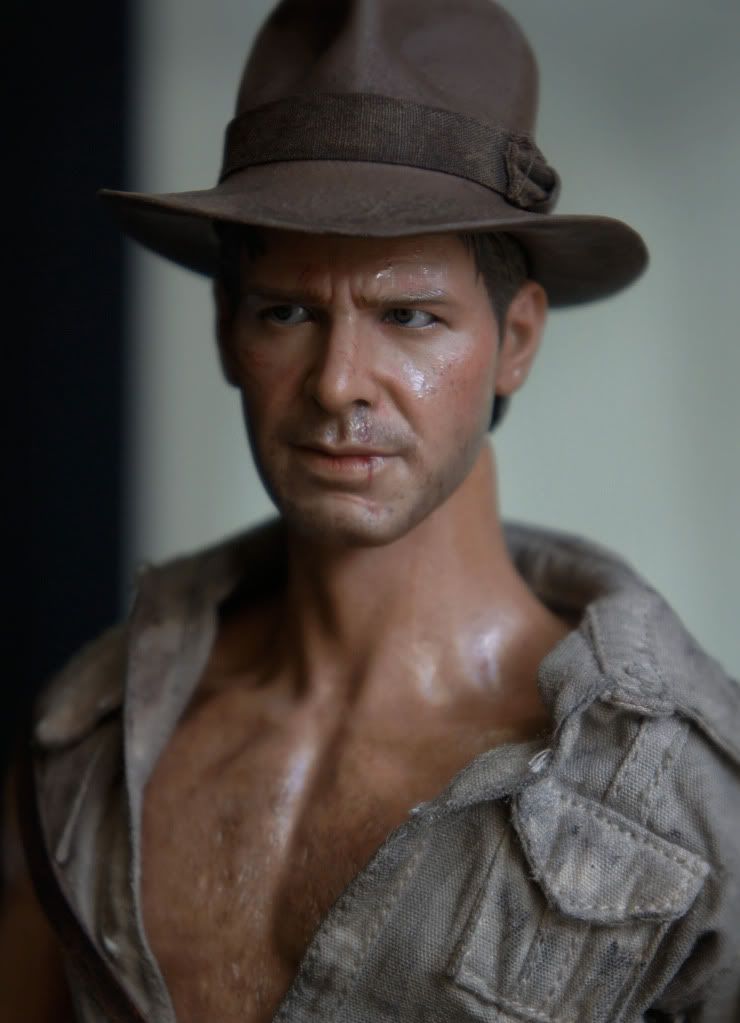
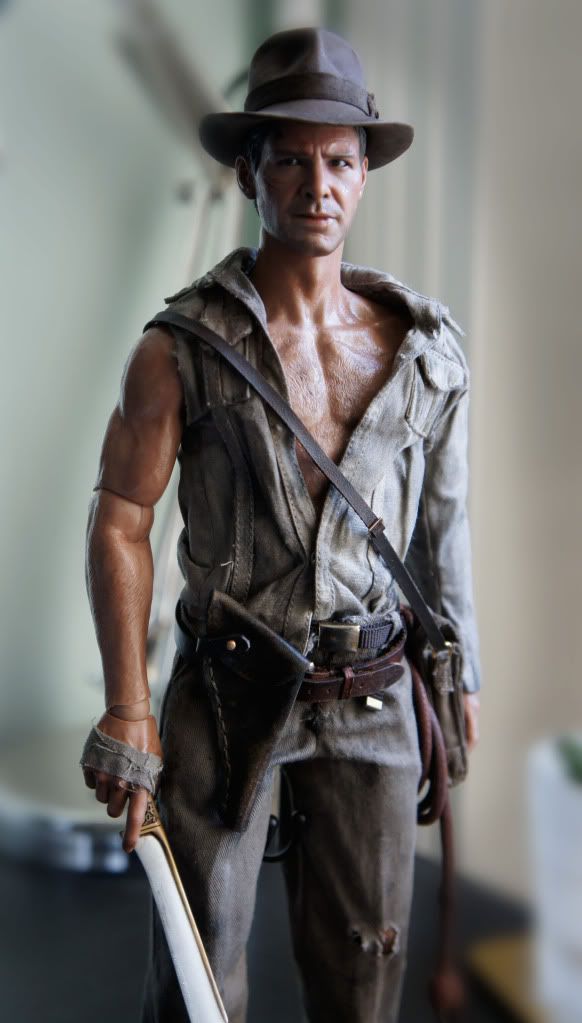
A few new pics of my WIP TOD Indy (raw, no shop, natural light)..

amidala_zelda
Super Freak
A few new pics of my WIP TOD Indy (raw, no shop, natural light)..
GREAT JOB MATE! did you resculpt that HS hot toys indy? or just repainted?? it looks real indiana jones now, well done
")
- Joined
- Dec 31, 2009
- Messages
- 15,215
- Reaction score
- 157
Thanks man, not a resculpt as such more a restructure. And a repaint.
I went through it a few pages back.
I went through it a few pages back.
amidala_zelda
Super Freak
Thanks man, not a resculpt as such more a restructure. And a repaint.
I went through it a few pages back.
woow nice restructure, the best customized HT indy so far
.. i really see Harrison ford as indiana jones in 1:6 scale now..looking forward when it is finished
bbl
Super Freak
- Joined
- Jan 4, 2011
- Messages
- 1,633
- Reaction score
- 10
Looks awesome rory...great detail ...i got a new body and head today..gonna color the shirt grey and dirty it up. For the head, if i want to add the blood, what is the process. Do i make a cut in the head first before painting? I recon i use red with a little black.
Other tips?
...i got a new body and head today..gonna color the shirt grey and dirty it up. For the head, if i want to add the blood, what is the process. Do i make a cut in the head first before painting? I recon i use red with a little black.Other tips?
A few new pics of my WIP TOD Indy (raw, no shop, natural light)..
- Joined
- Dec 31, 2009
- Messages
- 15,215
- Reaction score
- 157
Looks awesome rory...great detail
Other tips?
Thanks man, for blood, mix a little dark brown, black with the red you use, make sure it's not too pink. test it on your hand first, to see if it looks right, the darker the more realistic. Don't cut or scrape the actual sculpt. Get a tiny brush, dip it and test on a piece of paper, tiny dots at first, once you get used to that, paint the cut shape with tiny dots on the sculpt, then when you are happy with the position, use a tiny thin line through the middle, this makes it look like the skin is bruised or inflamed around the slice, as it would be. For added realism, use a slightly darker red for the actual cut, this makes it look like the blood has dried a little. when it's dry cover carefully with a line of varnish.
It's actually fun to do, but make sure you get your blood/red color correct first!
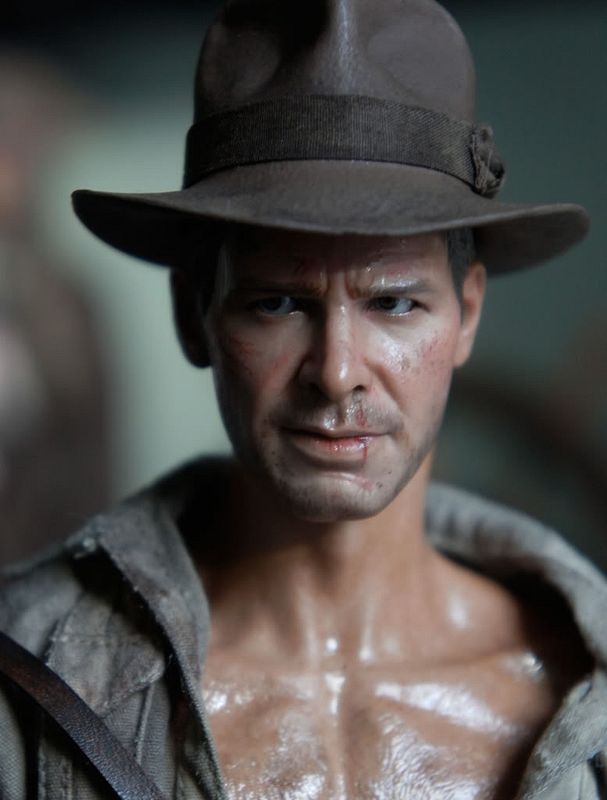
You can see the paint a little clearer on this (my first attempt at a TOD head, not the same as the one above, I wanted to get it more "fleshy" so I started again):
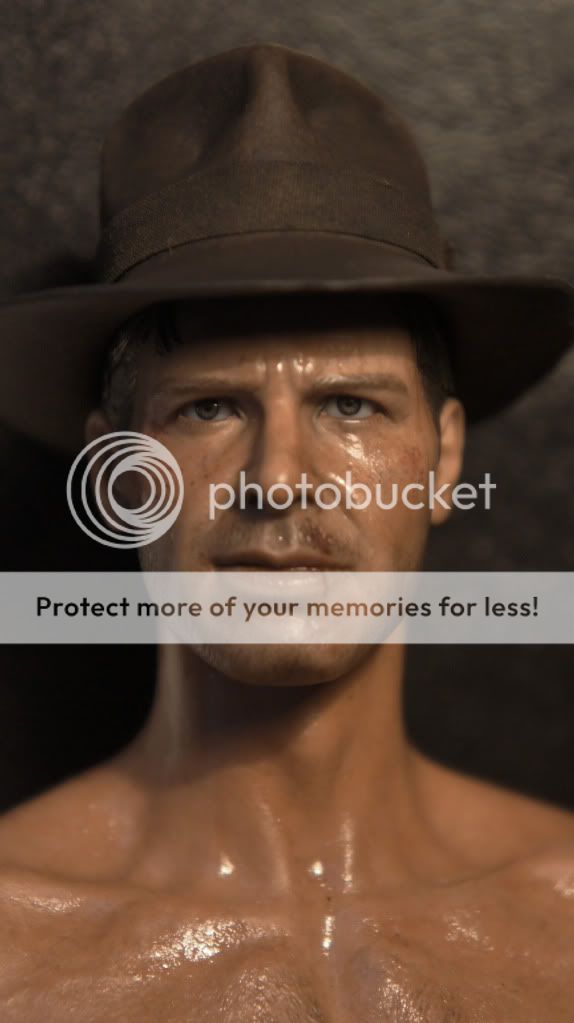
and this newer one..
Last edited:
Legionnaire75
Just a little freaky
- Joined
- Dec 26, 2011
- Messages
- 4
- Reaction score
- 0
WOW Now THAT is what Hot Toys should have released as their DX Indy! Amazing work indeed!!
A few new pics of my WIP TOD Indy (raw, no shop, natural light)..
nice improve.. good job rorywan.. much better... but for me he can be anyone.. the dress helps a lot...still now for me is difficulty too see a good Ford here...
have you plugged firmly the neck joint on the head? I see a little giraffe's look here
Last edited:
Mad Old Lu
Super Freak
Amazing work, Rory! 
bbl
Super Freak
- Joined
- Jan 4, 2011
- Messages
- 1,633
- Reaction score
- 10
Thank again for all the tips. Will try all of them. I am having a blast with modding my indy. Did you add the sweat first before you added the blood stains? The sweat is a mix of reddish and the varnish and water. I saw you also dyed the pants. Amazing work on the entire figure.
My mfisher package is on the way for my Raiders indy. Thinking of getting another set for TOD. You inspire me my man . I will post some pictures as soon as the fisherset is in. 
Is there a way to shorten the neck? I accidently pulled out the neckjoint within the skin. It should be possible. It is a small cyllindertype neckjoint.
My mfisher package is on the way for my Raiders indy. Thinking of getting another set for TOD
. You inspire me my man . I will post some pictures as soon as the fisherset is in. Is there a way to shorten the neck? I accidently pulled out the neckjoint within the skin. It should be possible. It is a small cyllindertype neckjoint.
Thanks man, for blood, mix a little dark brown, black with the red you use, make sure it's not too pink. test it on your hand first, to see if it looks right, the darker the more realistic. Don't cut or scrape the actual sculpt. Get a tiny brush, dip it and test on a piece of paper, tiny dots at first, once you get used to that, paint the cut shape with tiny dots on the sculpt, then when you are happy with the position, use a tiny thin line through the middle, this makes it look like the skin is bruised or inflamed around the slice, as it would be. For added realism, use a slightly darker red for the actual cut, this makes it look like the blood has dried a little. when it's dry cover carefully with a line of varnish.
It's actually fun to do, but make sure you get your blood/red color correct first!
You can see the paint a little clearer on this (my first attempt at a TOD head, not the same as the one above, I wanted to get it more "fleshy" so I started again):
- Joined
- Dec 31, 2009
- Messages
- 15,215
- Reaction score
- 157
Thank again for all the tips. Will try all of them. I am having a blast with modding my indy. Did you add the sweat first before you added the blood stains? The sweat is a mix of reddish and the varnish and water. I saw you also dyed the pants. Amazing work on the entire figure.
My mfisher package is on the way for my Raiders indy. Thinking of getting another set for TOD
Is there a way to shorten the neck? I accidently pulled out the neckjoint within the skin. It should be possible. It is a small cyllindertype neckjoint.
Thanks man

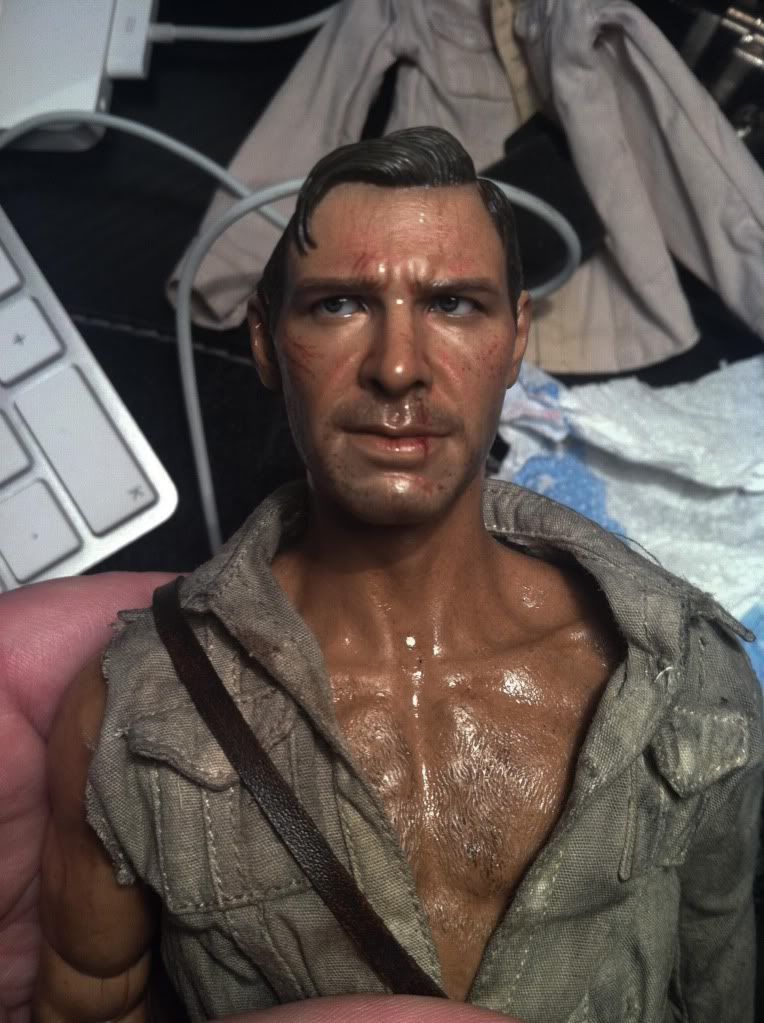
Paint first, varnish last. And only use the tiniest amount of varnish, and only in certain areas. (see below pic) I have seen a few people ruin their hard work with too much varnish. You need to allow the skin to show through, what I do, is use a watered down satin acrylic varnish first, this gives a base skin shine, then add sweat with proper gloss varnish. The neck is the neck I'm afraid, problem is the head is too small for that muscle body. It looks fine on the Goemon body for a Raiders bash, but for TOD you need a proper sculpted chest. To be honest you don't really notice it as much inland or from some angles.. I wouldn't cut down the muscle body neck, it would still be too wide I think. Best of luck with it!
bbl
Super Freak
- Joined
- Jan 4, 2011
- Messages
- 1,633
- Reaction score
- 10
Thnx again . Gonna take everybit of advice. your head is smaller than usual. You used heat didn't you? Do i need to get the eyesystem out first?
. Gonna take everybit of advice. your head is smaller than usual. You used heat didn't you? Do i need to get the eyesystem out first?Thanks man
Paint first, varnish last. And only use the tiniest amount of varnish, and only in certain areas. (see below pic) I have seen a few people ruin their hard work with too much varnish. You need to allow the skin to show through, what I do, is use a watered down satin acrylic varnish first, this gives a base skin shine, then add sweat with proper gloss varnish. The neck is the neck I'm afraid, problem is the head is too small for that muscle body. It looks fine on the Goemon body for a Raiders bash, but for TOD you need a proper sculpted chest. To be honest you don't really notice it as much inland or from some angles.. I wouldn't cut down the muscle body neck, it would still be too wide I think. Best of luck with it!
- Joined
- Dec 31, 2009
- Messages
- 15,215
- Reaction score
- 157
Thnx again
No mate, the modded head is the same size, just an optical illusion because there is so little detail on the HT original paint job. I have had around 4 heads now and they are all the same size, just fatter in places with slightly different paint jobs on them, some better than others.
I wouldn't take out the eye system unless you are really sure about it. I would pare out the inside of the head and heat it though, as I outlined a while back. That makes the biggest difference IMO.
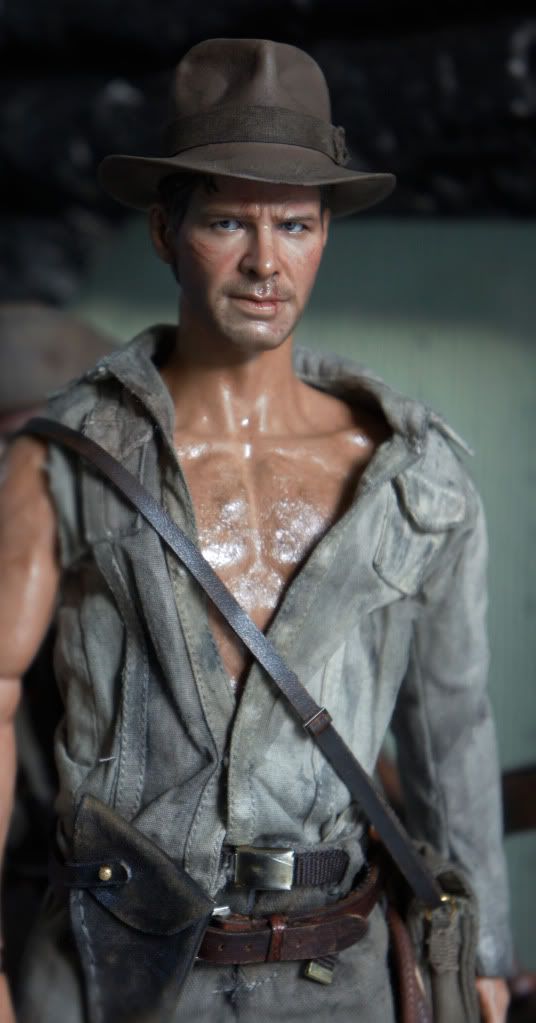
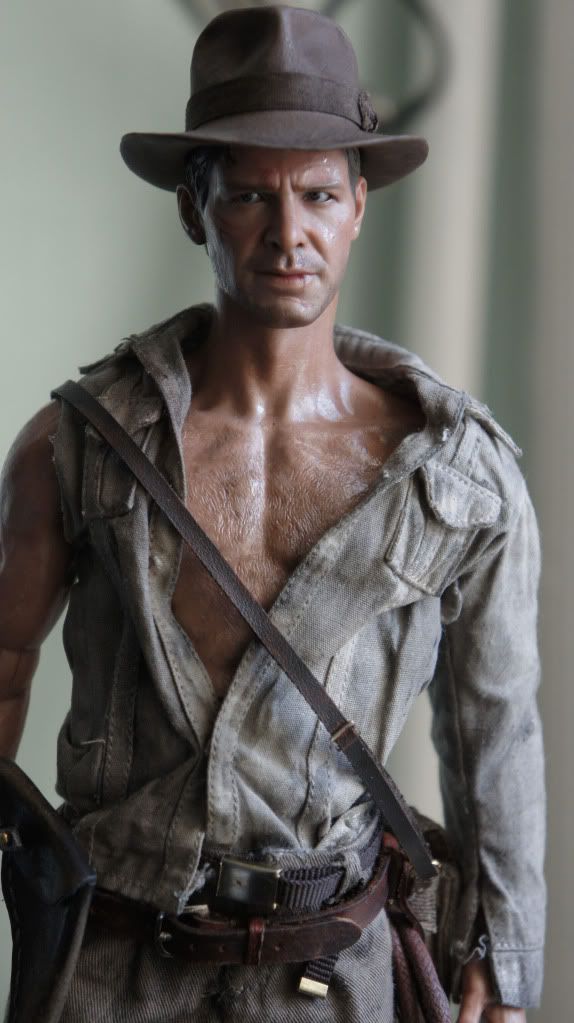
Happy New Year All! Here's a quick update on my Indy #2, I took a risk and carved the inside of the head and made it thinner, thanks Rory for the tips
Some Natural sunlight pics


IMG]https://i270.photobucket.com/albums/jj83/guyver12/IMG_1677.jpg[/IMG]

Some Natural sunlight pics
IMG]https://i270.photobucket.com/albums/jj83/guyver12/IMG_1677.jpg[/IMG]
captainjamesbrooke
Super Freak
- Joined
- Sep 21, 2008
- Messages
- 2,282
- Reaction score
- 9
Sorry to go off topic, and apologise if this is not allowed but just wanted to say that I'm looking for an upgrade jacket for my Indy. Kato's or Sovereign Studios etc would be great if anyone has a spare or looking to sell? please pm me!
bbl
Super Freak
- Joined
- Jan 4, 2011
- Messages
- 1,633
- Reaction score
- 10
I already got everything out with the other head to remove the guyliner. Gonna do the same with this one...i scratched it out using my girlfriends dental supplies. I thought about following guyver and paint this one. What do you think?
Great job guyver. Looks great.
Mmm, for the post above mine. Does anyone have a spare souvereign jacket? Contacted the man himself. Said he could make one, but haven't heard from him since.
Great job guyver. Looks great.
Mmm, for the post above mine. Does anyone have a spare souvereign jacket? Contacted the man himself. Said he could make one, but haven't heard from him since.
No mate, the modded head is the same size, just an optical illusion because there is so little detail on the HT original paint job. I have had around 4 heads now and they are all the same size, just fatter in places with slightly different paint jobs on them, some better than others.
I wouldn't take out the eye system unless you are really sure about it. I would pare out the inside of the head and heat it though, as I outlined a while back. That makes the biggest difference IMO.
I already got everything out with the other head to remove the guyliner. Gonna do the same with this one...i scratched it out using my girlfriends dental supplies. I thought about following guyver and paint this one. What do you think?
Great job guyver. Looks great.
Mmm, for the post above mine. Does anyone have a spare souvereign jacket? Contacted the man himself. Said he could make one, but haven't heard from him since.
Go for it bbl! but take heed on the advice I've and Rory has given you, it's fun, but the trick is try not to lose the essence of Ford in the process, because with this sculpt, you can easily lose him and remember don't paint! accent the HT's sculpt and paint with washes and subtly, The factory paint is still very realistic and needs to stay on the hs.

But when you done the hollowing procedure, you can really see how just highlighting, not necessarily painting over the factory paint job, really brings out the best Ford likeness. And really be careful with the sweat process.
Ebeneezer Jones
Super Freak
Just thought i'd thank Mr Fisher for the gear from Raiders. Belt, holster, whip holder, whip and bag strap. The strap is not on yet and i actually ended up with two whips. One from you direct and another with the gear from a member here along with the Jacket.
Thanks Mike, top quality........................
Excuse the pictures...!


Thanks Mike, top quality........................
Excuse the pictures...!
- Joined
- Dec 31, 2009
- Messages
- 15,215
- Reaction score
- 157
Jesus Guyver!, did you cut off his bottom eyelid! Can you heat it and reset it?


Similar threads
- Replies
- 41
- Views
- 4K
- Replies
- 0
- Views
- 433
- Replies
- 3
- Views
- 616
- Replies
- 27
- Views
- 2K
- Replies
- 0
- Views
- 732