robbiethepainter
Super Freak
So I have been kicking around ideas in my head about a process on painting eyes. There are some on here that are amazing at it and those of us that want to be. I have been running through my head on how some of the bad azzes do it and I think I have an idea.
I make no claim to this being easy or even working but I thought people might want to give my idea a try. I am. My hardest part in this is this stuff is so damn small. So here goes. Feel free to post results and or comments. Or if this doesn't work, maybe a better way of doing it?
Start with a primed eye/ face. Color of primer doesn't matter because it will all get covered eventually but the lighter the base the more vivid the colors become with layering too much paint on. White will make the colors pop.
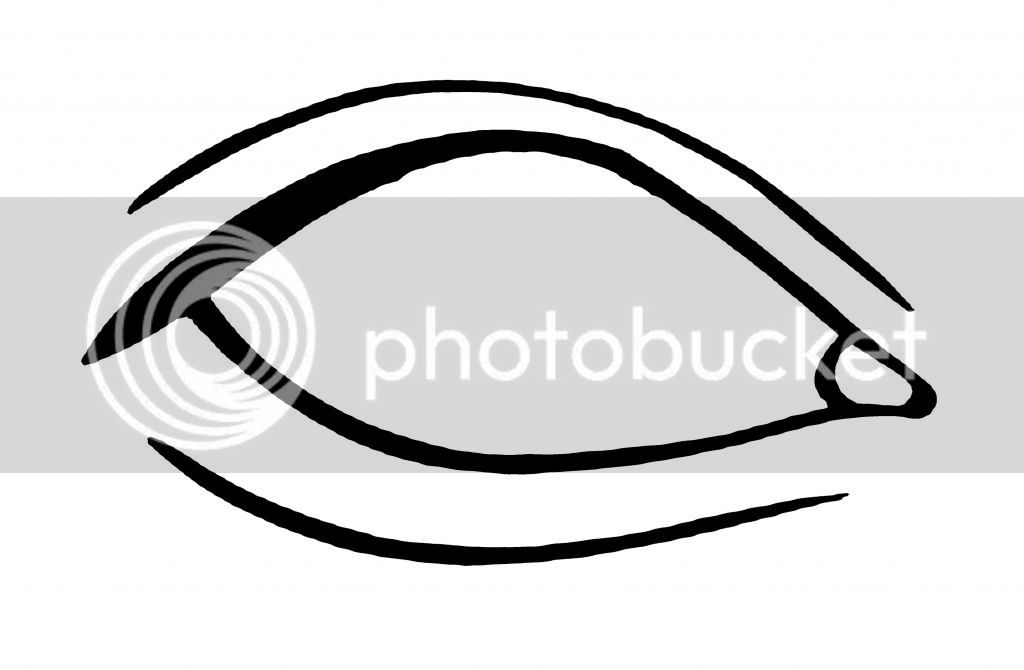
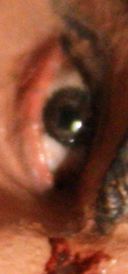
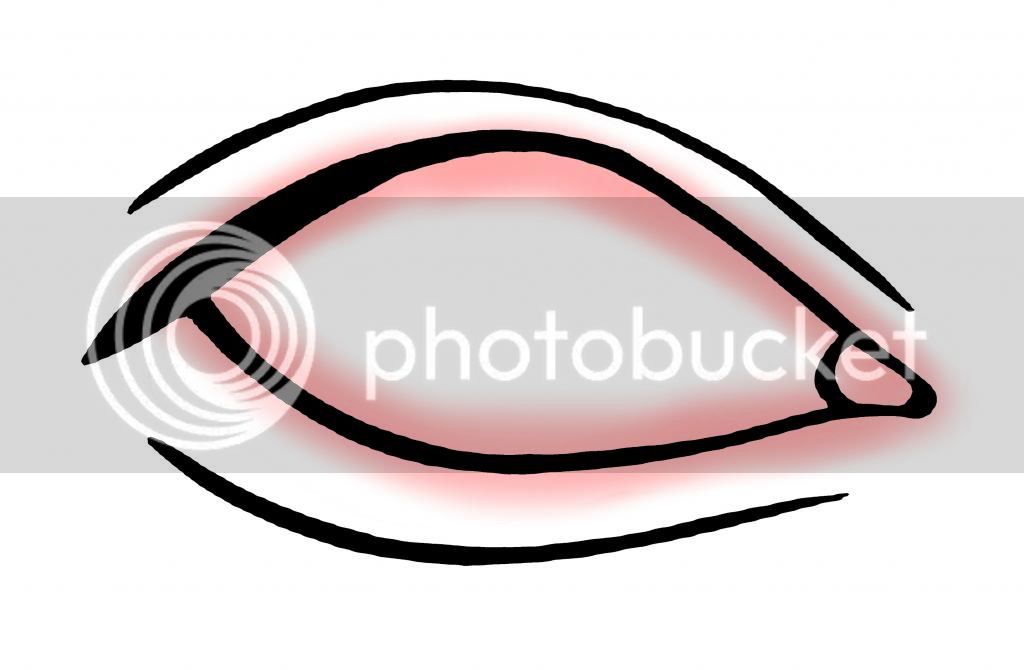
Step #1- Wash, airbrush or simply paint a pink color on the edge of the eyeball and lid. Rainman uses a lot of pink and a thicker line on the eye lid edges but its should be about your preference. Same goes for color choice.
Step #2- This step I have not tried so I have no idea if this will work mainly with how small this stuff is but here is the notion. With a very sharp and hard lead pencil draw in where the iris and pupil will go. This will just give a reference while painting. Does not have to be perfect, it will eventually get covered.

Step #3- Paint in the iris using one or more colors. Brush strokes should come from the inside out or outside in. Multiple colors can bring more definition and complexity to the the eye. This takes a good solid hand with a really small pointy brush. Dont go too far outside of where you want the iris but a little slop is ok. The closer you stick to the correct size of the iris the easier the next step is.
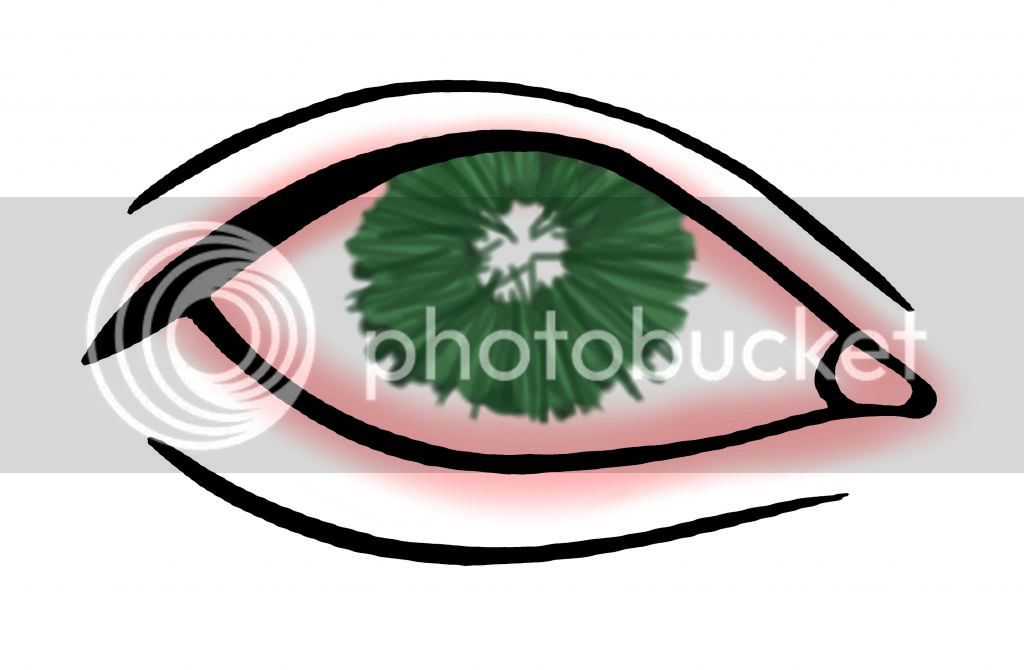
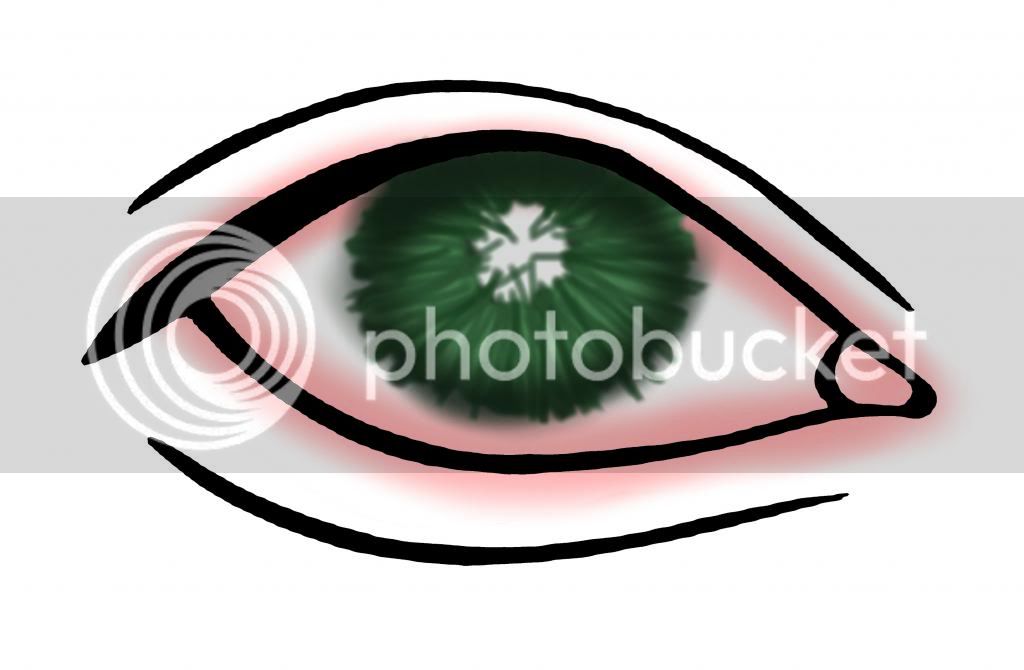
Step #4- Now we want to shadow the iris. This step needs to be a wash or airbrush because it should be soft. I'm not sure an airbrush could do this but who knows, there are some really good brushes out there, but I don't think I have a steady enough hand. This gets added on the top and bottom, with the heaviest being on the top.
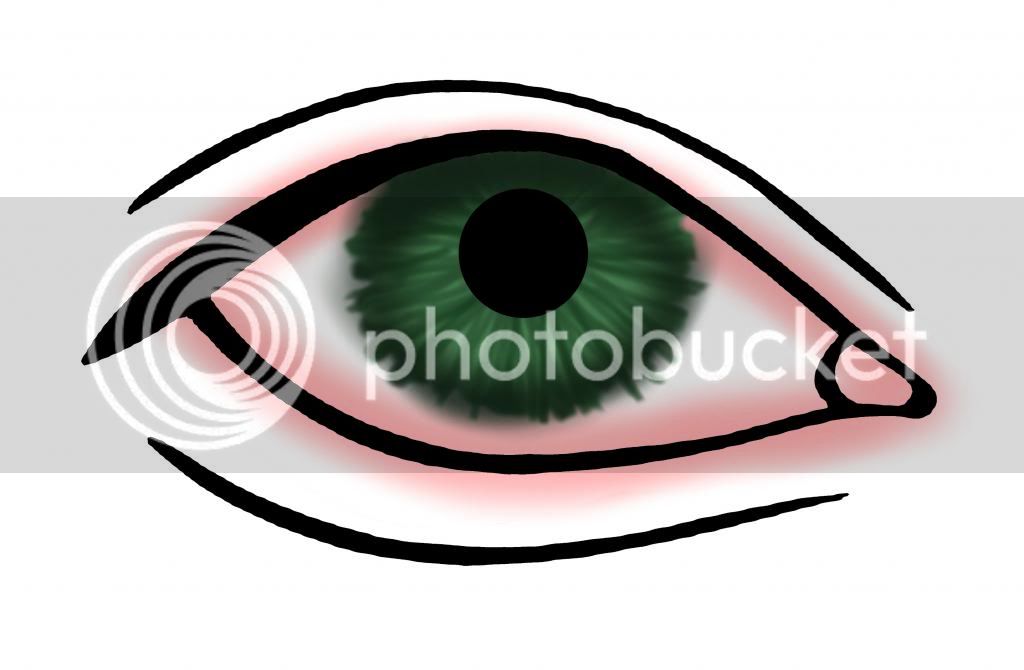
Step #5- This step is a one shot only so make sure you hit it right the first time. The pupil. This will determine where your figure is looking. I have read people use all sorts of tricks for this from cut straight pins to tooth picks and brushes. The good thing about a fixed applicator is hopefully its easier to make the dots uniform. But there are no guarantees. You might also be able to use a pin or marker as long as the ink dries well enough so that when you clear over the eye it doesn't smear. Also it needs to be opaque so it covers the iris paint.Test it if you are using anything other then paint before risking it on a completed, very tricky, iris paint job. Its better to do a lot of testing to make sure the dots are consistent before diving into application too. Not only will this give the much needed pupil but it will also hide all of the inconstant edges of the iris on the inside. So your pupil needs to be big enough to cover the edges.
Step #6A- At this point if you are feeling good about everything and you are certain its dry, it might be a good time to put a thin coat of clear to seal all the work down. I have two thoughts on this. One is it will give the iris and pupil a deeper look to them then the rest of the eyeball. And also, if you make a mistake with the next step, you may be able to do a little clean up and not ruin all your work. But who knows. This is only a theory.
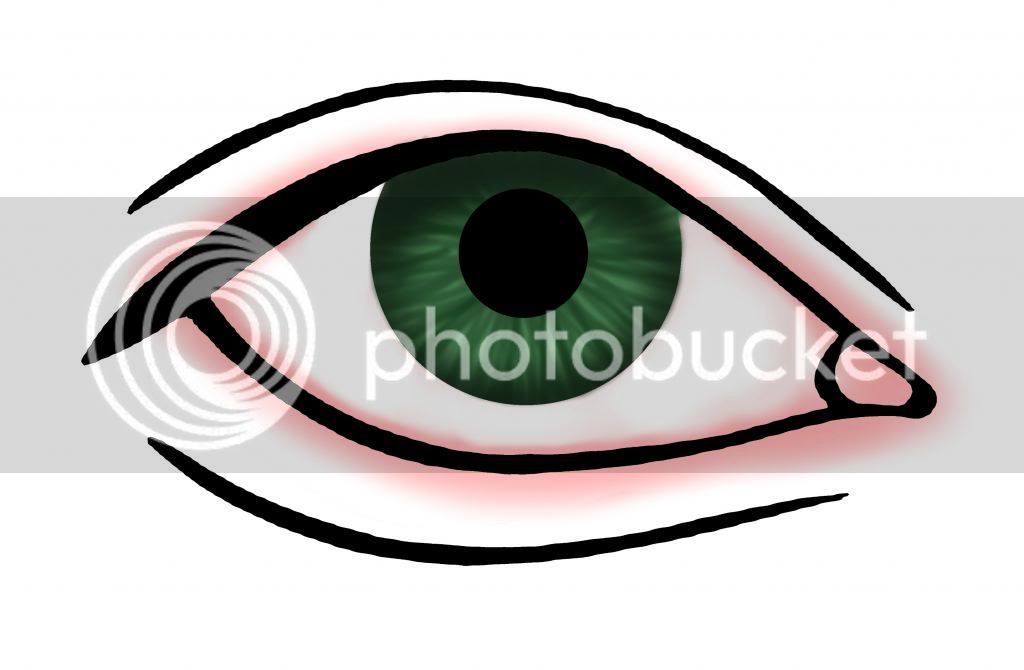
Step #6- This is the point where all the uneven outside edges of the iris are going to be covered up to leave a nice clean rounded edge. Your going to want to two different kind of edges. The edge along the iris should be nice and sharp. The edge along the lid should be a soft transition. So maybe as the paint moves outward switch to a feathering or wash style of painting so that the pink shows through as it gets farther out.
Step #7- Final clear coat over the eyes to give them the wet look and seal them in. I know some use floor polish but I like using gloss acrylic medium. Choices yours. Well I hope this helps. I know people will have questions so please feel free to post up. This technique is a combination of thought and reading and very little practice so I may be completely out of my mind on this but I just figured this may spark conversation and development.
Good Luck!!!
I make no claim to this being easy or even working but I thought people might want to give my idea a try. I am. My hardest part in this is this stuff is so damn small. So here goes. Feel free to post results and or comments. Or if this doesn't work, maybe a better way of doing it?
Start with a primed eye/ face. Color of primer doesn't matter because it will all get covered eventually but the lighter the base the more vivid the colors become with layering too much paint on. White will make the colors pop.
Step #1- Wash, airbrush or simply paint a pink color on the edge of the eyeball and lid. Rainman uses a lot of pink and a thicker line on the eye lid edges but its should be about your preference. Same goes for color choice.
Step #2- This step I have not tried so I have no idea if this will work mainly with how small this stuff is but here is the notion. With a very sharp and hard lead pencil draw in where the iris and pupil will go. This will just give a reference while painting. Does not have to be perfect, it will eventually get covered.
Step #3- Paint in the iris using one or more colors. Brush strokes should come from the inside out or outside in. Multiple colors can bring more definition and complexity to the the eye. This takes a good solid hand with a really small pointy brush. Dont go too far outside of where you want the iris but a little slop is ok. The closer you stick to the correct size of the iris the easier the next step is.
Step #4- Now we want to shadow the iris. This step needs to be a wash or airbrush because it should be soft. I'm not sure an airbrush could do this but who knows, there are some really good brushes out there, but I don't think I have a steady enough hand. This gets added on the top and bottom, with the heaviest being on the top.
Step #5- This step is a one shot only so make sure you hit it right the first time. The pupil. This will determine where your figure is looking. I have read people use all sorts of tricks for this from cut straight pins to tooth picks and brushes. The good thing about a fixed applicator is hopefully its easier to make the dots uniform. But there are no guarantees. You might also be able to use a pin or marker as long as the ink dries well enough so that when you clear over the eye it doesn't smear. Also it needs to be opaque so it covers the iris paint.Test it if you are using anything other then paint before risking it on a completed, very tricky, iris paint job. Its better to do a lot of testing to make sure the dots are consistent before diving into application too. Not only will this give the much needed pupil but it will also hide all of the inconstant edges of the iris on the inside. So your pupil needs to be big enough to cover the edges.
Step #6A- At this point if you are feeling good about everything and you are certain its dry, it might be a good time to put a thin coat of clear to seal all the work down. I have two thoughts on this. One is it will give the iris and pupil a deeper look to them then the rest of the eyeball. And also, if you make a mistake with the next step, you may be able to do a little clean up and not ruin all your work. But who knows. This is only a theory.
Step #6- This is the point where all the uneven outside edges of the iris are going to be covered up to leave a nice clean rounded edge. Your going to want to two different kind of edges. The edge along the iris should be nice and sharp. The edge along the lid should be a soft transition. So maybe as the paint moves outward switch to a feathering or wash style of painting so that the pink shows through as it gets farther out.
Step #7- Final clear coat over the eyes to give them the wet look and seal them in. I know some use floor polish but I like using gloss acrylic medium. Choices yours. Well I hope this helps. I know people will have questions so please feel free to post up. This technique is a combination of thought and reading and very little practice so I may be completely out of my mind on this but I just figured this may spark conversation and development.
Good Luck!!!