Casting a resin head and creating the mold?

Collector Freaks Forum

Help Support Collector Freaks Forum:

This site may earn a commission from merchant affiliate links, including eBay, Amazon, and others.

zenonithus

Freaked Out
Joined
Jan 6, 2009
Messages
177
Reaction score
6
I've looked all over and can't find any solid info on creating a good mold from silicone.

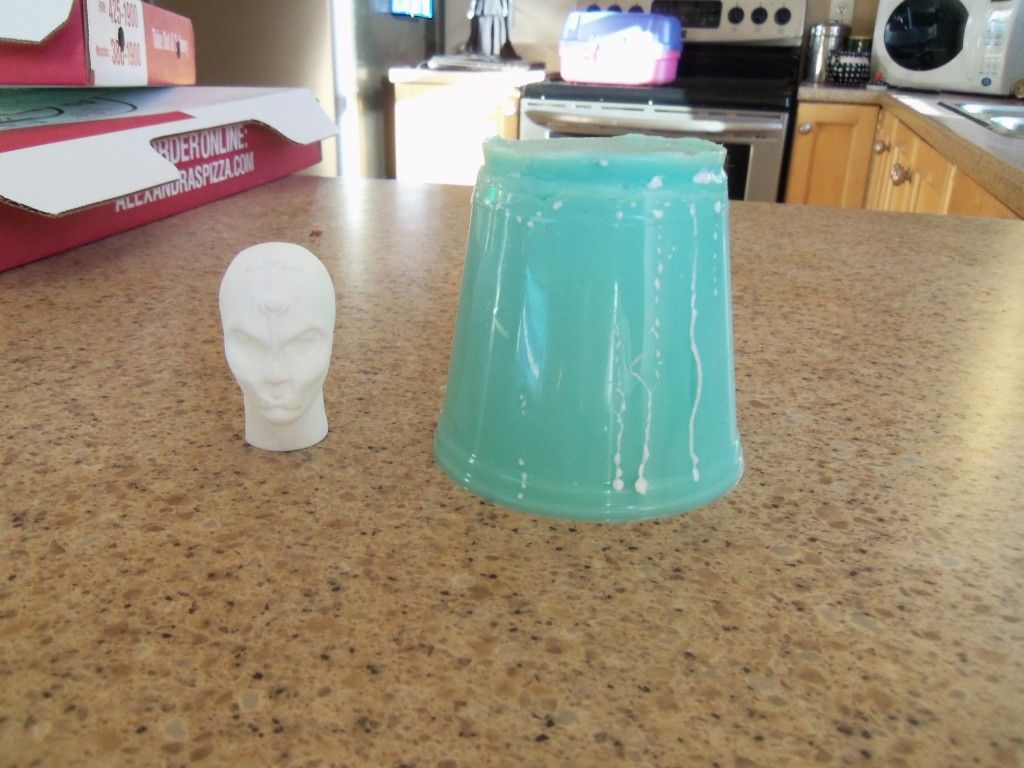
Say I wanted to make a resin copy of a hot toys head, the one that fits on to a TTM19 body with no neck. I'm having trouble trying to figure out how to go about this?

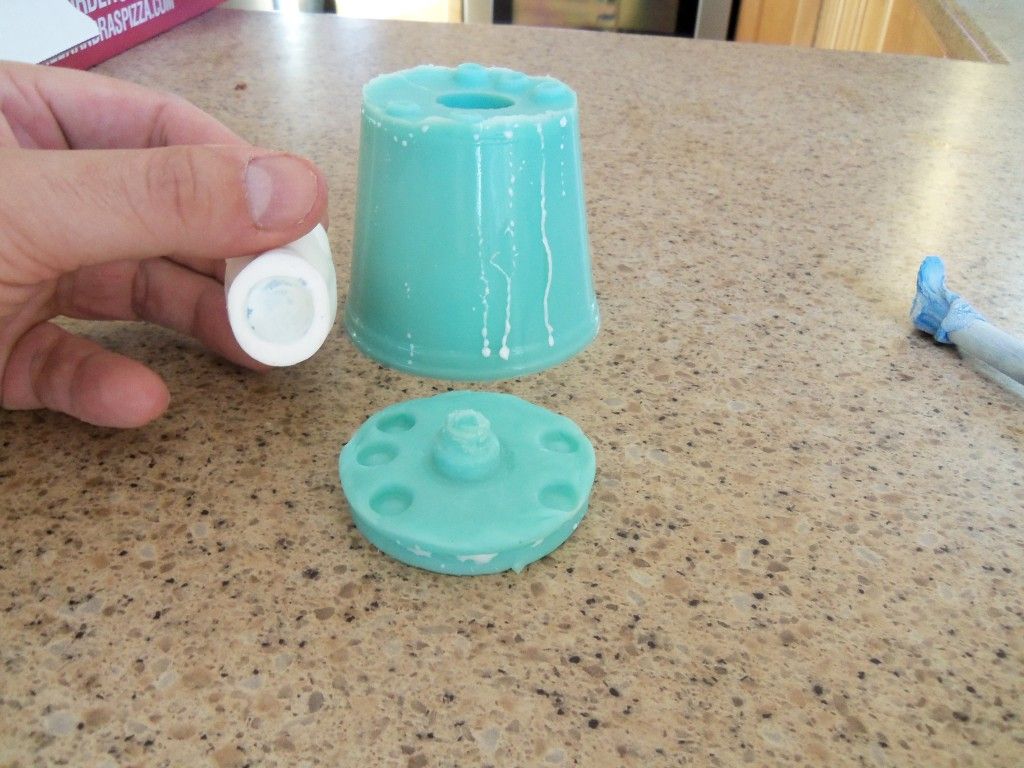
Should it be in two, three parts? where would the pouring point be? I'm sure I've seen people casting heads like this, though have no idea how they go about the mold, nor can I find any sort of tutorial that deals with 1/6 head molds. I can understand it would be easier to mold a head with a neck as the neck would be the pouring point, though casting one with a huge hollow hole like the hot toys heads is baffling me. Also how does one go about making a mold in two separate parts in order to open up? I'm also assuming a third part will be needed to define the hollow area inside the head?

Is head casting a close guarded secret or something?
 
I always cast mine from beneath the head (bottom up in the mold) Create a plasticen base in a small thunnel, stick two stems coming up out of it, use a little more plasticen to connect the head to the stems.

I always use plastic disposable cup, cut the base off. Place it over the head. Use more plasticen to seal the base edge of the cup.

Ready to pour in silicone. If you haven't got a vacuum camnister, make sure you bang the silicone mix on the table a number of times to get air bubbles out, it's not perfect, but will work well enough. Pour in the silicone. Let it cure. *** take note, even mark which side of the cup is the back of the head****

When fully cured, tip the cup up so you can see the base thunnel plasticen. With a sharp craft knife, scalpel gently slice down the back side of the mound down to the head. If you stretch it as you go, the silicone will pull away from the head and you can tease it out with the knife without damaging the head. Cut it enough somewhat you can pop the original head out, along with the stem materials use. At this point you should have an empty mold, note how the seam cut practically reseals when you release it. I normally just use a bit of tape to hold it together when pouring urethane resin. Another good option is to put it back into another plastic cup to keep perfect shape.

So in short, mold is one piece.

You need a pouring hole and a evacuation hole, this lets the resin flow out when mold is full, but more importantly, it also allows air in the mold to be pushed out, reducing bubbles. If you have a pressure put let the resin cure in that at 50 kpa (I use an old spray paint pot and compressor. Compressing the air in the mold reduces the size of any remaining air bubbles in the mold)

This is how I do it anyway, works well enough for small jobs
 
Last edited:
nice one, thanks for that explanation Laney, that helps allot :)

Do you have or know of any pictures that depict this process you use? Where would you situate the evacuation hole and how would you go about setting that up?

From what little experience I've had with silicone I've been told to pour it on very thin from a high distance to eliminate bubbles more. Would this work also? Also I was thinking of applying silicone with a paintbrush to the surface of the head just to ensure it gets into all the details, though this would have to be done hastily as the silicone will start to dry up.

cool, would appreciate any other tips and tricks anyone has to offer, especially images of the process :)
 
Split Glove Mold

This type of mold eliminates having to make a two piece mold and drastically reducing parting lines. It also helps relieve drastic undercuts in a simple one piece mold saving time and clean up on your finished part. We are going to show you a simple way to make a one piece mold with virtually no seam using Dow Corning's HS III silicone mold making rubber. We accomplish this by gluing our doll or action figure's neck to a piece of plastic. He will now be standing straight up.

head1.jpg


Make a mold box by cutting a section of a PVC pipe, plastic container (yogurt, sour cream, etc.), wood, metal tubing, or any other nonporous medium that will fit around the head without touching any part of him. You are looking for approximately 1/3 to 1/4 inch gap between any part of the mold frame (PVC pipe) and the head.

head2.jpg


Once you have a container that fits around the head without touching him, spot glue it in place using super glue. You don't need to glue it all the way around because next you will seal the mold frame to the plastic base using Alumilite's Molding Clay. Roll the clay out and press it on the outside of the PVC pipe/mold frame and base plastic.

head3.jpg


Mark your mold box with a marker to show which side is the back of the man's head. This will help you determine what side of the mold you will cut to remove the master and the cast piece..

head4.jpg


Once the mold frame is sealed all the way around the pipe with clay, you are ready to pour the silicone. Use Dow Corning's HS III Silicone Rubber to make the mold. HS III has excellent flexibility and tear strength to allow the maximum number of releases per mold. Mix the silicone thoroughly and pour it into the mold. Allow the rubber to cure for 18-24 hours at room temperature before demolding. Before removing the silicone from the mold frame, make a mark on the silicone (same spot as on the pipe) as to reference the back side of the head. This will show you where you need to cut. After you have poured the silicone and allowed the silicone to completely cure, scrape away the clay and remove the plastic base by breaking the super glued sections. To remove the silicone from the PVC pipe you may wish to use rubbing alcohol down the inside of the mold box (PVC pipe). This will allow the mold to slide out easier.

head5.jpg


Once you have removed the silicone from the pipe cut out, take a scalpel or sharp knife and cut the silicone, starting at the neck, down the back of the head until you get to the middle of the head as shown in the picture below. Cut the silicone just enough to be able to stretch the silicone and remove the master/original from the mold. Before casting a piece, put a small piece of tape or rubber band around the seam to prevent it from moving and leaking while you cast. Be sure not to squeeze the mold too tightly which would prevent the mold from lining up properly. The only seam that will show is a small line in the back of the man's neck that goes up to the hair line or lower portion of the back of his head. This type of mold will leave no seam in any cosmetic area of the figures face, ears, or nose and can easily by cleaned up by scraping with a dull knife or even your finger nail. You may wish to clean it up further with a light sand paper.

head6.jpg
 
Two Piece Mold

A two or multiple piece mold is typically required when the object you need to mold has detail on all sides of the piece.

2piece6.jpg


As you can see with this bear, the back is not flat and has detail in which the mold and casting will need to have in order to reproduce the piece exactly. In order to mold both halves, you will need to start by making a mold of the front and then making a mold of the back. You will need to start by determining a parting line which is where the two halves of the mold will meet. This is typically an edge or perhaps the half way point from the front and back.

2piece7.jpg


You begin by building a clay base and pressing your piece into the clay.

2piece11.jpg


Press the bear down until it is close to where you want the parting line.

2piece8.jpg


Using clay tools, smooth and flatten the clay to establish a perfectly smooth and clean parting line where the clay touches the part. The cleaner the edge, the smaller your parting line will be and the less clean up will be required on the seam line of your cast resin piece.

2piece13.jpg


Once the part is completely clayed up to the parting line you've established, you are ready to build your mold box to contain the liquid rubber.

2piece12.jpg


Using corrugated plastic, angle iron, wood, a recycled piece of plastic, Legos, or any other non porous material, construct a mold box to contain the liquid silicone rubber. Build your box so that the walls are ¼”-3/8” around the outside of your original. Building your walls too big around the outside of your piece require much more silicone which wastes unneeded silicone.

2piece18.jpg


Make sure to seal the box well to prevent leaks. Hot melt, super glue, clay, or even caulk works well.

2piece17.jpg


Properly measure your silicone RTV and mix thoroughly to ensure a proper cure and physical properties of the rubber mold. If you need help calculating the volume needed for your piece, visit the Calculating Volume page on our website.

2piece19.jpg


Once the silicone is thoroughly mixed, pour the silicone in the sealed mold box. Start from one corner and allow the liquid rubber to flow naturally over the original rather than pouring the rubber directly onto the piece. This technique will reduce the possibility of trapping air on the surface of the original.

2piece21.jpg
 
Part 2:

Continue to pour the silicone until the entire piece is covered by at least ¼” of liquid silicone.

2piece22.jpg


Allow the silicone rubber to fully cure. In this case, the Alumilite Quick Set silicone RTV was used and the cure time is 4-8 hours. With most silicones, it is always a good idea to allow them to cure overnight.

2piece24.jpg


Once the rubber has cured, remove the mold and box from the base.

2piece26.jpg


You can also remove the mold from the box but if possible, leave the box in the mold to prevent breaking the seal between the box and the mold.

2piece27.jpg


Remove the clay from the back side of the piece but DO NOT REMOVE THE PIECE FROM THE POURED RUBBER MOLD. This will break the seal and damage the clean parting line you clayed up.

2piece29.jpg


Remove the bulk of the clay and then go back and clean off all of the left over clay.

2piece30.jpg


Using your Alumilite clay tools, remove every tiny bit of clay from the mold and original.

2piece31.jpg


Once you have cleaned the mold and master off completely of all clay residue, you are ready to cut your locators so the second half of the mold aligns with the first.

2piece32.jpg


Using an Excel knife or better yet a U-Channel knife, cut “v” or “u” channels in the rubber mold. This will allow the rubber you pour during the second half to flow into these channels and provide great locators to align the two halves of the mold.

2piece33.jpg


Cut locators on at least two or three sides of the mold.

2piece35.jpg
 
Part 3:

Place your mold back into the mold box and reseal it if necessary.

2piece36.jpg


You are now ready to mold release the first half of your mold. The only thing silicone rubber sticks to is another silicone. Failing to use mold release will allow the first and second pour of your silicone rubber to bond perfectly together and not allow you to remove your original without cutting blind to the piece. This would destroy the perfectly placed parting line you established with your clay line. So MOLD RELEASE IS REQUIRED to separate the two halves. Use Alumilite's UMR spray all over the cured rubber from the first pour. It is not required on your original but some overspray is expected and will not hurt.

2piece37.jpg


The other option is to use Alumilite's Rubber to Rubber Mold Release. Shake the bottle well before using and brush on multiple coats waiting 5-10 minutes between coats before applying the next.

2piece41.jpg


Before pouring your second half of your silicone rubber mold, be sure to check that your mold box is sealed and seal any gaps you may find to eliminate the chance of your entire silicone batch leaking out a hole in your mold box. Once the silicone starts to leak, it is nearly impossible to stop and creates a huge mess along with wasted time and material. It is always best to take a minute to double check to make it is sealed well.

2piece42.jpg


Measure and mix the proper amount of silicone required to fill the second half of the mold. Once again, if you need help calculating the volume needed for your piece, visit the Calculating Volume page on our website.

2piece43.jpg


As you did with the first have of the mold, pour the rubber from one corner of the mold box and allow the material to flow naturally over your original and cover it by at least ¼”.

2piece45.jpg


Allow the rubber to fully cure and remove it from the mold base.

2piece46.jpg


Remove the mold from the mold box.

2piece47.jpg


Using your hands, find the seam line and begin to separate the two halves of the mold.

2piece48.jpg


As you can see, the mold will separate exactly where the two halves were poured and mold released. You will also see how the second half of the mold filled in the locators from the first half and how it will give you perfect alignment between the two halves.

2piece49.jpg
 
Part 4:

Remove the unharmed original from your two piece mold.

2piece50.jpg


You are now ready to cut your pour hole and any vents if they are needed. Using an Excel knife, find the most non-cosmetic area to use as your pour area. Ideally this will allow for natural flow of the resin and area in which air bubbles will float to the top and escape without trapping air on flat surfaces of your mold. In this example, we chose to use the bottom of the bear's feet. So using an Excel knife, cut a “u” shaped channel from the bottom of the bear's feet to the outside of the mold on both halves of the mold.

2piece52.jpg


Once you have both channels cut out and place the mold together, you will find a perfect pour hole in which you are ready to pour an exact replica of your original. You can also use 1/8” copper or brass tubing to twist and cut holes through the silicone to place vents and/or injection points throughout the mold.

2piece55.jpg
 
Excellent! Thanks for posting those tutorials Skiman :) All looks like pretty straight forward stuff. I guess its also down to trial and error if doing it for the first time.

The head one would be simple with a neck attached, though it might be a bit more tricky with the HT no neck type head. I guess Laney's funnel idea is a good solution for that, just the cutting out bit might be a bit of a fiddle :S
 
Practice makes perfect with this stuff. And I find it rather fun! Lol. If you need any more help, post it here! I missed it up until now. :)
 
cheers :) I will most likely come back to this thread when the time comes for me to cast my creations ;) its good to know what I've got in store in the meantime.
 
great tutorial! this'll help me a lot.. I'm a beginner and this is exactly what I wanted to know as well. for some reason it's hard to find molding how-to's
 
Wow skiman, just "liked" your facebook page and youtube channel, your walter white is amazing!! are you from the UK?
 
If u are doing a neckless hot toys head u want to make a 2 peace mould so u can cast it with the neck hole already there.

I now exclusively Use 2 peace moulds now. Its save u a lot of dremmel time and material. But the best part is the neck or bottom of the sculpt will be perfect!

Let me find a picture! Hope this makes your life a little easier!

100_0388.jpg

100_0389.jpg
 
Last edited:
If u are doing a neckless hot toys head u want to make a 2 peace mould so u can cast it with the neck hole already there.

I now exclusively Use 2 peace moulds now. Its save u a lot of dremmel time and material. But the best part is the neck or bottom of the sculpt will be perfect!

Let me find a picture!

Ive never tried making a 2 part mold as i'm still new to casting.

I use a boring wood drill bit as its perfect for making holes in long necks very very quickly.

TM820.jpg
 
Last edited:
Ive never tried making a 2 part mold as i'm still new to casting but i'd love to see how it gets done.

I use a boring wood drill bit as its perfect for making holes in long necks very very quickly.

TM820.jpg

Basically how i make a mould is put some blue teachers tack in the bottom of a disposable plastic cup. Set the sculpt in it. It usually sticks nicely. Then I pour the first half of the mould like skiman showed.

Then once the mould has cured 16 hours later I flip the cup upside down and cut the very bottom of the cup out. Then i remove the teachers tack and and apply the silicone to silicone release. I use Vaseline Or vicks right now cause I ran out of Vaseline lol. Then pour the second half of the mould and walla u are done your 2 peace mould!

It should look like the pictures above in my last post!
 
Has anyone tried casting with latex and a mother mold? Ive been researching other techniques for molding and this method involves coating your sculpture with latex and then creating a supporting mother mold out of silicone or whatever works. Once the object is cast you remove the mother mold and peel off the latex (to be used again.) The benefit seems to be that you can cast pieces without having to create a two piece mold or a one piece and splitting it. Let me know if any of you fellas have tried this.
 
Has anyone tried casting with latex and a mother mold? Ive been researching other techniques for molding and this method involves coating your sculpture with latex and then creating a supporting mother mold out of silicone or whatever works. Once the object is cast you remove the mother mold and peel off the latex (to be used again.) The benefit seems to be that you can cast pieces without having to create a two piece mold or a one piece and splitting it. Let me know if any of you fellas have tried this.

How would u remouve the sculpt?
 
Back
Top